Supergaming
How to Hook a Stroblaster to Your Joystick
Last issue we told you how to build a Stroblaster. Although one can come up with numerous applications, the most obvious is using it to enhance the visual blasts caused by depressing your action button.
Following last issue’s instructions, you built a unit which must operate independently of the action button — fired by another player, for example, to “blind” you in a strategic maneuver, or to help create the ambiance of battle.
This issue, we’re going to explain how to hook the Stroblaster directly to your joystick so that you can generate a powerful burst of light every time you press the action button.
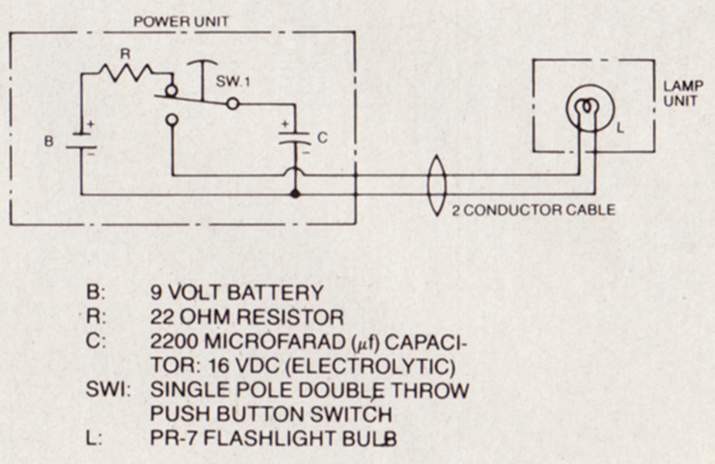
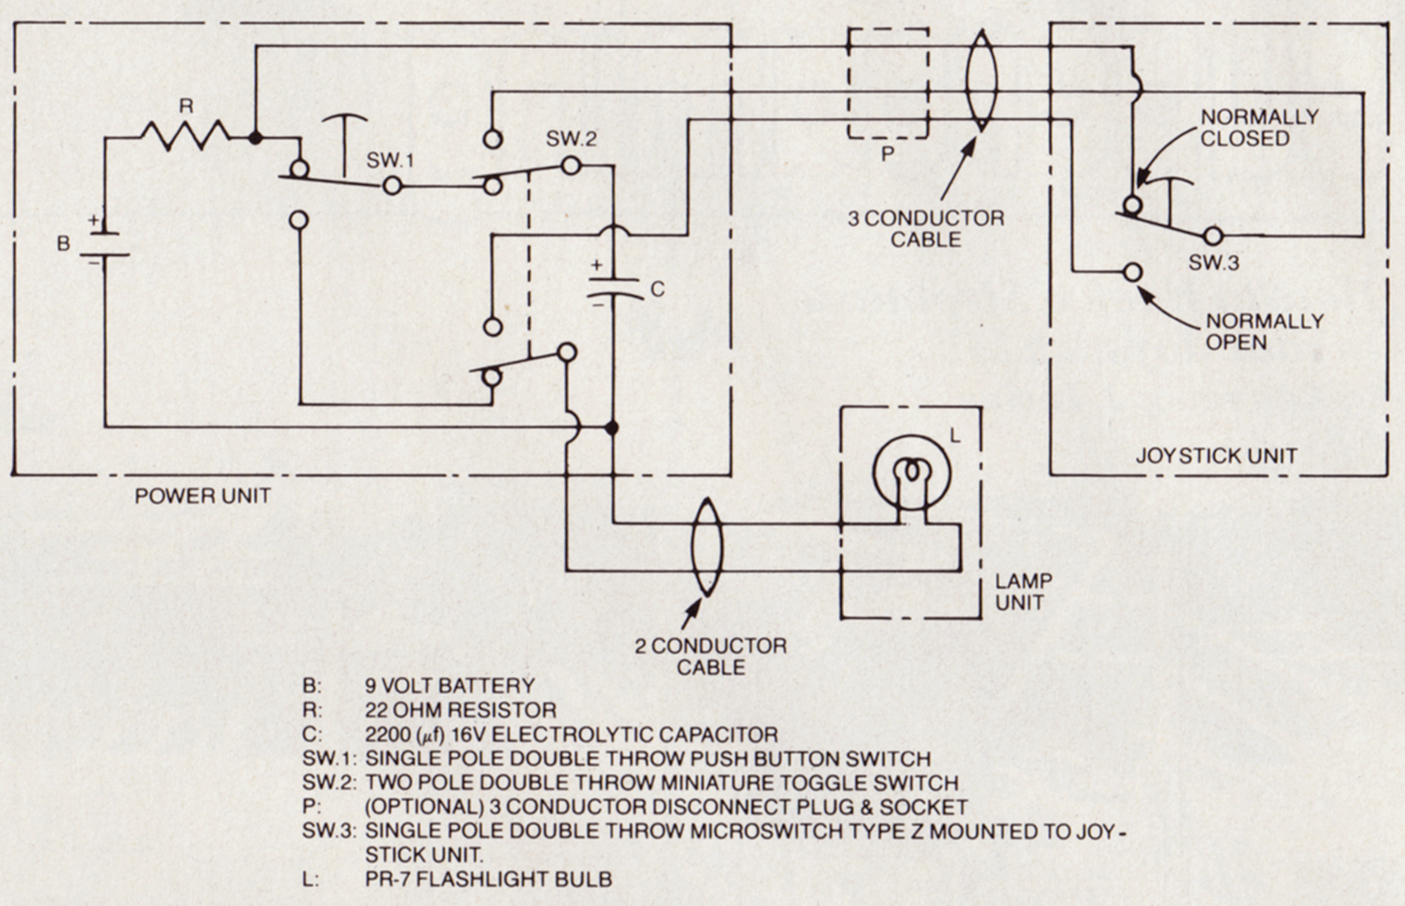
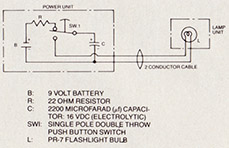
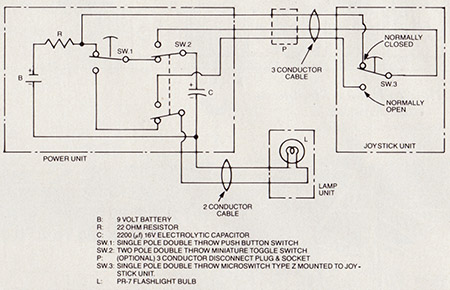
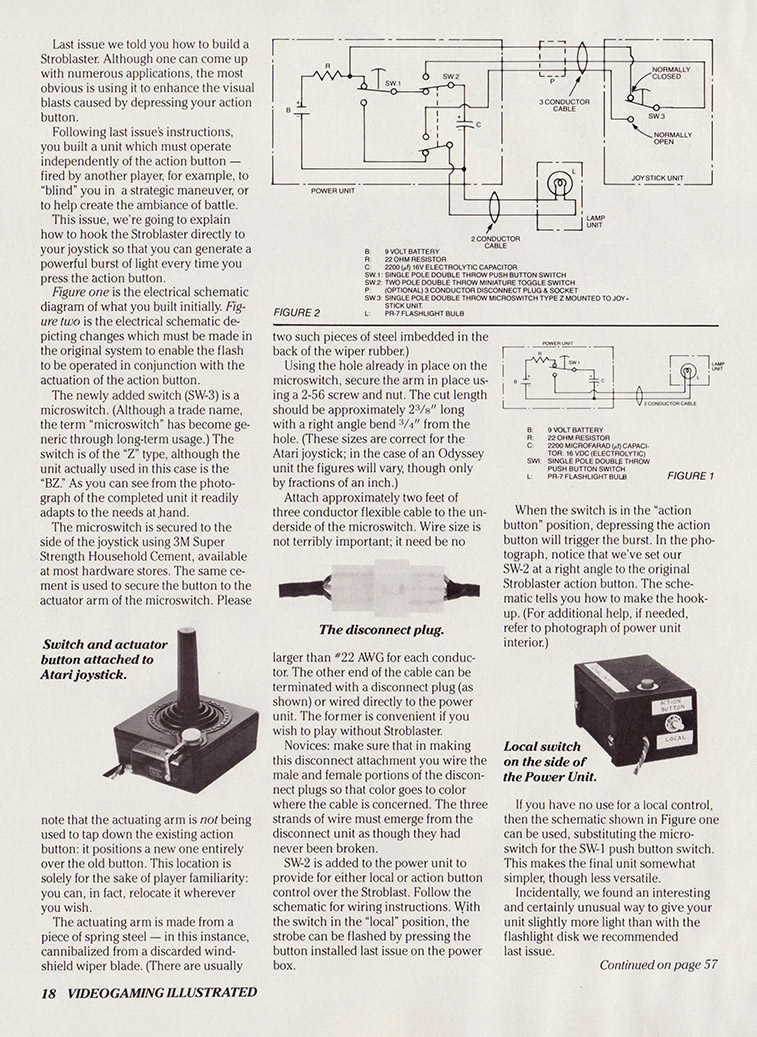
Figure one is the electrical schematic diagram of what you built initially. Figure two is the electrical schematic depicting changes which must be made in the original system to enable the flash to be operated in conjunction with the actuation of the action button.
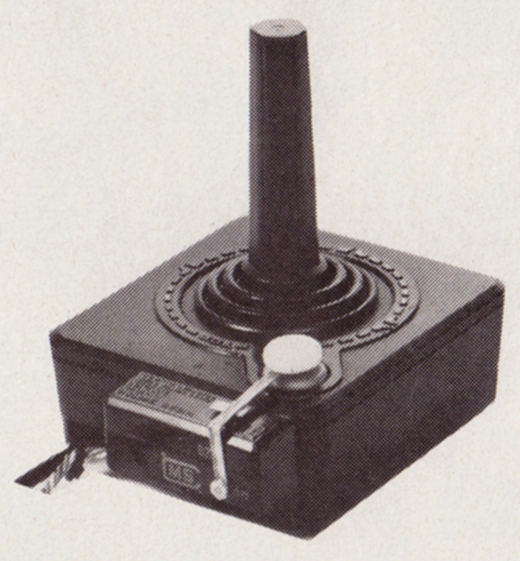
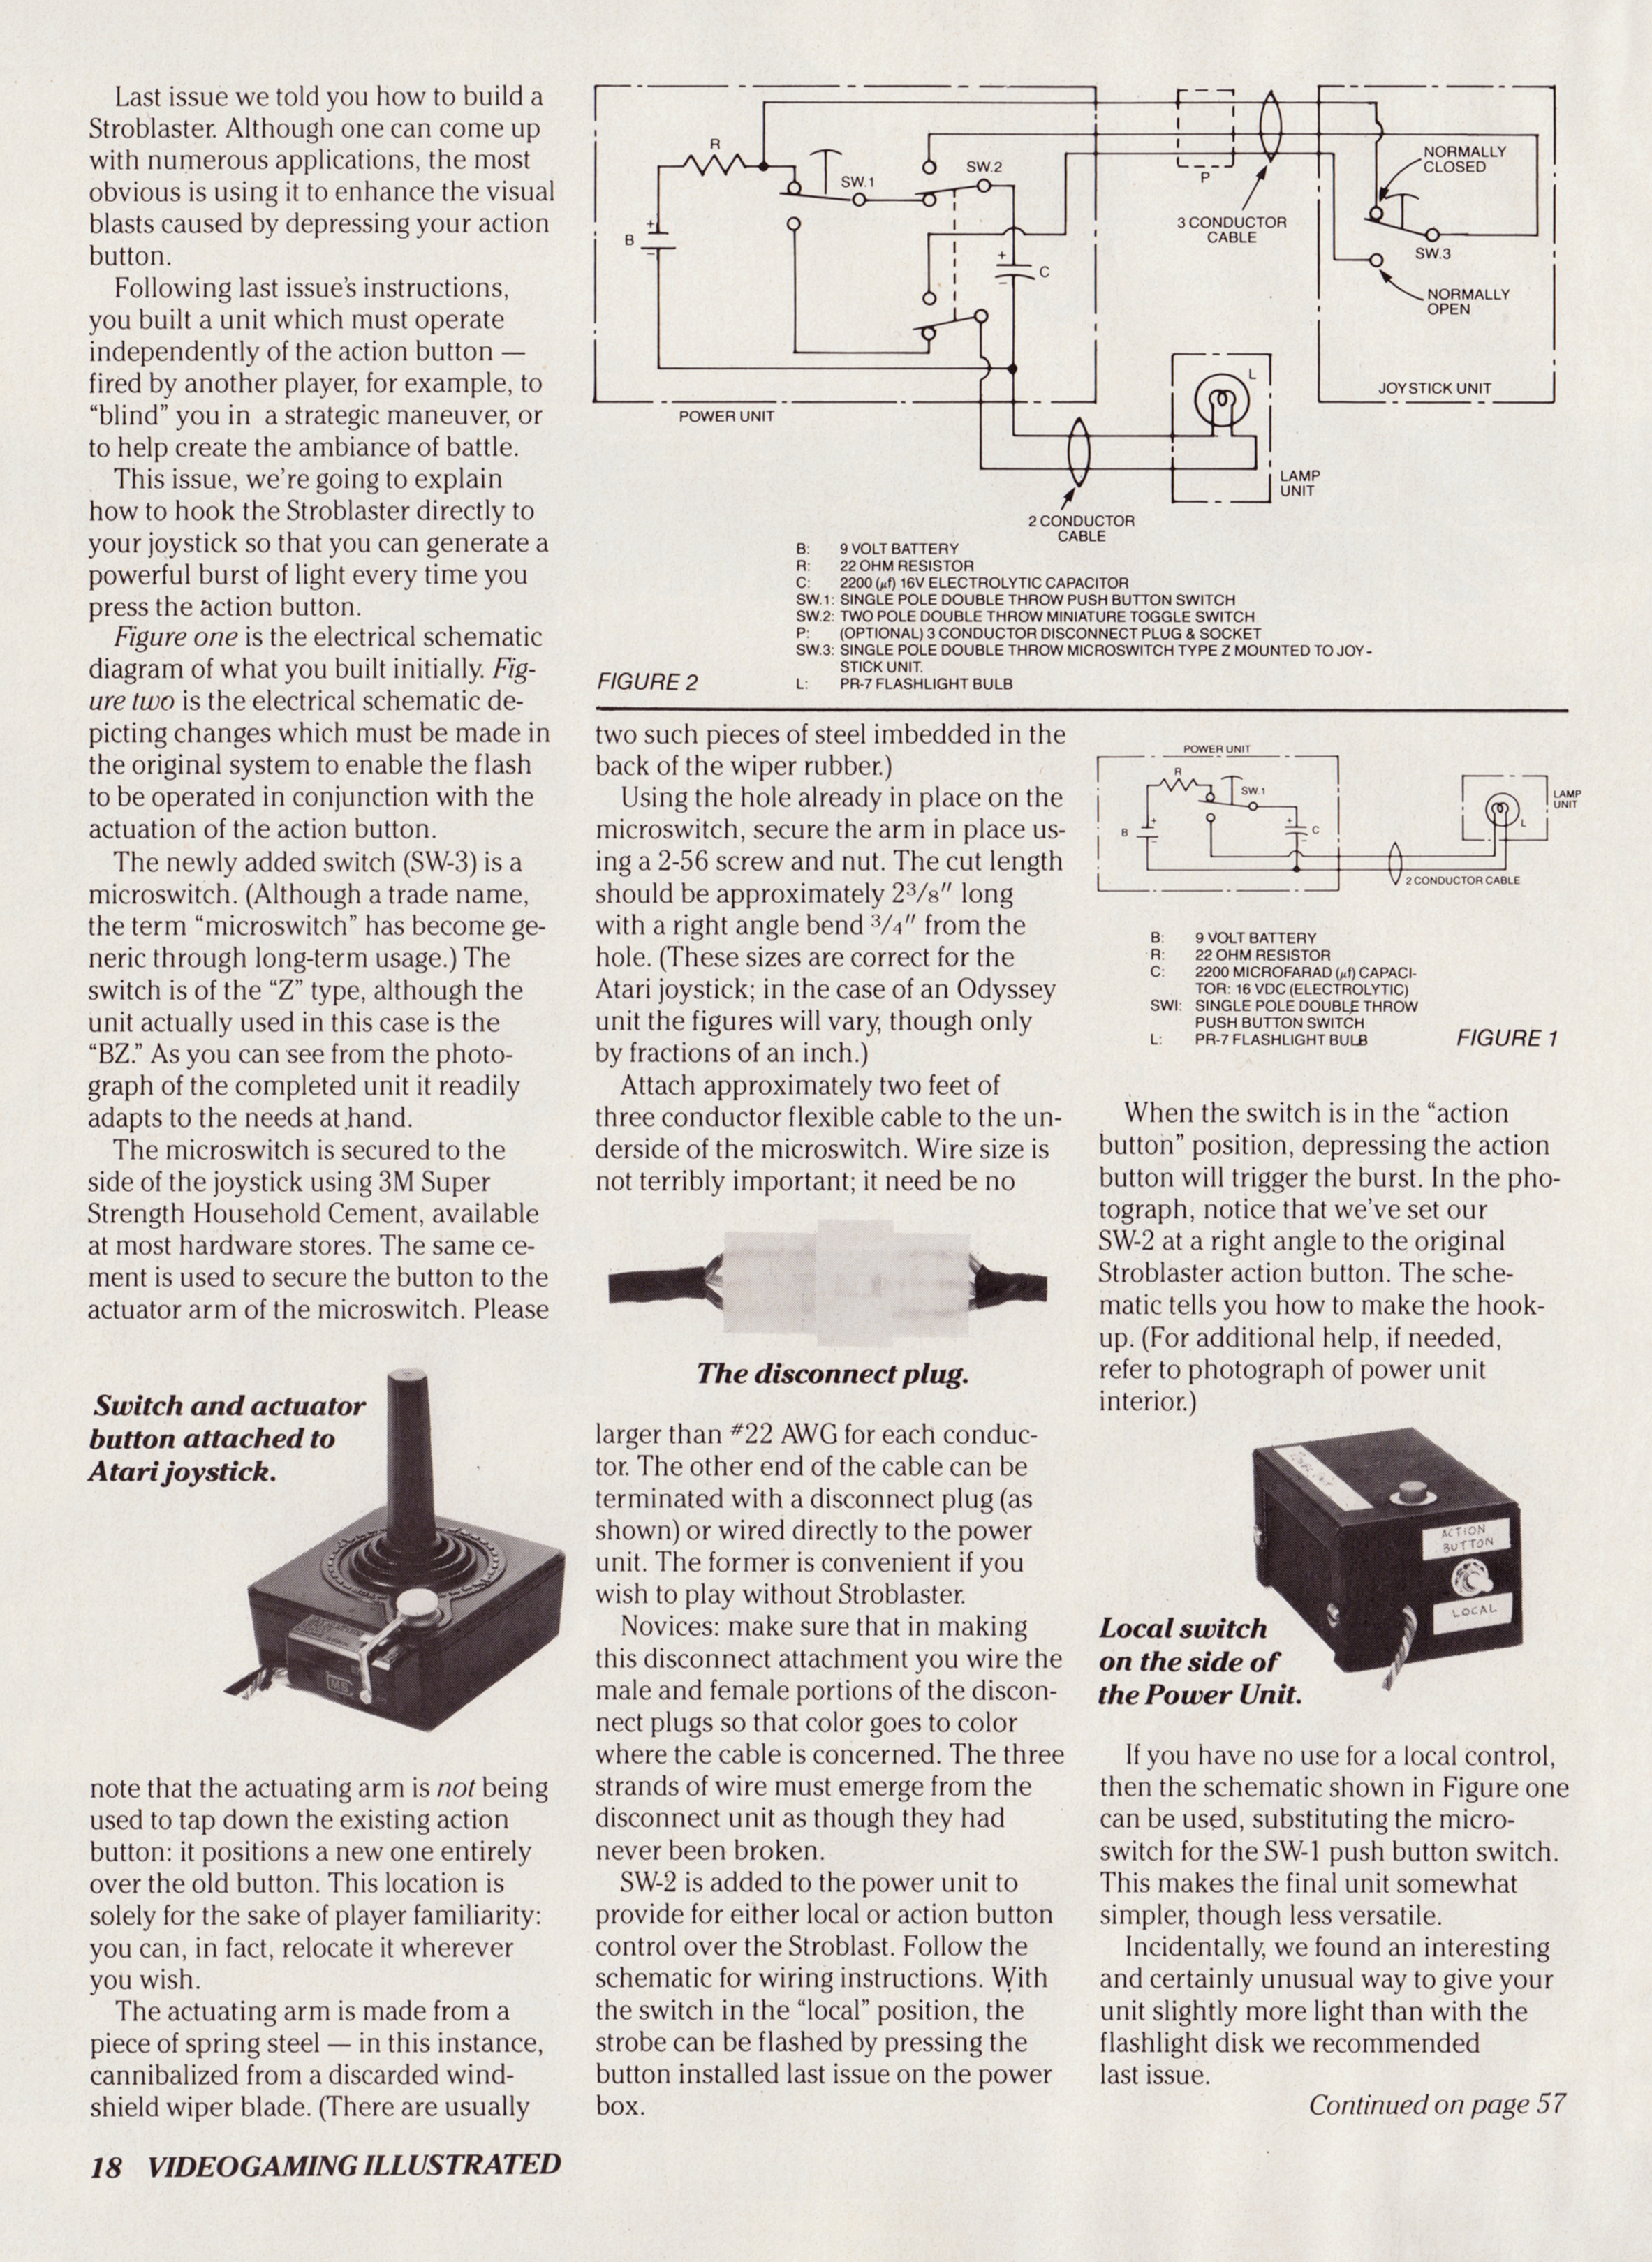
The newly added switch (SW-3) is a microswitch. (Although a trade name, the term “microswitch” has become generic through long-term usage.) The switch is of the “Z” type, although the unit actually used in this case is the “BZ.” As you can see from the photograph of the completed unit it readily adapts to the needs at hand.
The microswitch is secured to the side of the joystick using 3M Super Strength Household Cement, available at most hardware stores. The same cement is used to secure the button to the actuator arm of the microswitch. Please note that the actuating arm is not being used to tap down the existing action button: it positions a new one entirely over the old button. This location is solely for the sake of player familiarity: you can, in fact, relocate it wherever you wish.
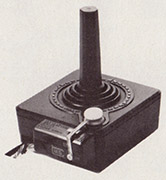
The actuating arm is made from a piece of spring steel — in this instance, cannibalized from a discarded windshield wiper blade. (There are usually two such pieces of steel imbedded in the back of the wiper rubber.)
Using the hole already in place on the microswitch, secure the arm in place using a 2-56 screw and nut. The cut length should be approximately 2⅜” long with a right angle bend ¾” from the hole. (These sizes are correct for the Atari joystick; in the case of an Odyssey unit the figures will vary, though only by fractions of an inch.)
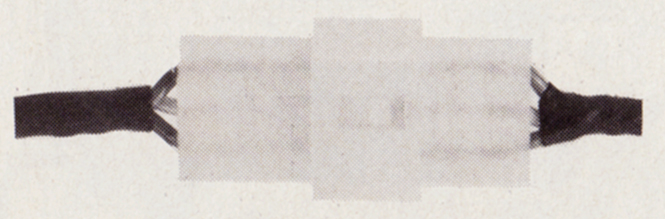
Attach approximately two feet of three conductor flexible cable to the underside of the microswitch. Wire size is not terribly important; it need be no larger than #22 AWG for each conductor. The other end of the cable can be terminated with a disconnect plug (as shown) or wired directly to the power unit. The former is convenient if you wish to play without Stroblaster.
Novices: make sure that in making this disconnect attachment you wire the male and female portions of the disconnect plugs so that color goes to color where the cable is concerned. The three strands of wire must emerge from the disconnect unit as though they had never been broken.
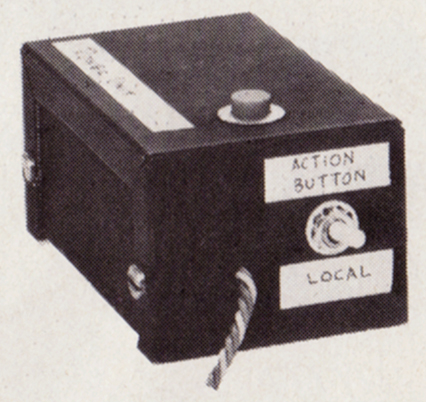
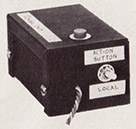
SW-2 is added to the power unit to provide for either local or action button control over the Stroblast. Follow the schematic for wiring instructions. With the switch in the “local” position, the strobe can be flashed by pressing the button installed last issue on the power box.
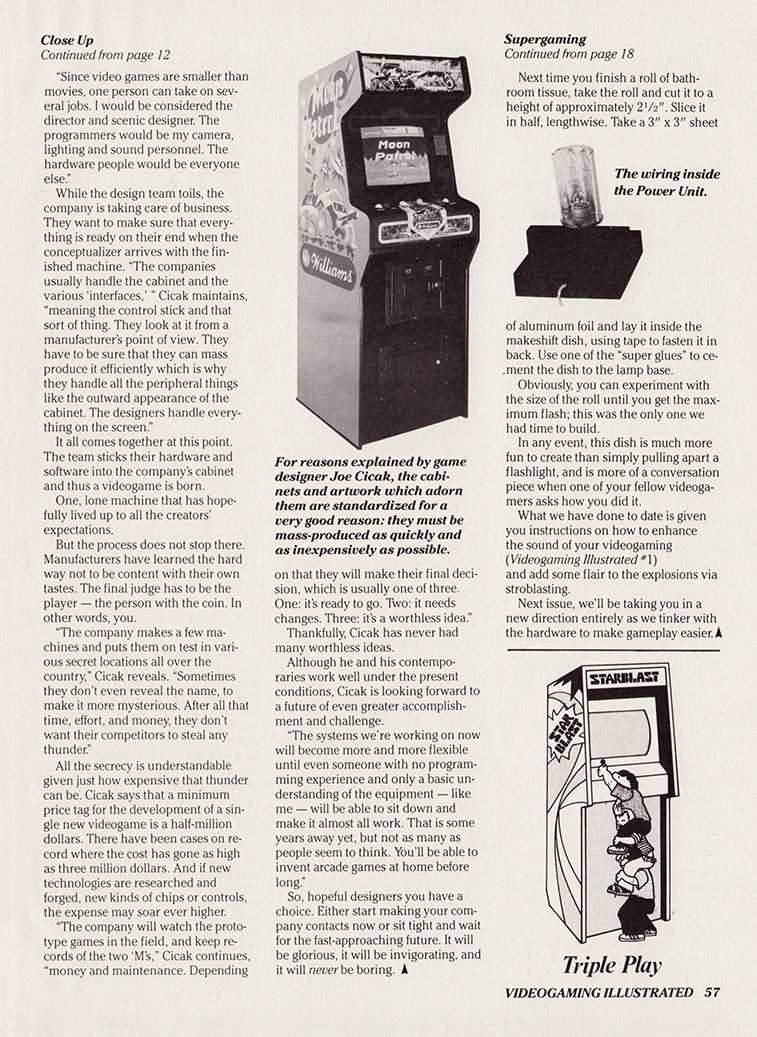
When the switch is in the “action button” position, depressing the action button will trigger the burst. In the photograph, notice that we’ve set our SW-2 at a right angle to the original Stroblaster action button. The schematic tells you how to make the hookup. (For additional help, if needed, refer to photograph of power unit interior.)
If you have no use for a local control, then the schematic shown in Figure one can be used, substituting the microswitch for the SW-1 push button switch. This makes the final unit somewhat simpler, though less versatile.
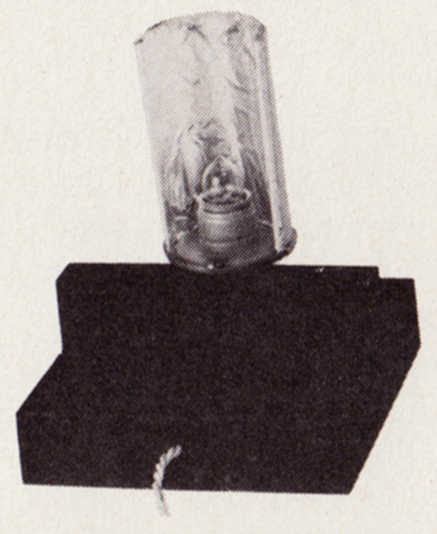
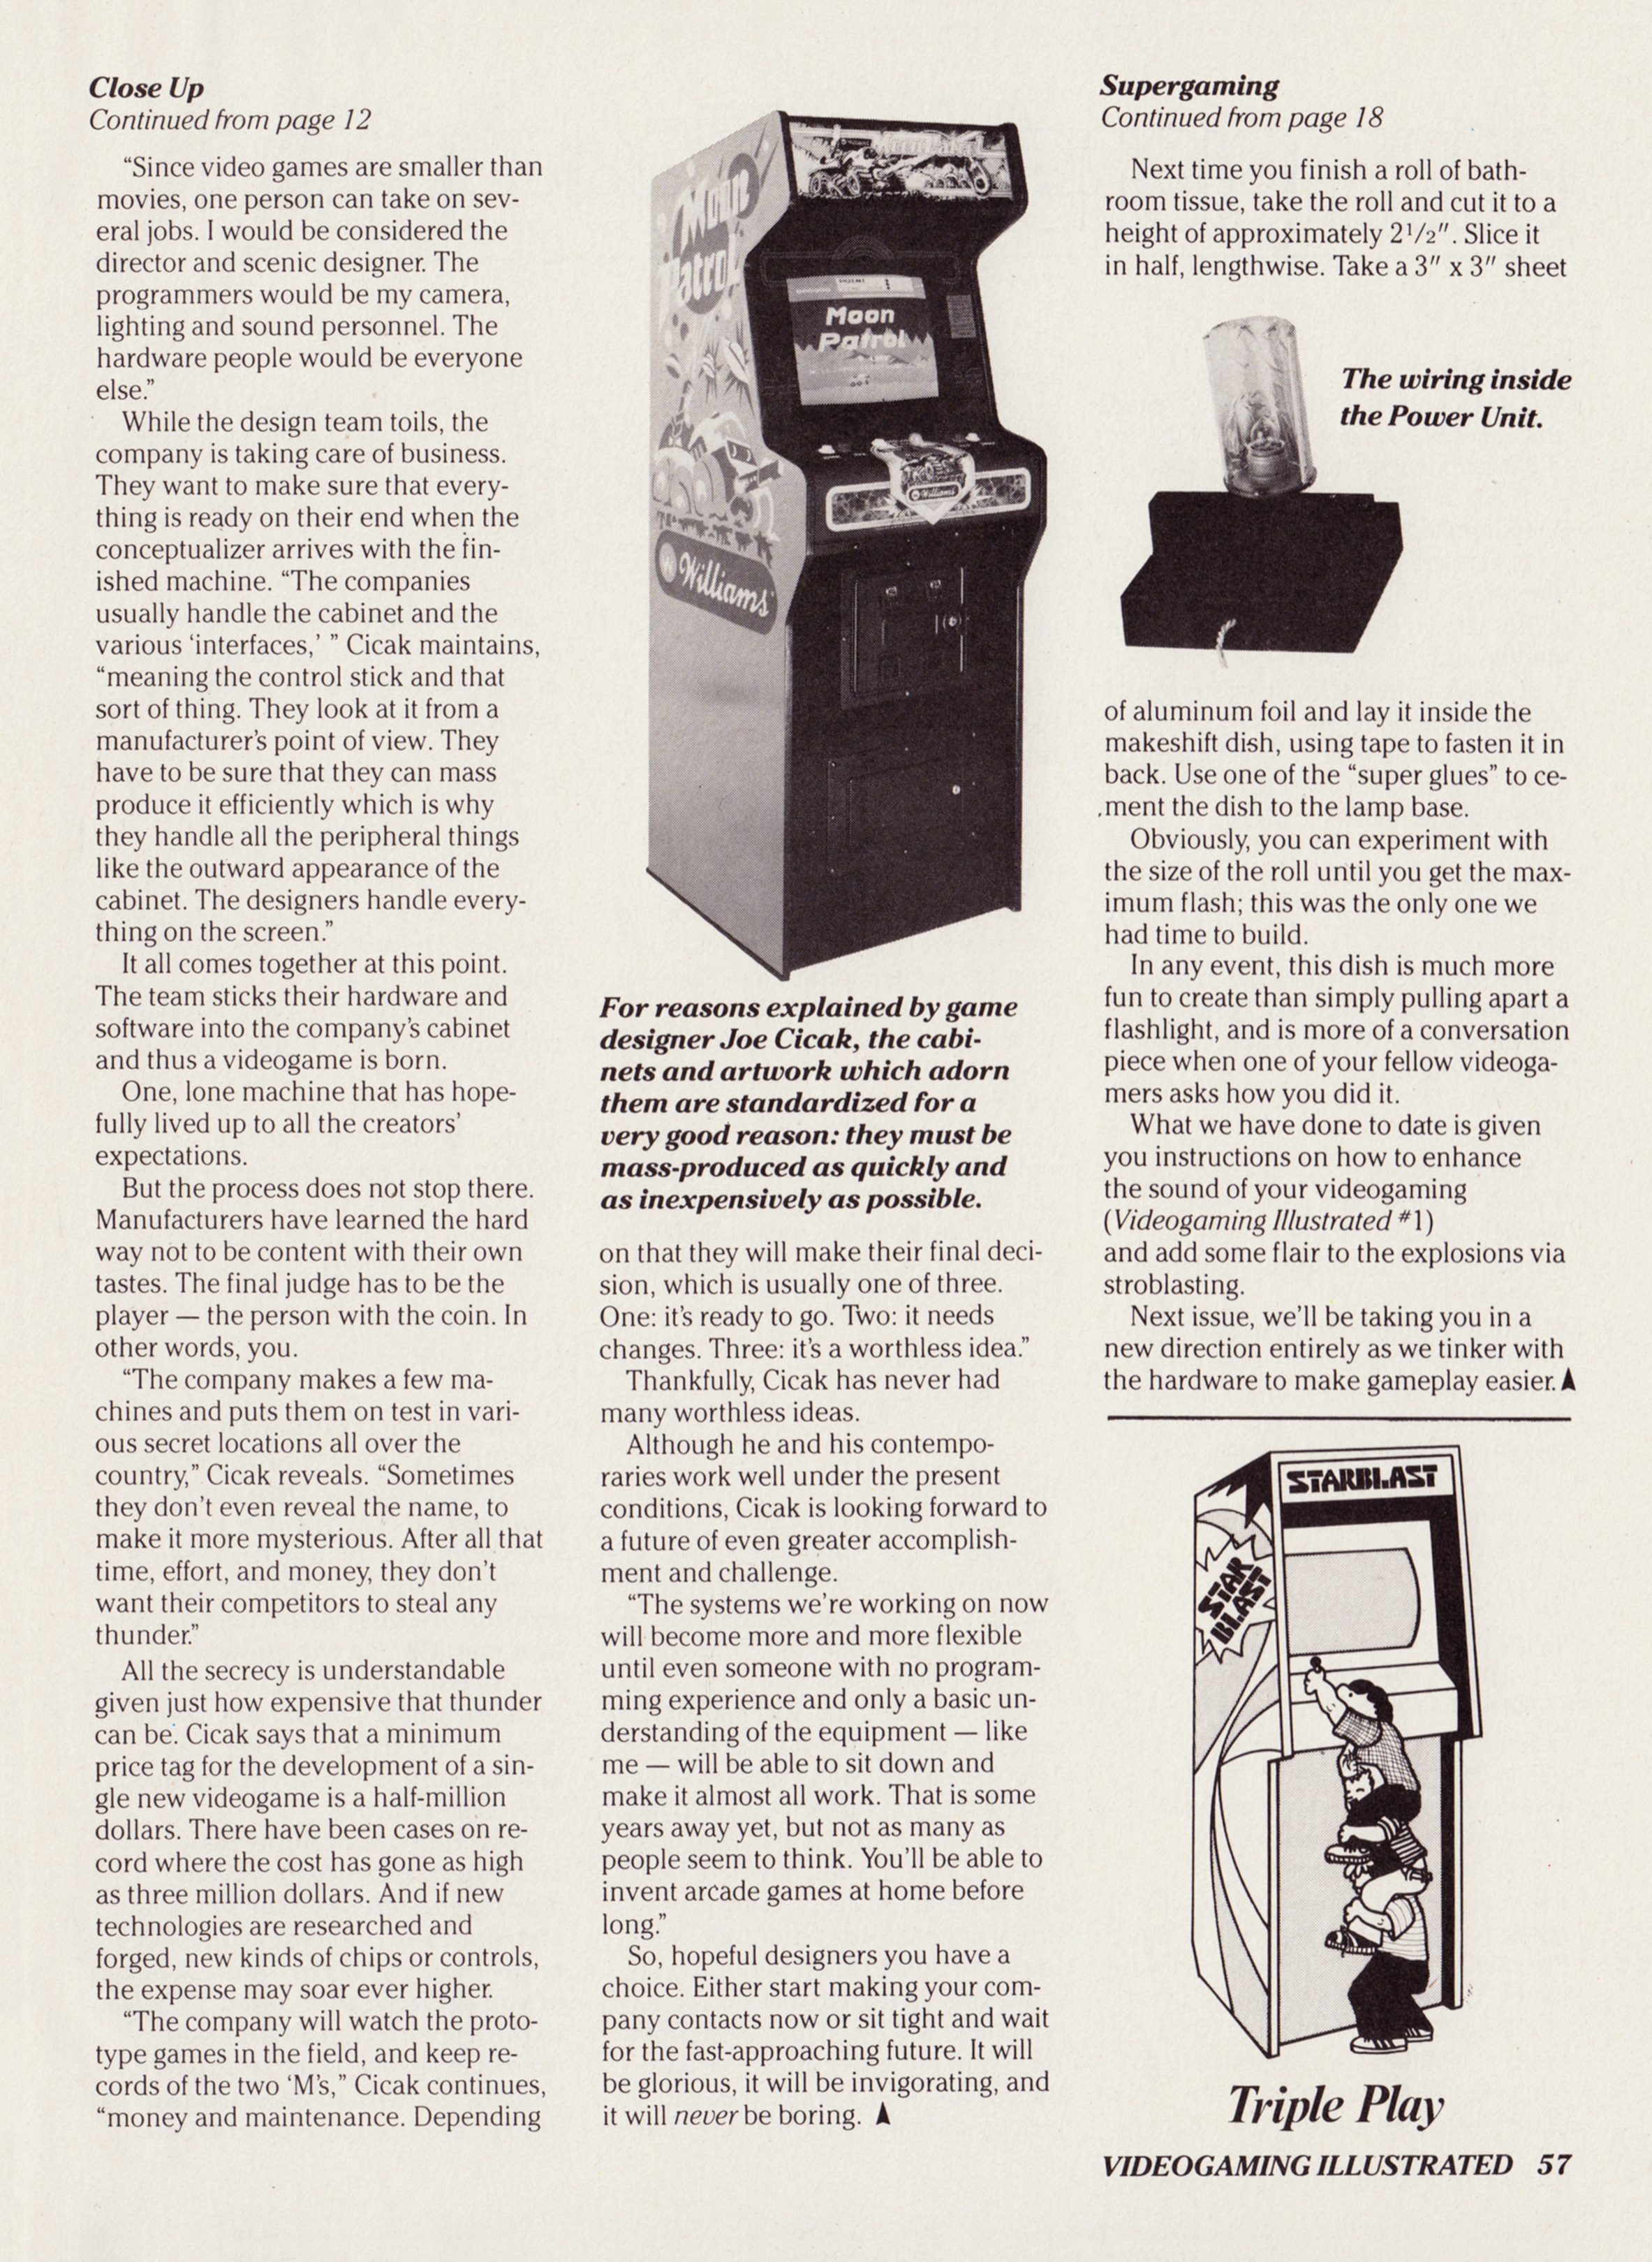
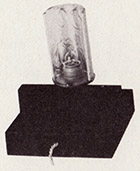
Incidentally, we found an interesting and certainly unusual way to give your unit slightly more light than with the flashlight disk we recommended last issue.
Next time you finish a roll of bathroom tissue, take the roll and cut it to a height of approximately 2½”. Slice it in half, lengthwise. Take a 3” x 3” sheet of aluminum foil and lay it inside the makeshift dish, using tape to fasten it in back. Use one of the “super glues” to cement the dish to the lamp base.
Obviously, you can experiment with the size of the roll until you get the maximum flash; this was the only one we had time to build.
In any event, this dish is much more fun to create than simply pulling apart a flashlight, and is more of a conversation piece when one of your fellow videogamers asks how you did it.
What we have done to date is given you instructions on how to enhance the sound of your videogaming (Videogaming Illustrated #1) and add some flair to the explosions via stroblasting.
Next issue, we’ll be taking you in a new direction entirely as we tinker with the hardware to make gameplay easier.
Source Pages
Continue Reading