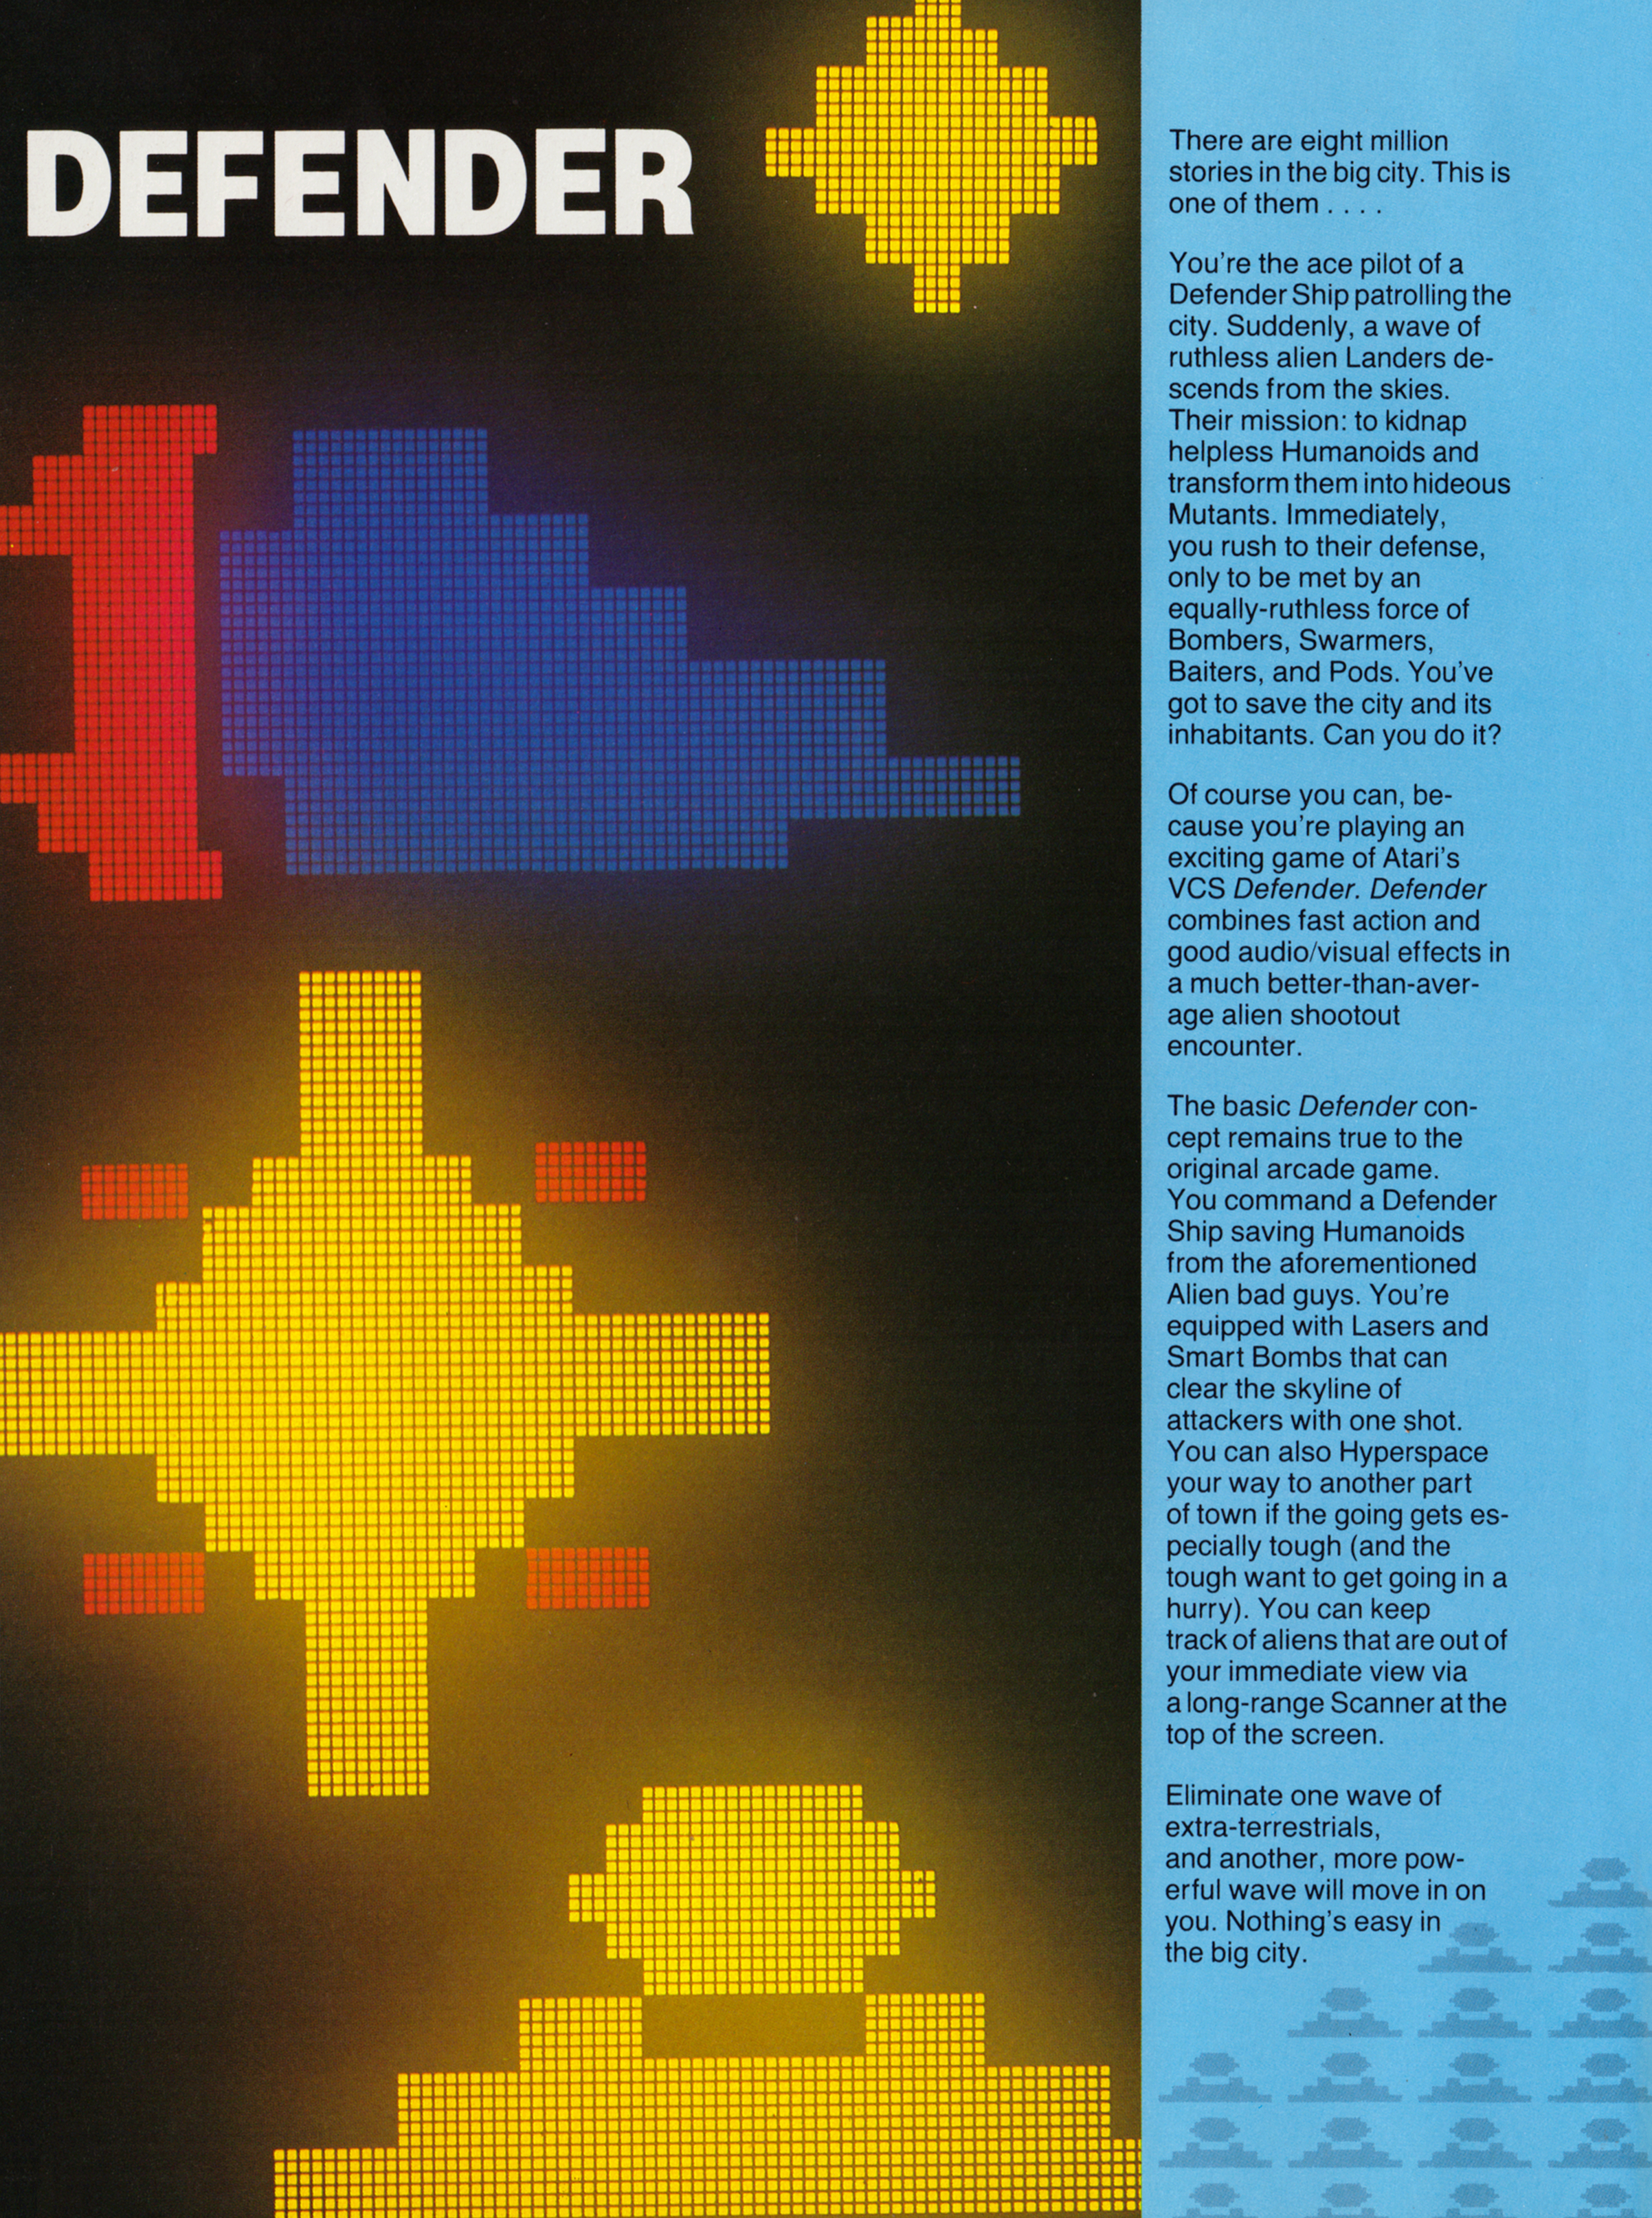
Defender
There are eight million stories in the big city. This is one of them….
You’re the ace pilot of a Defender Ship patrolling the city. Suddenly, a wave of ruthless alien Landers descends from the skies. Their mission: to kidnap helpless Humanoids and transform them into hideous Mutants. Immediately, you rush to their defense, only to be met by an equally-ruthless force of Bombers, Swarmers, Baiters, and Pods. You’ve got to save the city and its inhabitants. Can you do it?
Of course you can, because you’re playing an exciting game of Atari’s VCS Defender. Defender combines fast action and good audio/visual effects in a much better-than-average alien shootout encounter.
The basic Defender concept remains true to the original arcade game. You command a Defender Ship saving Humanoids from the aforementioned Alien bad guys. You’re equipped with Lasers and Smart Bombs that can clear the skyline of attackers with one shot. You can also Hyperspace your way to another part of town if the going gets especially tough (and the tough want to get going in a hurry). You can keep track of aliens that are out of your immediate view via a long-range Scanner at the top of the screen.
Eliminate one wave of extra-terrestrials, and another, more powerful wave will move in on you. Nothing’s easy in the big city.
Atari, Inc.
for Atari VCS
$37.95/$27.00-30.00
1 or 2 players
Rating: PG
Graphics: 8
Game Play: 8
Longevity: 8
OBJECTIVES
To rescue Humanoids and prevent them from being transformed into Mutants, and to destroy as many aliens as possible for points without being destroyed yourself.
CONTROLLERS
Defender uses the Atari joystick controller. The joystick action is quick and tight. It has to be, because when you’re in the thick of combat, you’ll have to make many sudden reversals of direction and changes in altitude. You can move your Defender Ship vertically, horizontally, and diagonally on the screen by pressing the joystick in the direction you want your ship to move. The action button fires your Lasers in the direction the ship is pointed.
ELEMENTS
Defender Ship: This is you, cruising the city skyline, defending yourself and the city’s inhabitants against Alien attack. You are armed with an unlimited supply of Laser Missiles and a limited supply of Smart Bombs; you may also go into Hyperspace at any time.
You begin each Defender game with three lives. Additional lives can be earned for reaching 10,000-point threshholds. You lose a Defender Ship life when either: a) you are hit by an Alien’s missile; b) you hit a Space Mine; or c) you crash into an Alien.
Humanoids: These are the people your Defender Ship must protect. They appear as small blips cowering near the buildings in the city beneath you. You begin each game with five Humanoids.
Throughout the game, Alien Landers will descend upon the city and kidnap helpless Humanoids. When this happens you will hear their shrill cries. You must immediately rush to the Humanoid’s defense and rescue him before the Lander flies off of the top of the screen. If this happens, both Lander and Humanoid will transform into a dangerous Mutant.
To rescue a Humanoid, you must first shoot and destroy the Lander carrying him.
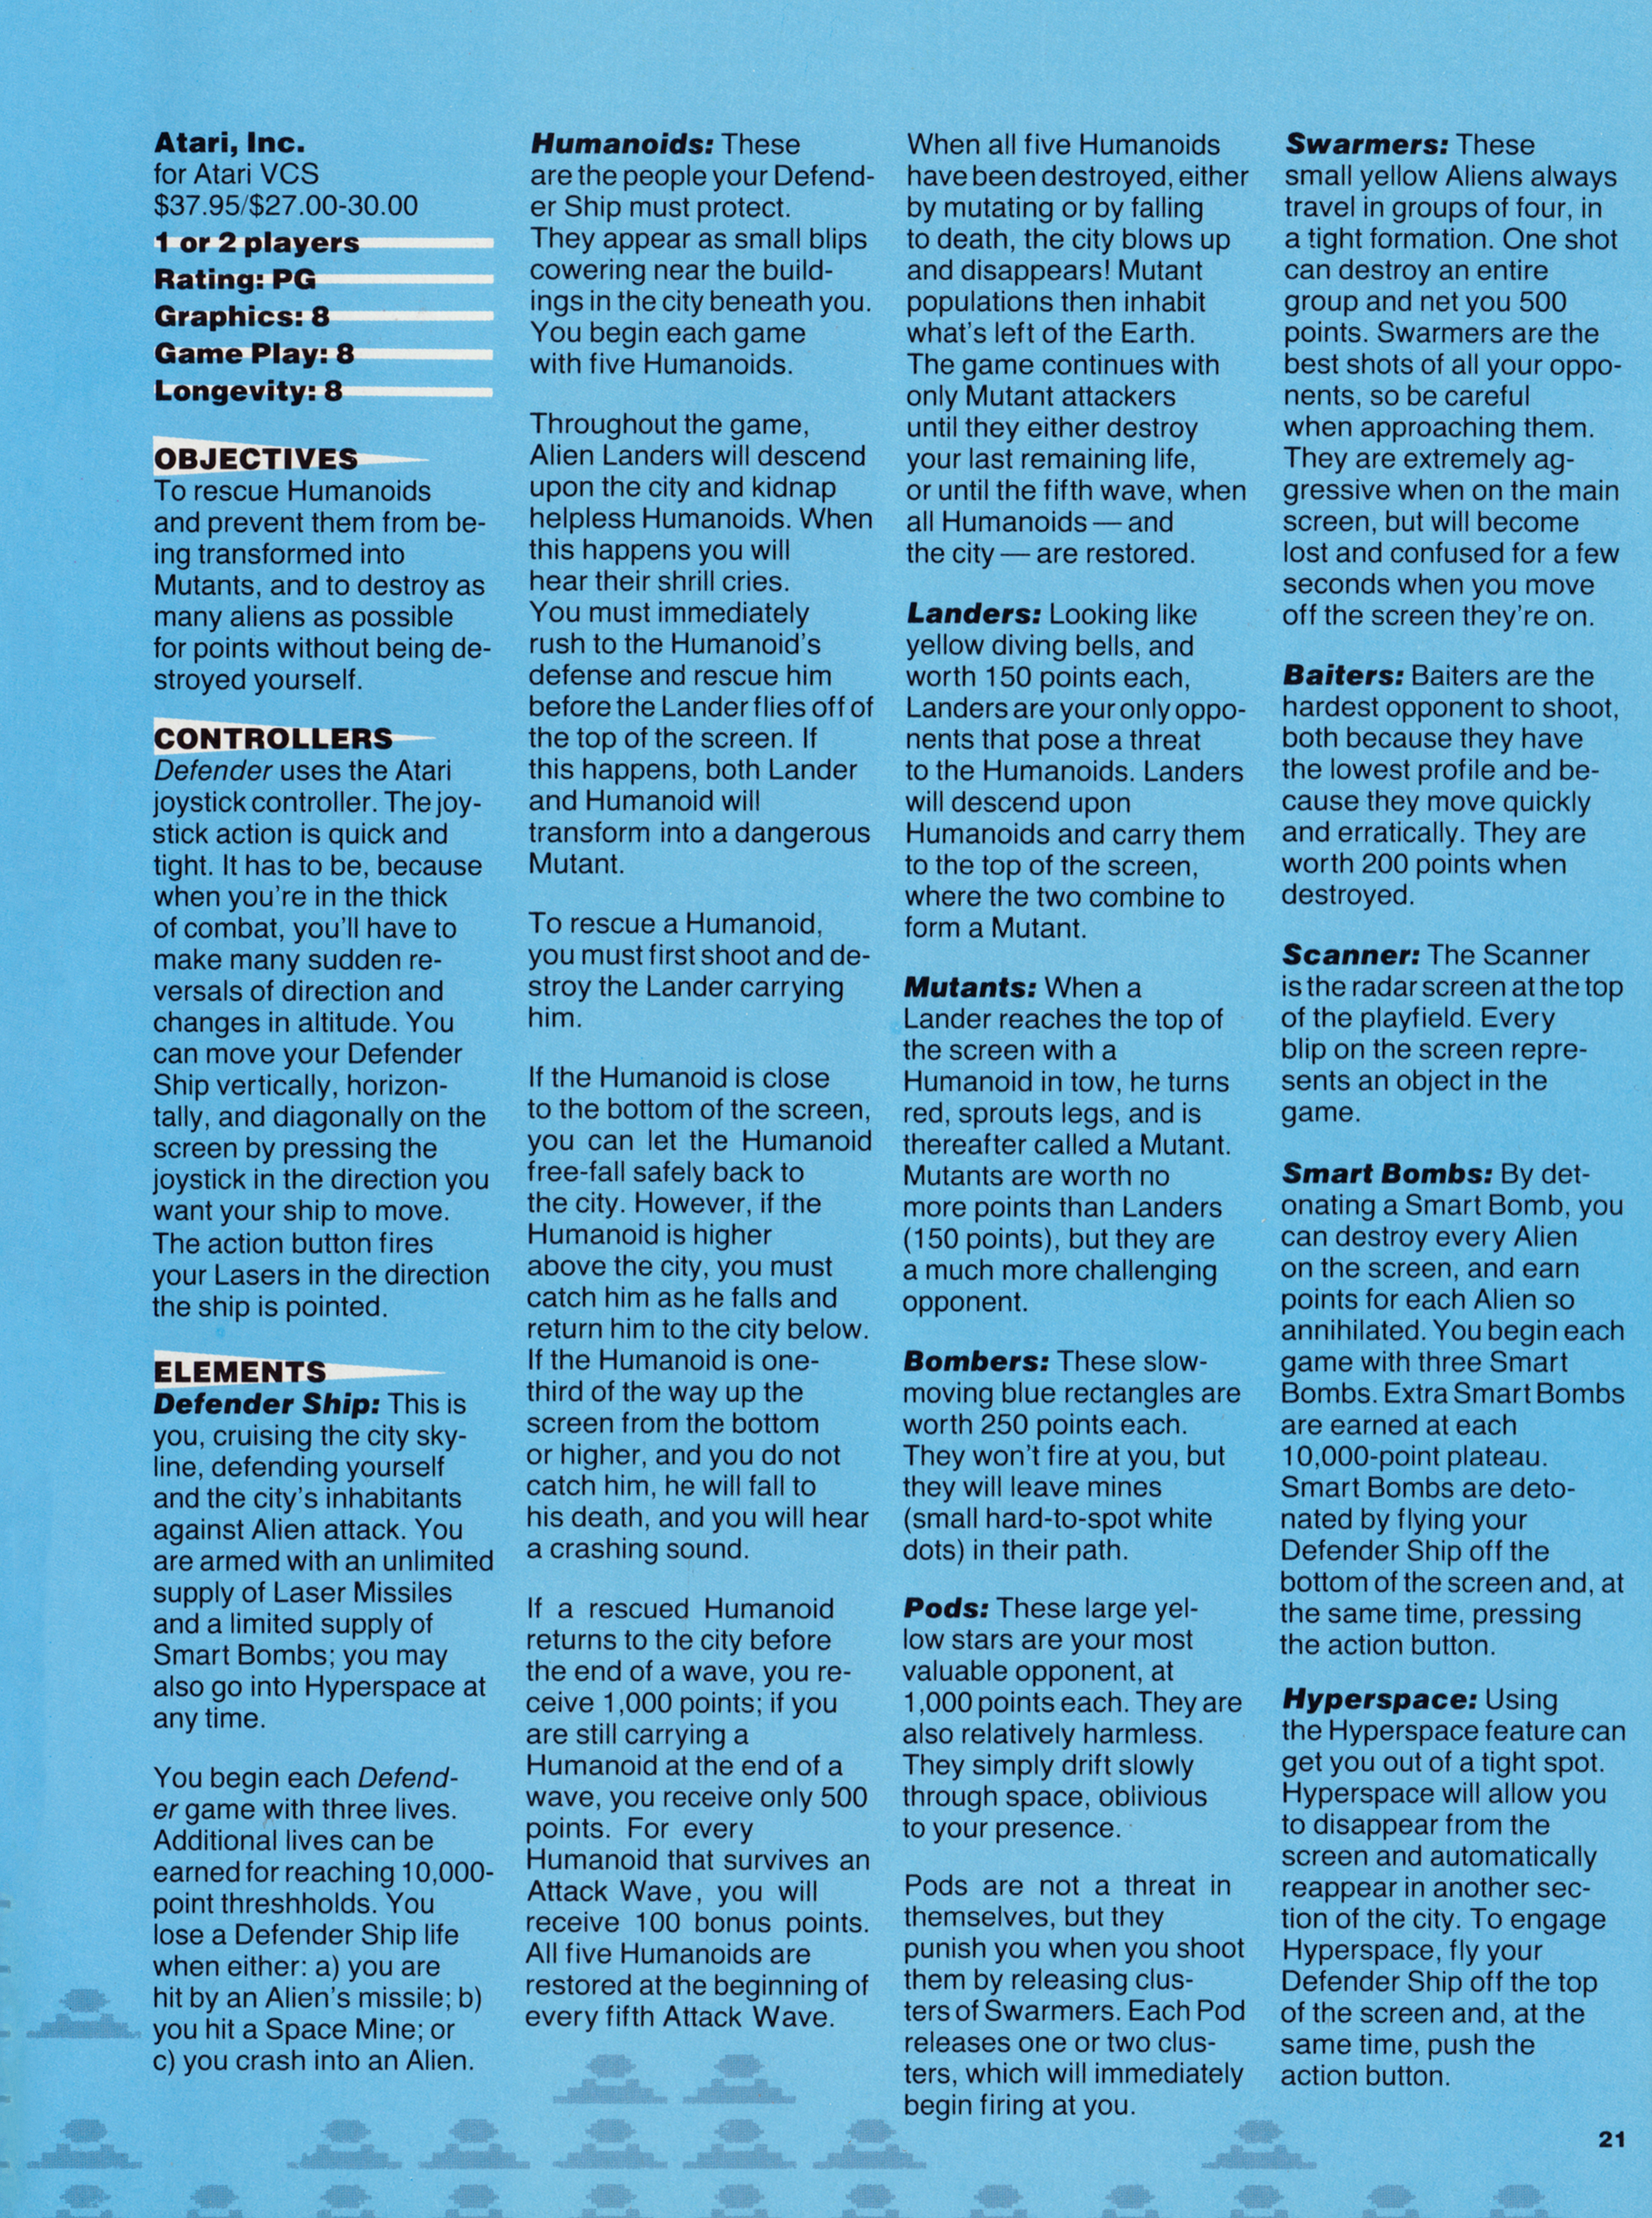
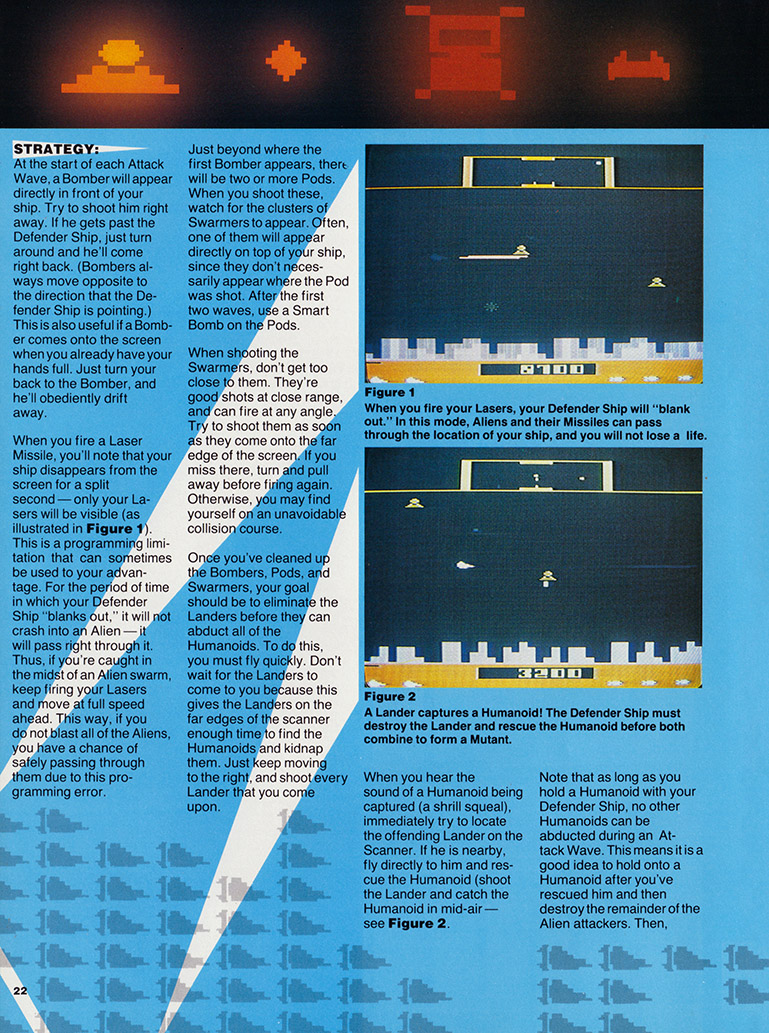
When you fire your Lasers, your Defender Ship will “blank out.” In this mode, Aliens and their Missiles can pass through the location of your ship, and you will not lose a life.
If the Humanoid is close to the bottom of the screen, you can let the Humanoid free-fall safely back to the city. However, if the Humanoid is higher above the city, you must catch him as he falls and return him to the city below. If the Humanoid is one-third of the way up the screen from the bottom or higher, and you do not catch him, he will fall to his death, and you will hear a crashing sound.
If a rescued Humanoid returns to the city before the end of a wave, you receive 1,000 points; if you are still carrying a Humanoid at the end of a wave, you receive only 500 points. For every Humanoid that survives an Attack Wave, you will receive 100 bonus points. All five Humanoids are restored at the beginning of every fifth Attack Wave.
When all five Humanoids have been destroyed, either by mutating or by falling to death, the city blows up and disappears! Mutant populations then inhabit what’s left of the Earth. The game continues with only Mutant attackers until they either destroy your last remaining life, or until the fifth wave, when all Humanoids — and the city — are restored.
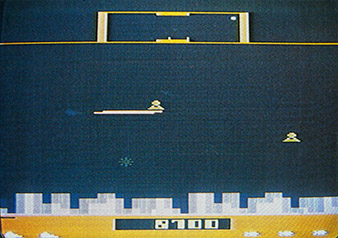
Landers: Looking like yellow diving bells, and worth 150 points each, Landers are your only opponents that pose a threat to the Humanoids. Landers will descend upon Humanoids and carry them to the top of the screen, where the two combine to form a Mutant.
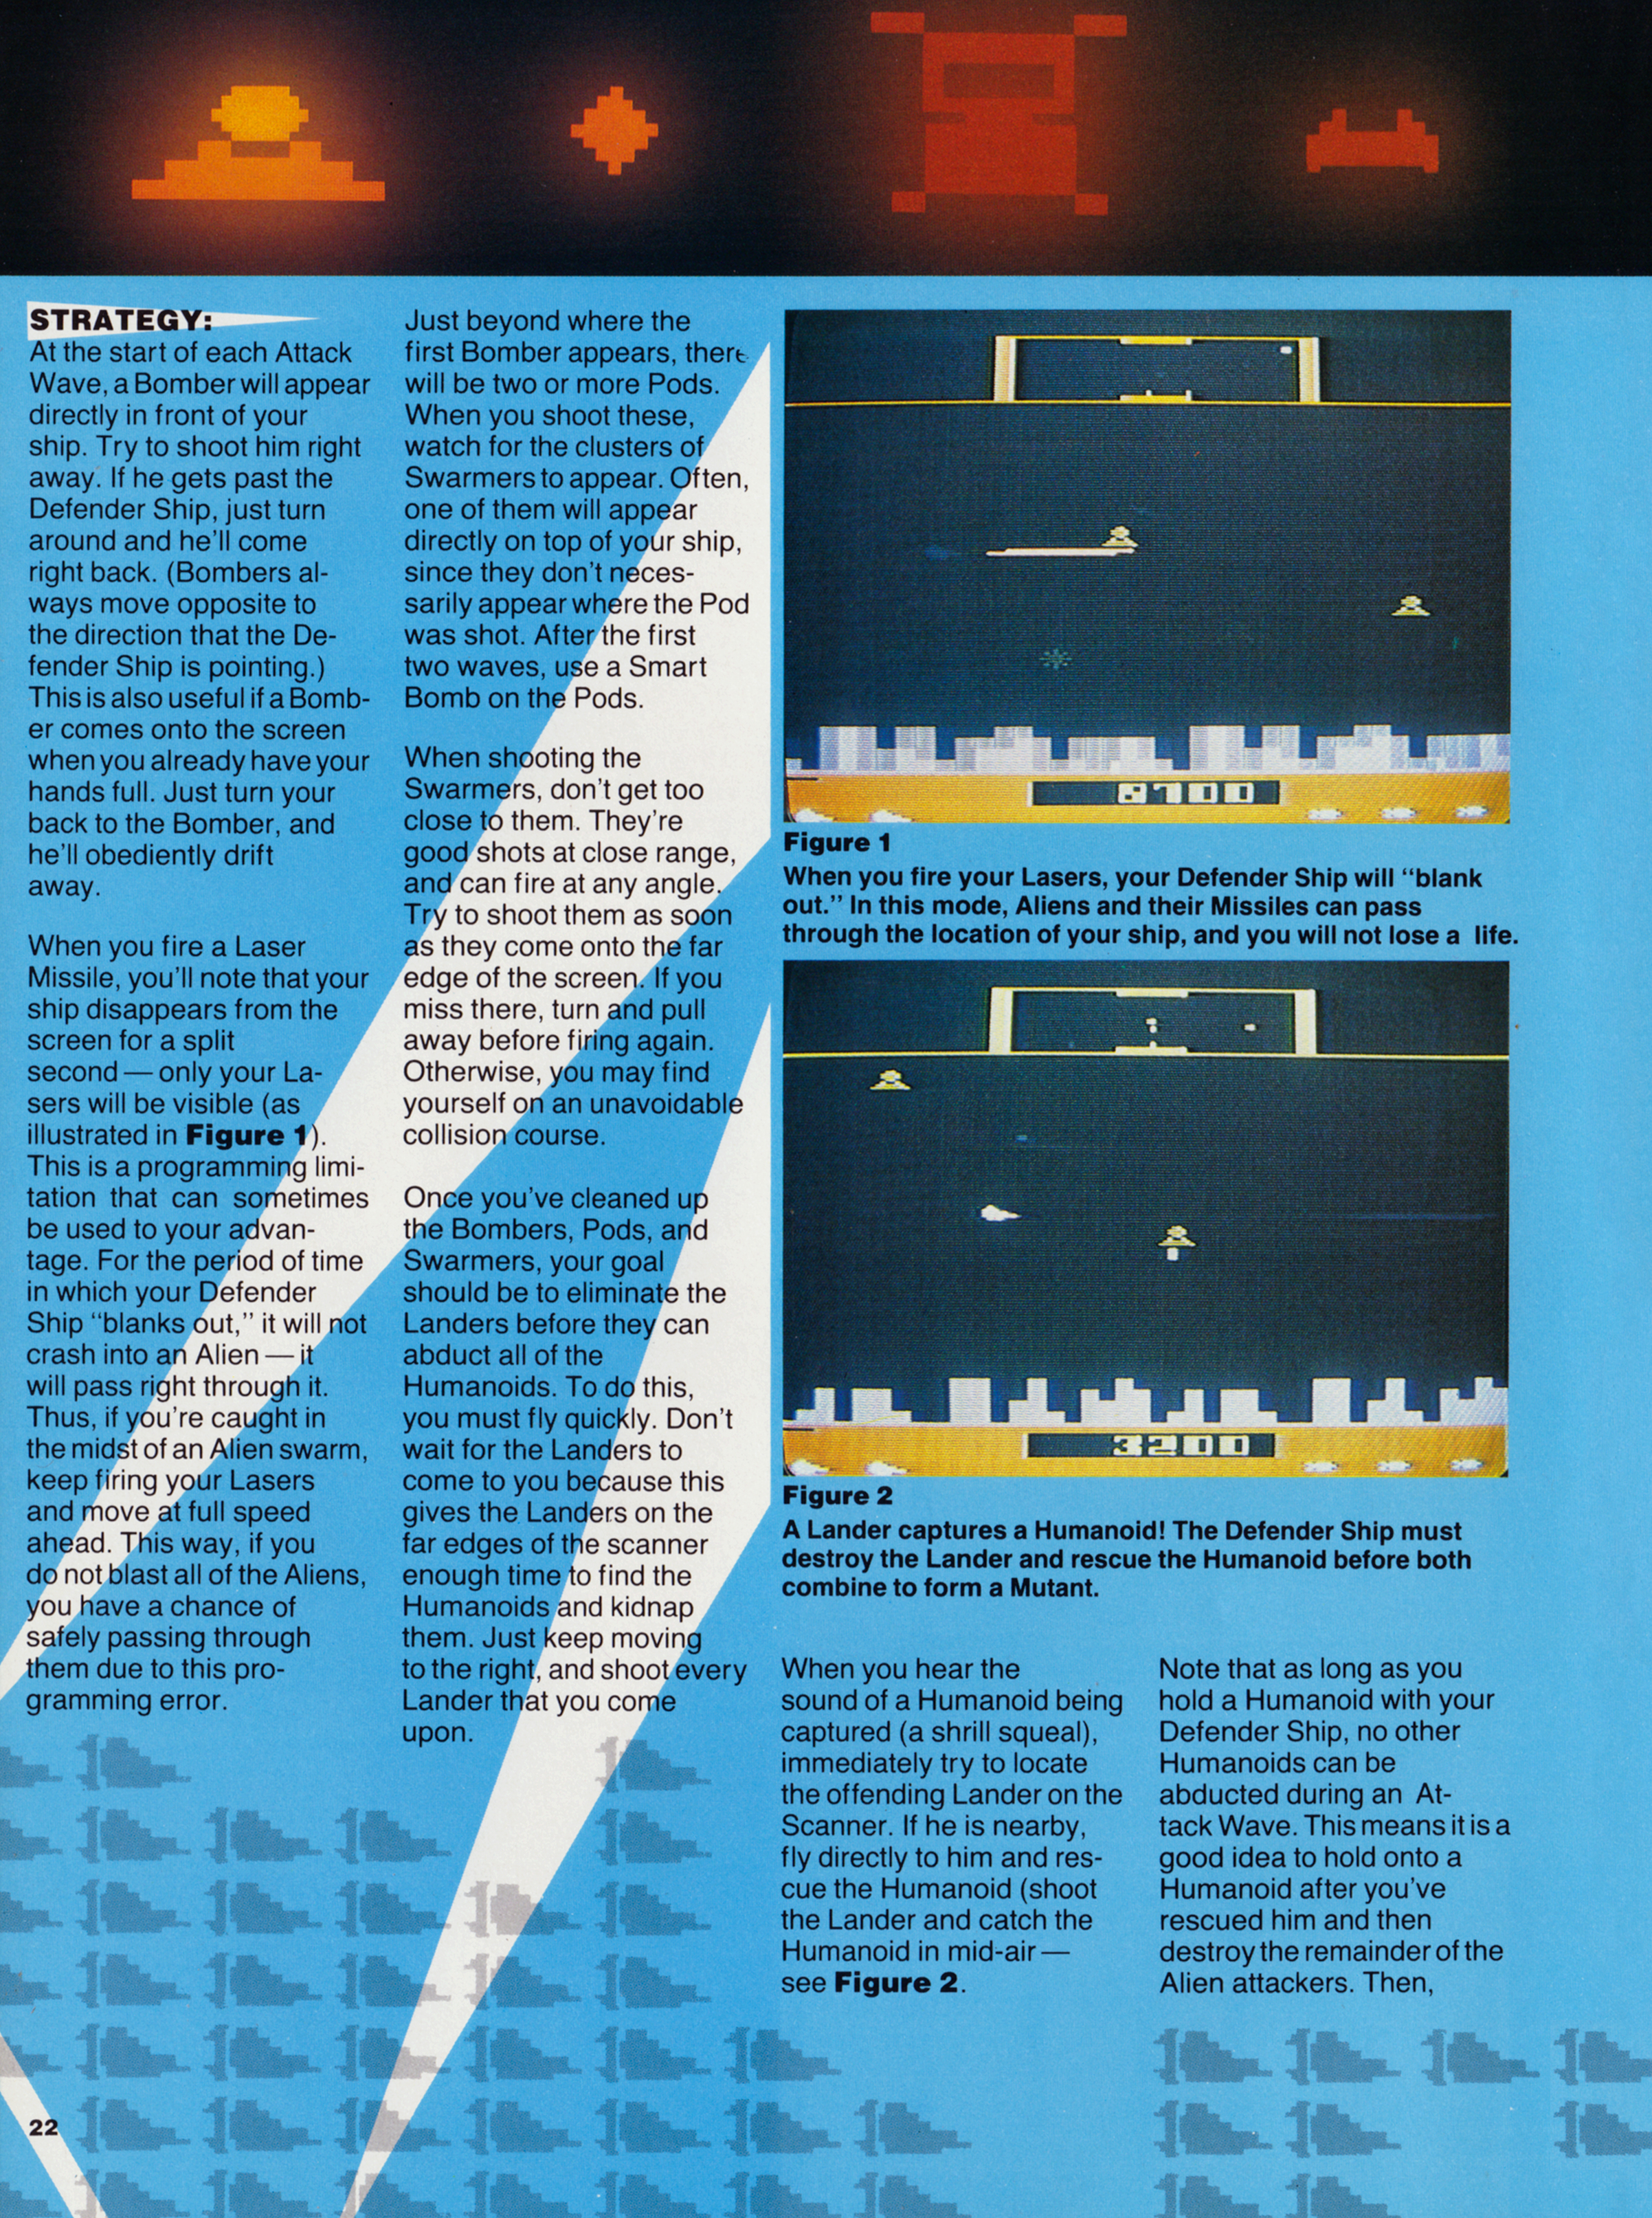
A Lander captures a Humanoid! The Defender Ship must destroy the Lander and rescue the Humanoid before both combine to for a Mutant.
Mutants: When a Lander reaches the top of the screen with a Humanoid in tow, he turns red, sprouts legs, and is thereafter called a Mutant. Mutants are worth no more points than Landers (150 points), but they are a much more challenging opponent.
Bombers: These slow-moving blue rectangles are worth 250 points each. They won’t fire at you, but they will leave mines (small hard-to-spot white dots) in their path.
Pods: These large yellow stars are your most valuable opponent, at 1,000 points each. They are also relatively harmless. They simply drift slowly through space, oblivious to your presence.
Pods are not a threat in themselves, but they punish you when you shoot them by releasing clusters of Swarmers. Each Pod releases one or two clusters, which will immediately begin firing at you.
Swarmers: These small yellow Aliens always travel in groups of four, in a tight formation. One shot can destroy an entire group and net you 500 points. Swarmers are the best shots of all your opponents, so be careful when approaching them. They are extremely aggressive when on the main screen, but will become lost and confused for a few seconds when you move off the screen they’re on.
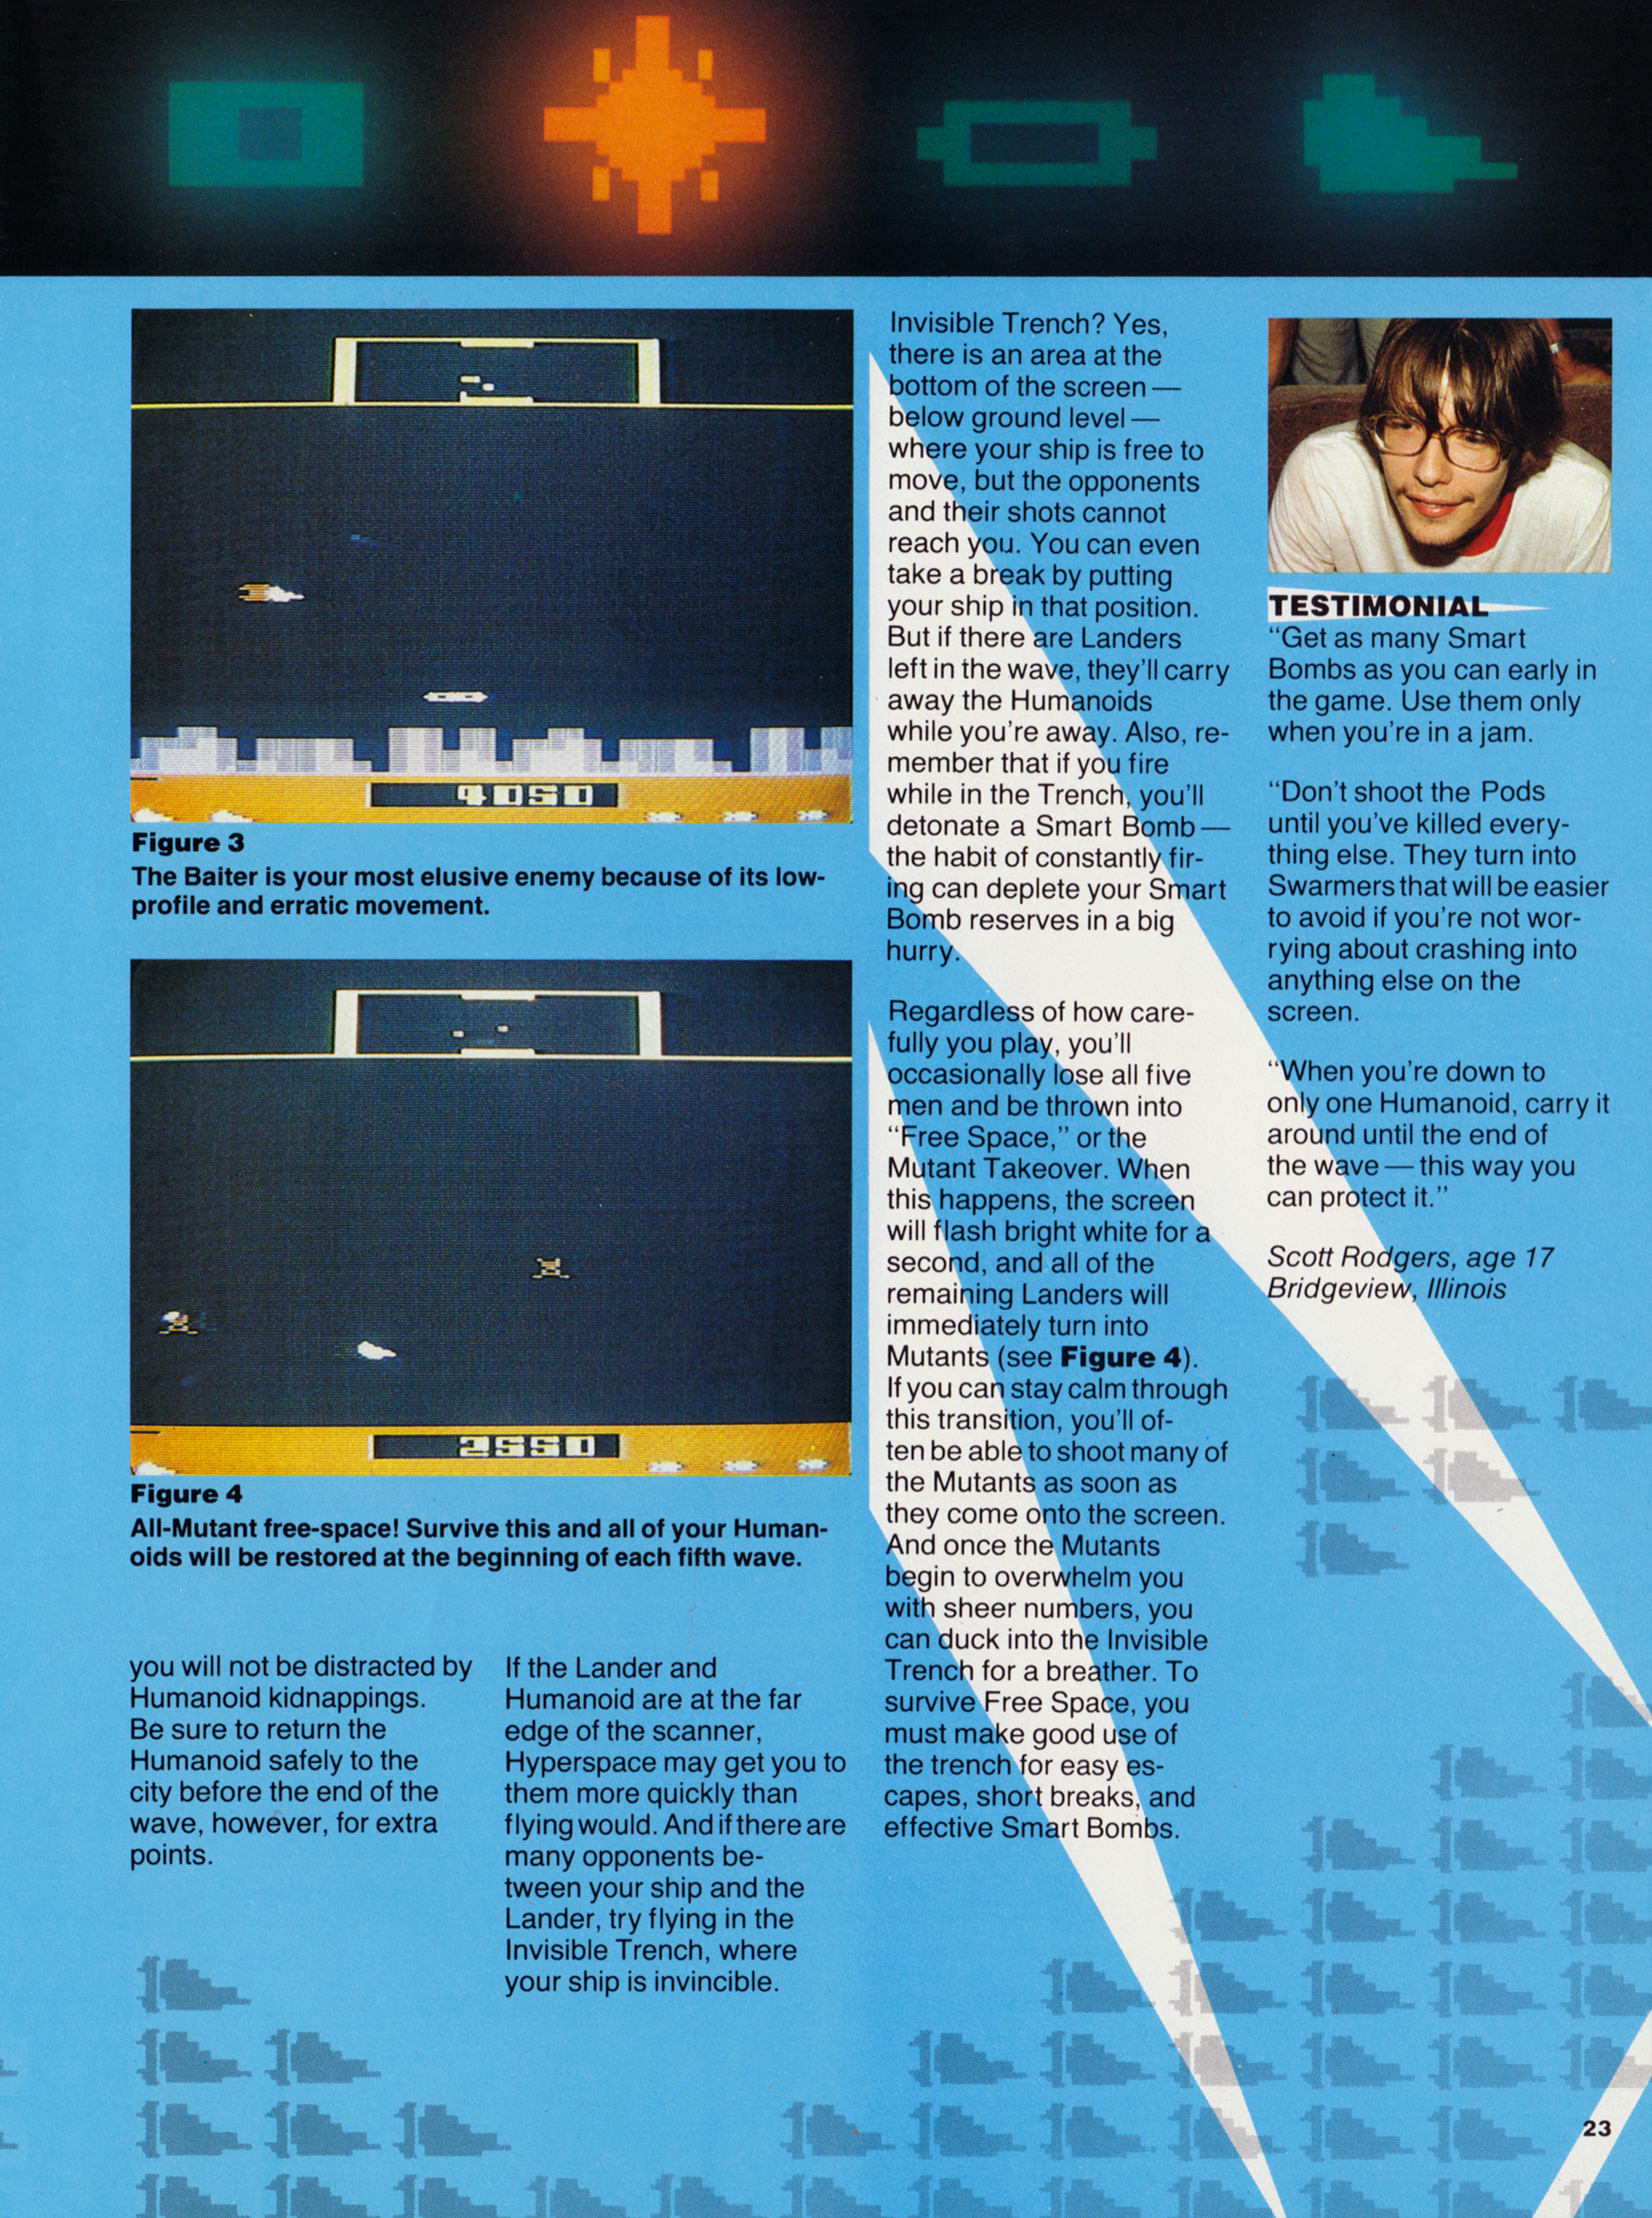
Baiters: Baiters are the hardest opponent to shoot, both because they have the lowest profile and because they move quickly and erratically. They are worth 200 points when destroyed.
Scanner: The Scanner is the radar screen at the top of the playfield. Every blip on the screen represents an object in the game.

The Baiter is your most elusive enemy because of its low-profile and erratic movement.
Smart Bombs: By detonating a Smart Bomb, you can destroy every Alien on the screen, and earn points for each Alien so annihilated. You begin each game with three Smart Bombs. Extra Smart Bombs are earned at each 10,000-point plateau. Smart Bombs are detonated by flying your Defender Ship off the bottom of the screen and, at the same time, pressing the action button.
Hyperspace: Using the Hyperspace feature can get you out of a tight spot. Hyperspace will allow you to disappear from the screen and automatically reappear in another section of the city. To engage Hyperspace, fly your Defender Ship off the top of the screen and, at the same time, push the action button.
STRATEGY
At the start of each Attack Wave, a Bomber will appear directly in front of your ship. Try to shoot him right away. If he gets past the Defender Ship, just turn around and he’ll come right back. (Bombers always move opposite to the direction that the Defender Ship is pointing.) This is also useful if a Bomber comes onto the screen when you already have your hands full. Just turn your back to the Bomber, and he’ll obediently drift away.
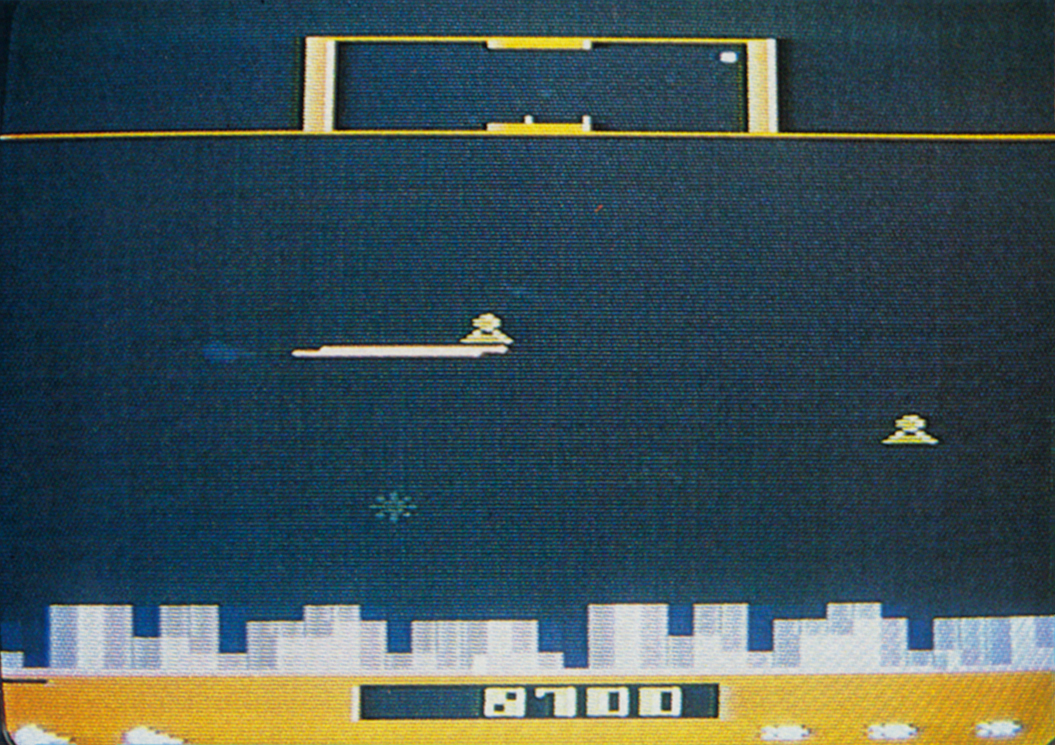
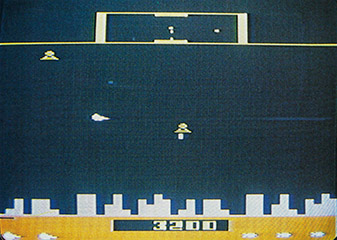
When you fire a Laser Missile, you’ll note that your ship disappears from the screen for a split second — only your Lasers will be visible (as illustrated in Figure 1). This is a programming limitation that can sometimes be used to your advantage. For the period of time in which your Defender Ship “blanks out,” it will not crash into an Alien — it will pass right through it. Thus, if you’re caught in the midst of an Alien swarm, keep firing your Lasers and move a full speed ahead. Tnis way, if you do not blast all of the Aliens, you have a chance of safely passing through them due to this programming error.
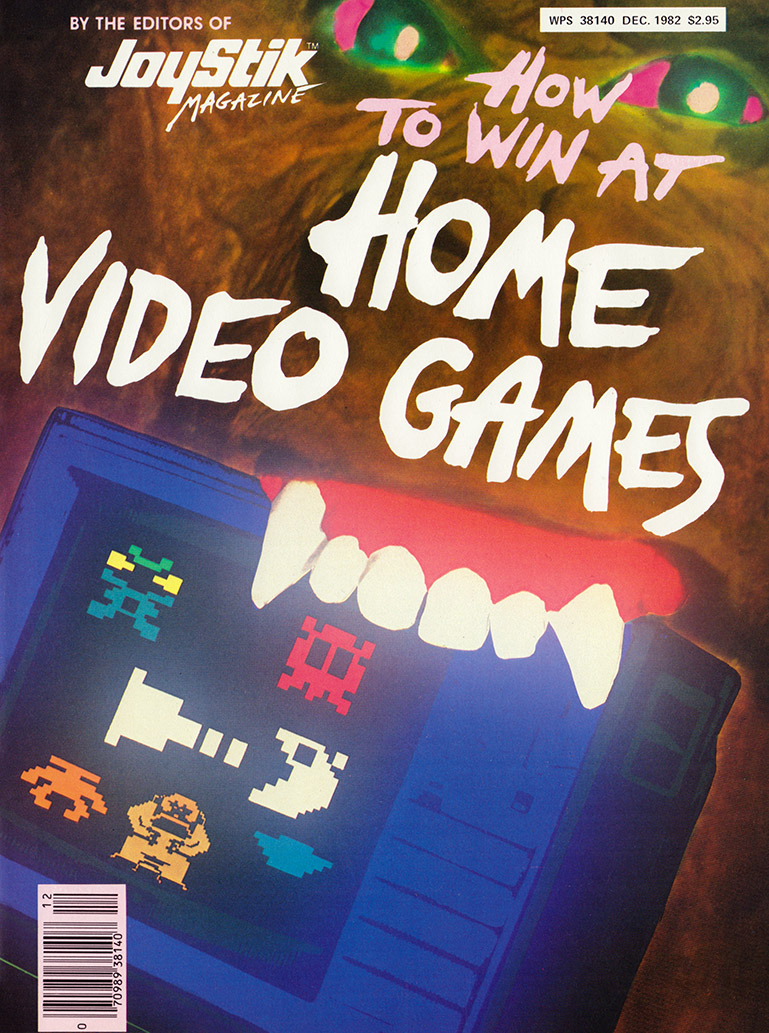
All-Mutant free-space! Survive this and all of your Humanoids will be restored at the beginning of each fifth wave.
Just beyond where the first Bomber appears, there will be two or more Pods. When you shoot these, watch for the clusters of Swarmers to appear. Often, one of them will appear directly on top of your ship, since they don’t necessarily appear where the Pod was shot. After the first two waves, use a Smart Bomb on the Pods.
When shooting the Swarmers, don’t get too close to them. They’re good shots at close range, and can fire at any angle. Try to shoot them as soon as they come onto the far edge of the screen. If you miss there, turn and pull away before firing again. Otherwise, you may find yourself on an unavoidable collision course.
Once you’ve cleaned up the Bombers, Pods, and Swarmers, your goal should be to eliminate the Landers before they can abduct all of the Humanoids. To do this, you must fly quickly. Don’t wait for the Landers to come to you because this gives the Landers on the far edges of the scanner enough time to find the Humanoids and kidnap them. Just keep moving to the right, and shoot every Lander that you come upon.

TESTIMONIAL
“Get as many Smart Bombs as you can early in the game. Use them only when you’re in a jam.
“Don’t shoot the Pods until you’ve killed everything else. They turn into Swarmers that will be easier to avoid if you’re not worrying about crashing into anything else on the screen.
“When you’re down to only one Humanoid, carry it around until the end of the wave — this way you can protect it.”
Scott Rodgers, age 17
Bridgeview Illinois
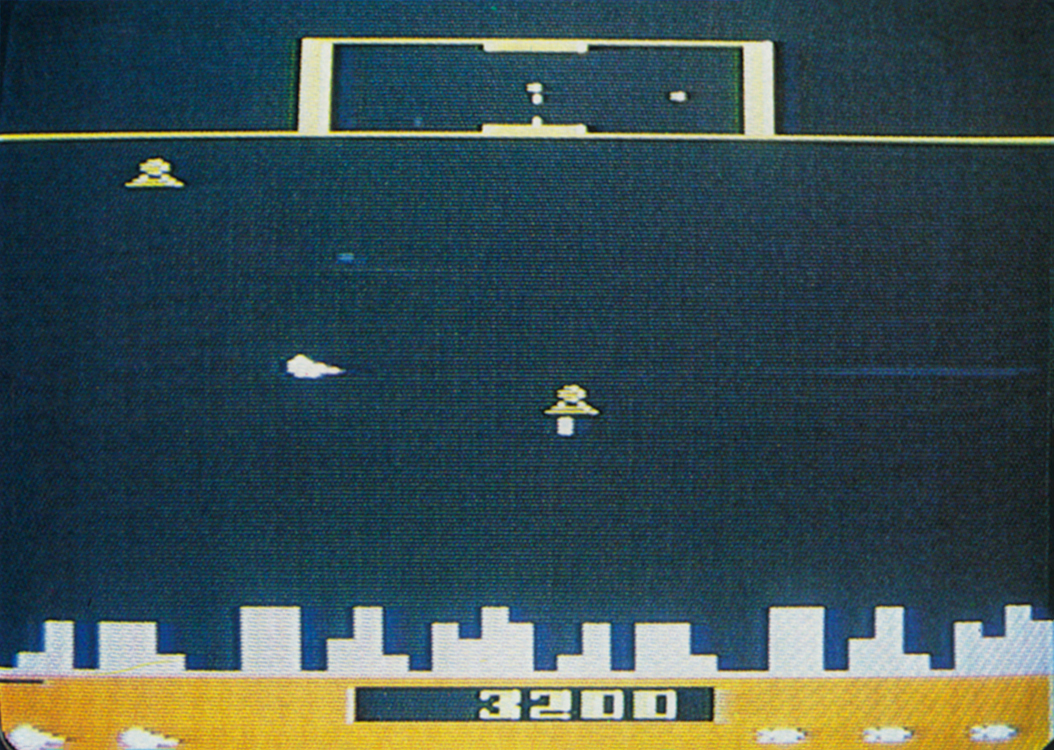
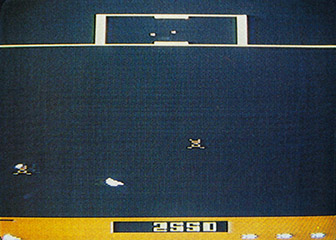
When you hear the sound of a Humanoid being captured (a shrill squeal), immediately try to locate the offending Lander on the Scanner. If he is nearby, fly directly to him and rescue the Humanoid (shoot the Lander and catch the Humanoid in mid-air — see Figure 2.
Note that as long as you hold a Humanoid with your Defender Ship, no other Humanoids can be abducted during an Attack Wave. This means it is a good idea to hold onto a Humanoid after you’ve rescued him and then destroy the remainder of the Alien attackers. Then, you will not be distracted by Humanoid kidnappings. Be sure to return the Humanoid safely to the city before the end of the wave, however, for extra points.
If the Lander and Humanoid are at the far edge of the scanner, Hyperspace may get you to them more quickly than flying would. And if there are many opponents between your ship and the Lander, try flying in the Invisible Trench, where your ship is invincible.
Invisible Trench? Yes, there is an area at the bottom of the screen — below ground level — where your ship is free to move, but the opponents and their shots cannot reach you. You can even take a break by putting your ship in that position. But if there are Landers left in the wave, they’ll carry away the Humanoids while you’re away. Also, remember that if you fire while in the Trench, you’ll detonate a Smart Bomb — the habit of constantly firing can deplete your Smart Bomb reserves in a big hurry.
Regardless of how carefully you pay, you’ll occasionally lose all five men and be thrown into “Free Space,” or the Mutant Takeover. When this happens, the screen will flash bright white for a second, and all of the remaining Landers will immediately turn into Mutants (see Figure 4). If you can stay calm through this transition, you’ll often be able to shoot many of the Mutants as soon as they come onto the screen. And once the Mutants begin to overwhelm you with sheer numbers, you can duck into the Invisible Trench for a breather. To survive Free Space, you must make good use of the trench for easy escapes, short breaks, and effective Smart Bombs.
Source Pages


Continue Reading