Information about the World of the game Defiance.
Defiance has a day/night cycle that I have broken into four distinct lighting groups: Day, Dusk, Night and Dawn.
The following is a video tutorial on a camera glitch useful for taking pictures or making machinima using Defiance. Video by CB2001 (aka Chase Lonehart).
I came across the camera glitch during one of my times messing around with a copy of the game that was modified to run without the online elements. The bypass allowed for the in-game world to run, but without any other players, enemies, NPCs, vendors, missions or world events (the bypass also allowed for the HUD to be switched off, as well as being able to set and lock the time of day it was in the game). I accidentally discovered the glitch when I was walking around The Crater. To my surprise, I discovered the glitch basically pushes the camera forward in a way that I figure it’s close to the player’s head, while pushing the player character off the screen. This was how I was able to take pictures of the in-game world without worrying about the player character being in the shot. I almost made a video about the glitch with the intention of putting it online before the game’s launch, but then I came to realize that I needed to wait, so to check and make sure the glitch worked in the game and confirm that it wasn’t just something that happened with the bypass version. Sure enough, after the game launched, I went in, did the tutorial, got into the game world and confirmed the glitch also worked in the game proper.
Prepping your PC and game to do pictures/video is something that is certainly an important thing. If you are planning on taking photos or videos, using a screen capture program is the best solution. When it came to doing the pictures like the ones I’ve done of the in-game world using the bypass copy I previously mentioned, I simply used the Print Screen button on my keyboard and then pasting the image into Paint and saving the image to the Desktop. However, that copy is on a PC that still runs Windows 10 (which I still use as my daily driver, as it was previously my daily driver and gaming PC). Windows 11, which I have on a separate PC, has a different setup when it comes to Print Screen. So, depending on how things are set, when you hit Print Screen, it freezes the screen and gives you the option to select either a portion of the screen or do Full Screen copy of the image, following by posting it into a photo editing program of your choosing.
With my copy of Defiance on the PC I use for gaming now, it has an occasional moment where hitting Print Screen causes the game to glitch out and minimize with no image being captured. Using an outside screen capture program is a better option to avoid any kind of glitching. You could go with programs like Fraps (which has been one means that machinima makers have used for years and at a single payment of $37) or OBS Studio (which is open source and free).
However, if you have an NVIDIA graphics card like me, the NVIDIA App comes with a screen recorder/screen capture option that I have used for not only recording the video I did on the tutorial, but of the image captures presented here. Either way, having the ability to hit a single key to capture images or start/stop recording video makes doing multiple takes of a lot easier to handle.
When it comes to the game itself, one of the things you’ll typically see when it comes to other users are their name and account info. That can be distracting if you’re trying to take a picture or video, as that information would be in the way of an otherwise good picture. So, you’re going to go under Gameplay (underneath your Settings), and you’re going to turn off Show Nameplates. This turns off Show Account Names and Show Character Names. This turns off the name and account info of the players whom will be your “actors” in whatever scene you’re filming or turn off the names of the users whom you’re taking pictures of.
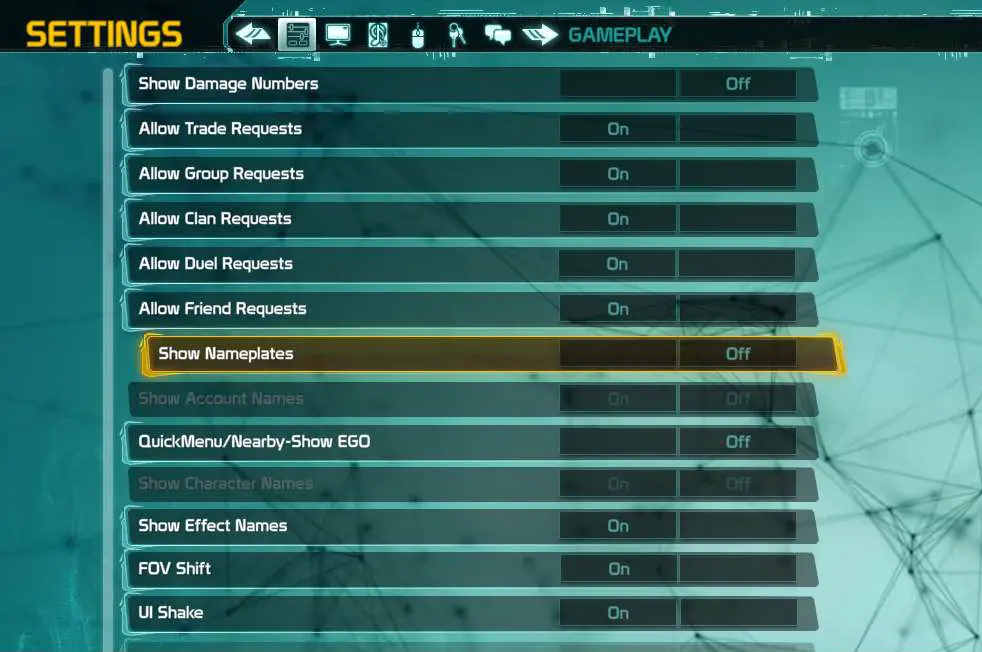
Author’s Note: You may want to examine and maybe turn off FOV Shift (which shifts the field of view depending on if you’re looking at items close by or at a distance) and UI Shake (which the screen shakes when explosives are going off, as seen in one of the test footage in the video I did). It’s best to go through the settings, find out what they do and turn off what you feel you don’t need or feel that you do need, depending on what you’re looking for. Experimentation with the settings before doing any pictures or videos is recommended.
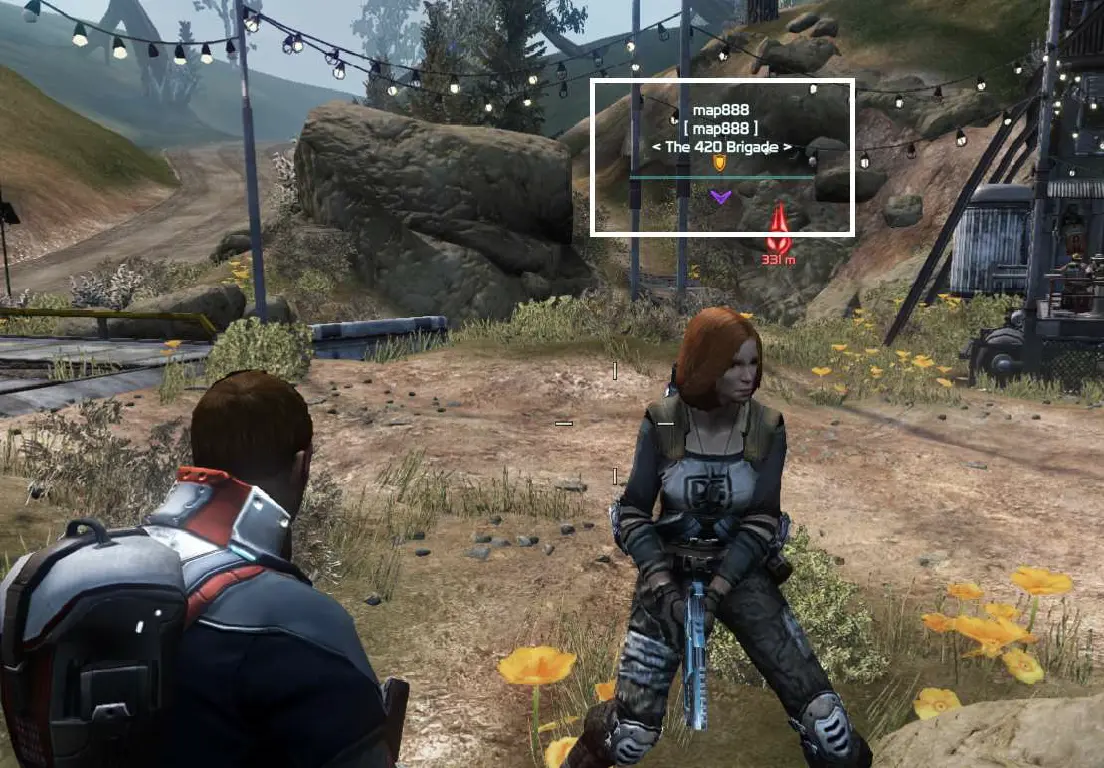
Before:
After:
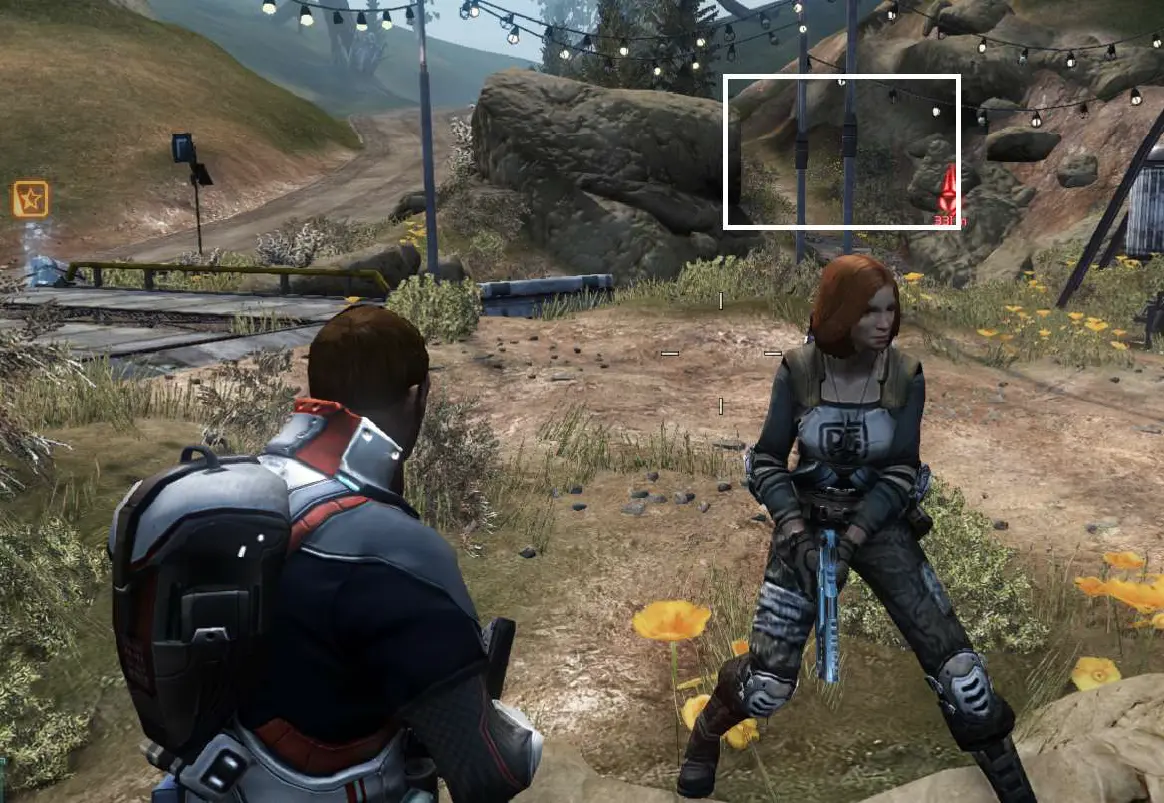
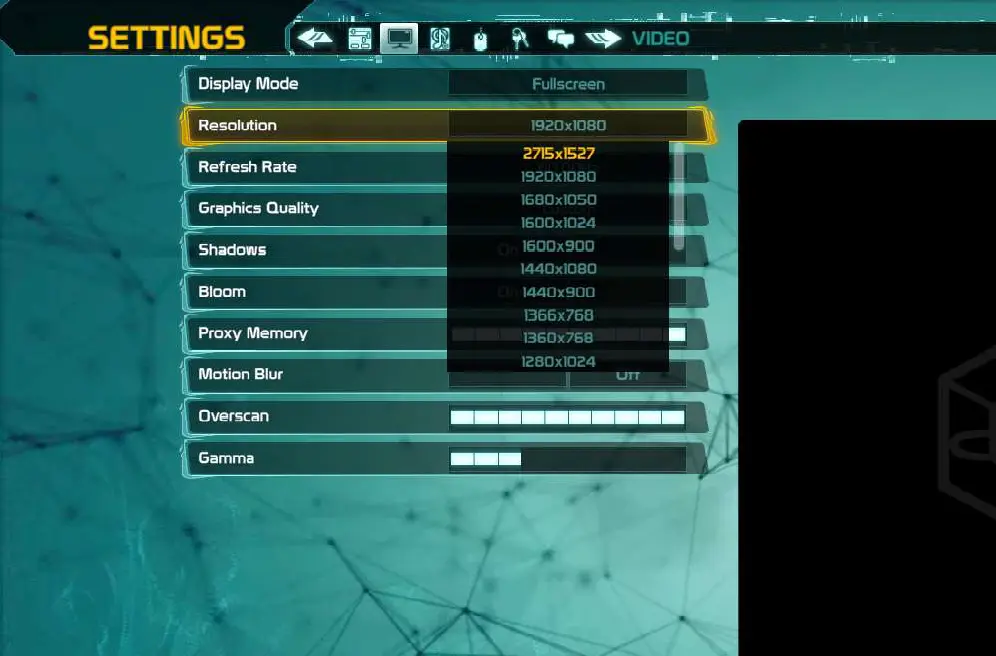
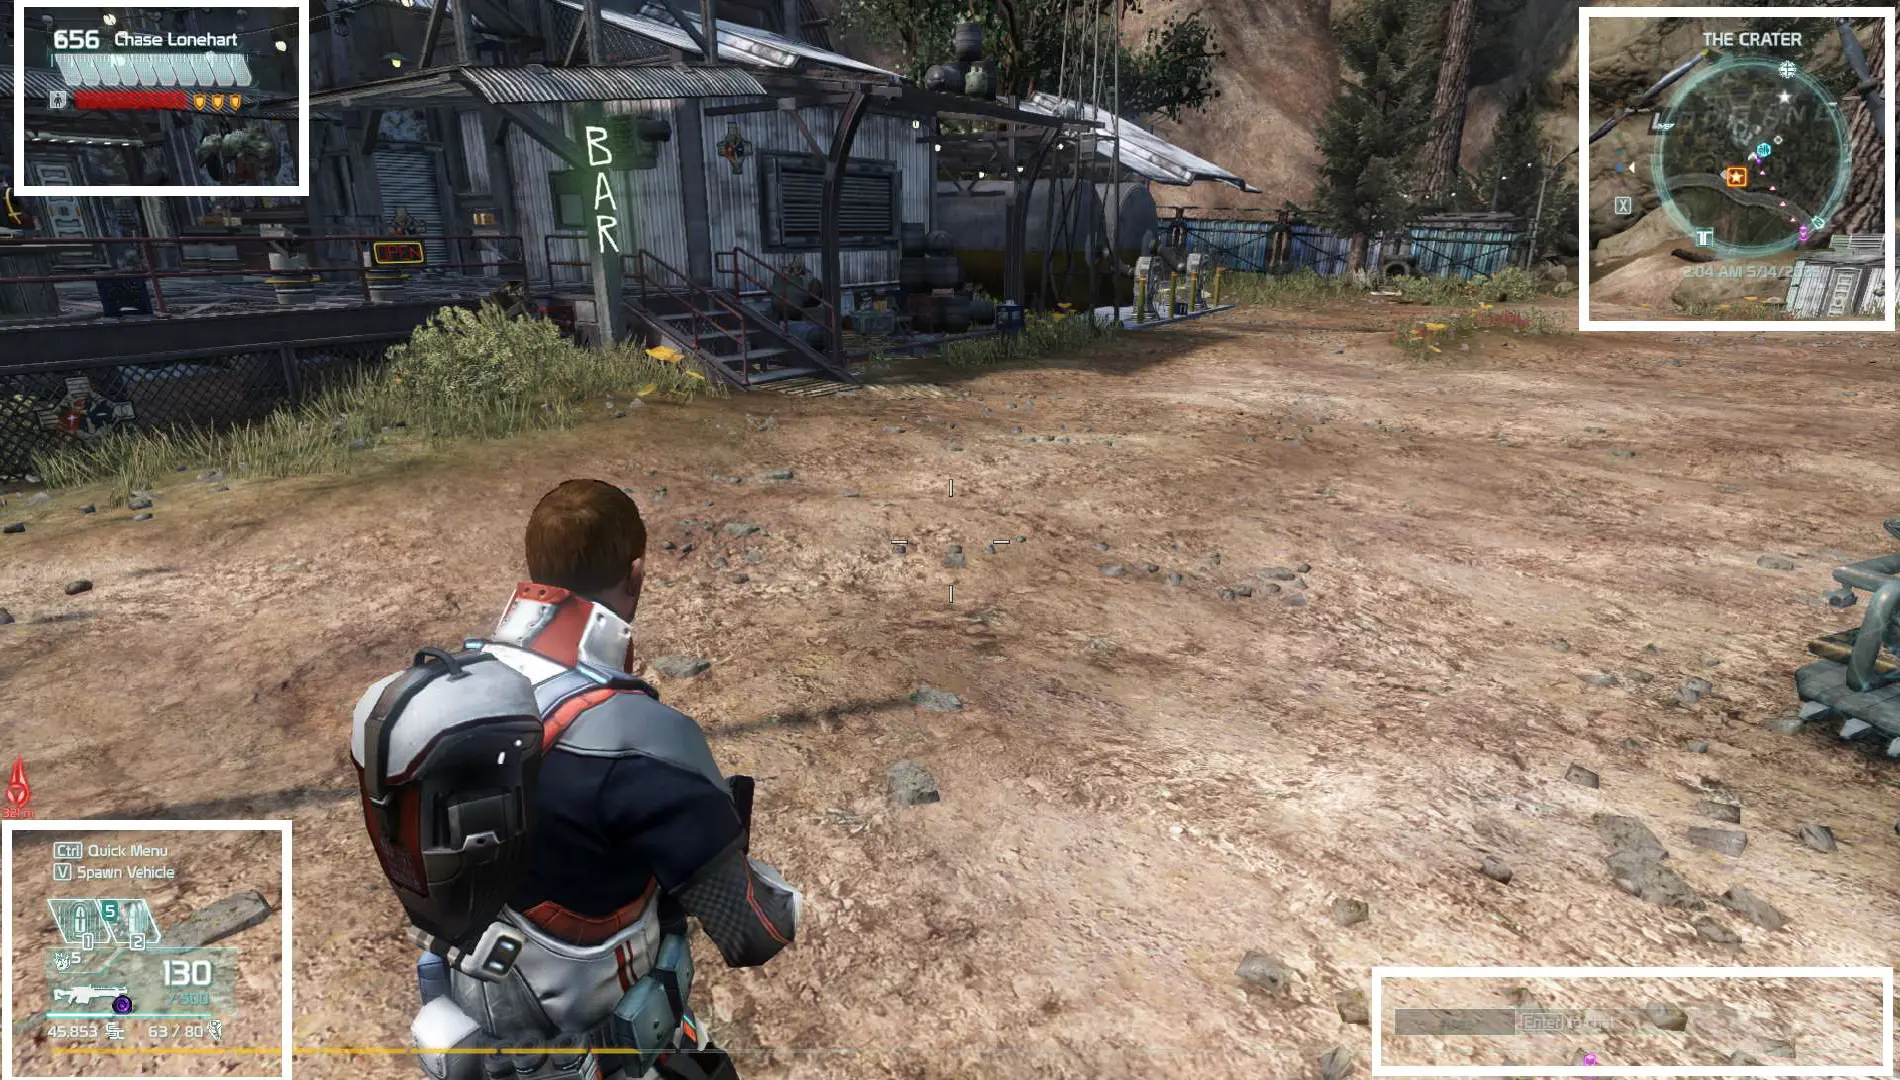
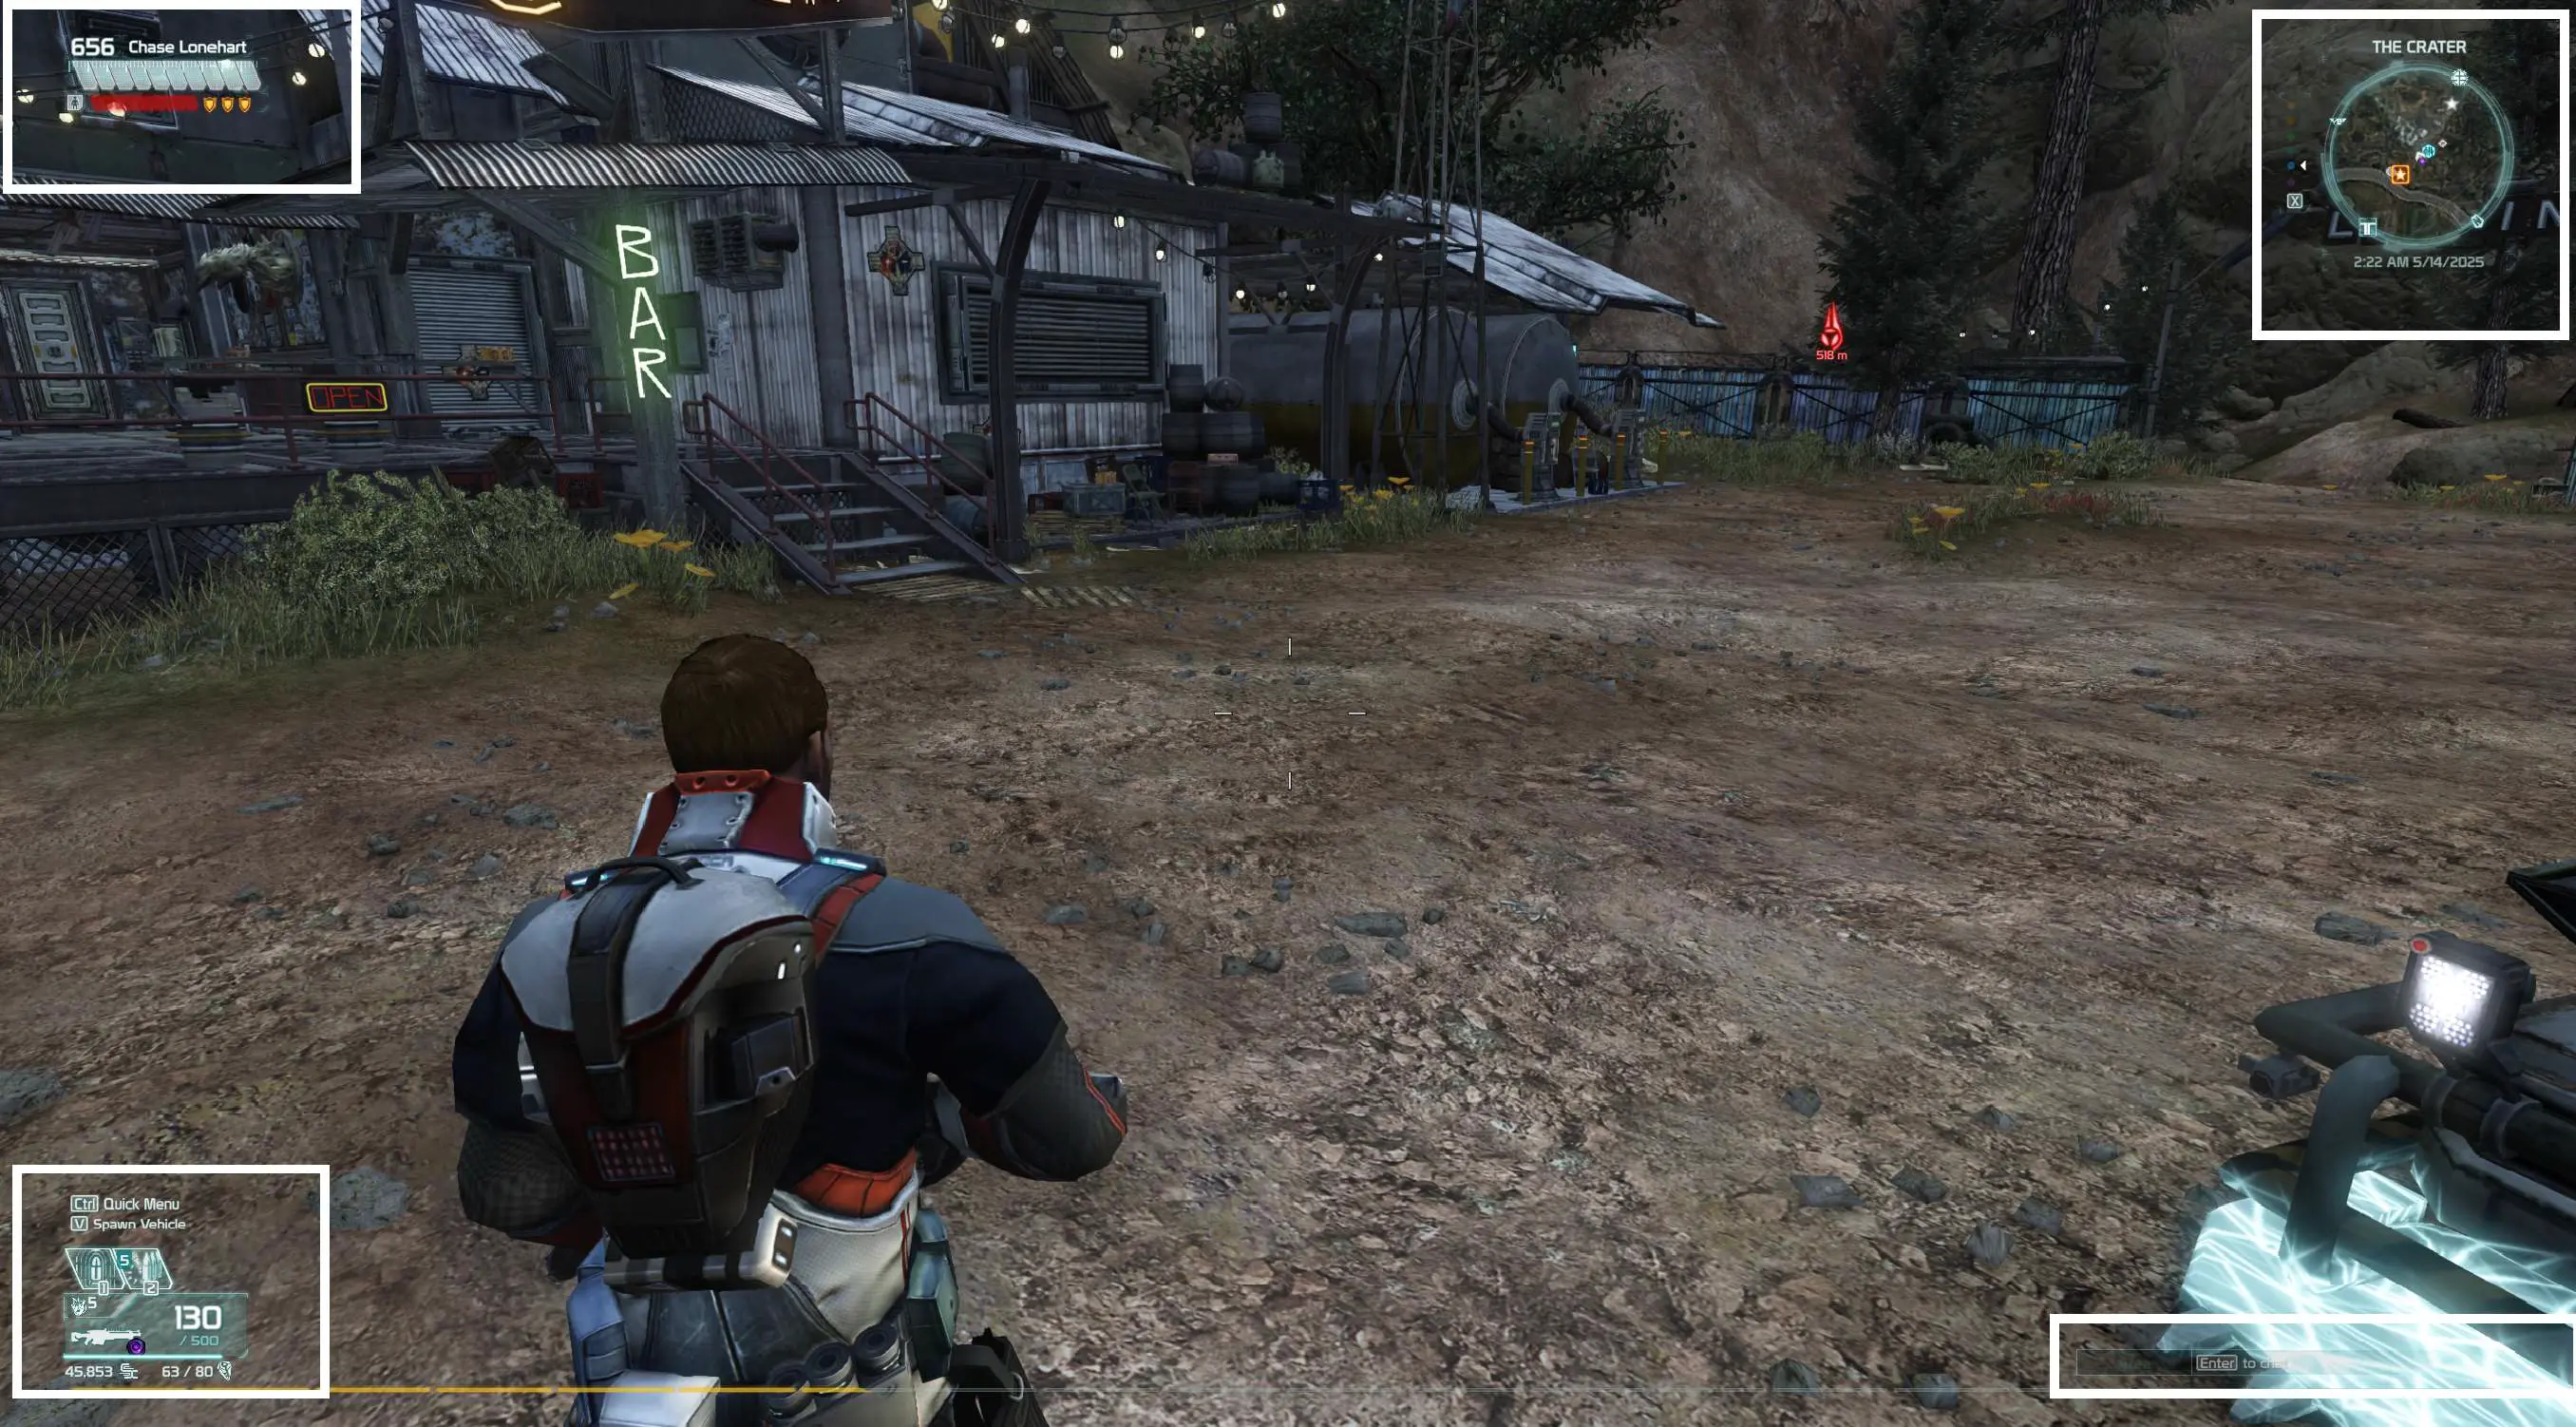
As you can see in this first picture, the HUD is big. The reason for this is because my graphic’s card setting is at 1920x1080. However, when you change the settings to a higher resolution, the HUD is smaller, giving you much more visual space to work with for your photos or videos. I’ve heard that the HUD can appear even smaller than the setting I have available (I came across one YouTube user who actually stated she had to change her setting from 4K to a lower setting to make the HUD more visible to her). The highest setting I can set (as you can see in the pictures and in my video) is 2715x1527, mostly due to the size of the monitor I have. Considering that you’re trying to get as much of a clear “window” to be able to record footage or take pictures, the smaller the HUD is is helpful. As demonstrated in the picture below, the HUD is smaller.
Author’s Note: Miss Kateya, a user from the Defiance subreddit, has stated there is a way to temporarily “turn off” the HUD if you’re doing pictures. If you set up the shot, and then quickly open and close the menu, (like the map), there’s a brief second where the HUD doesn’t show up (it is slower on slower computers) and if you time things right, you can get the HUD out of the way for pictures. Thank you again, Miss Kateya for the tip. 😀
Before:
After:
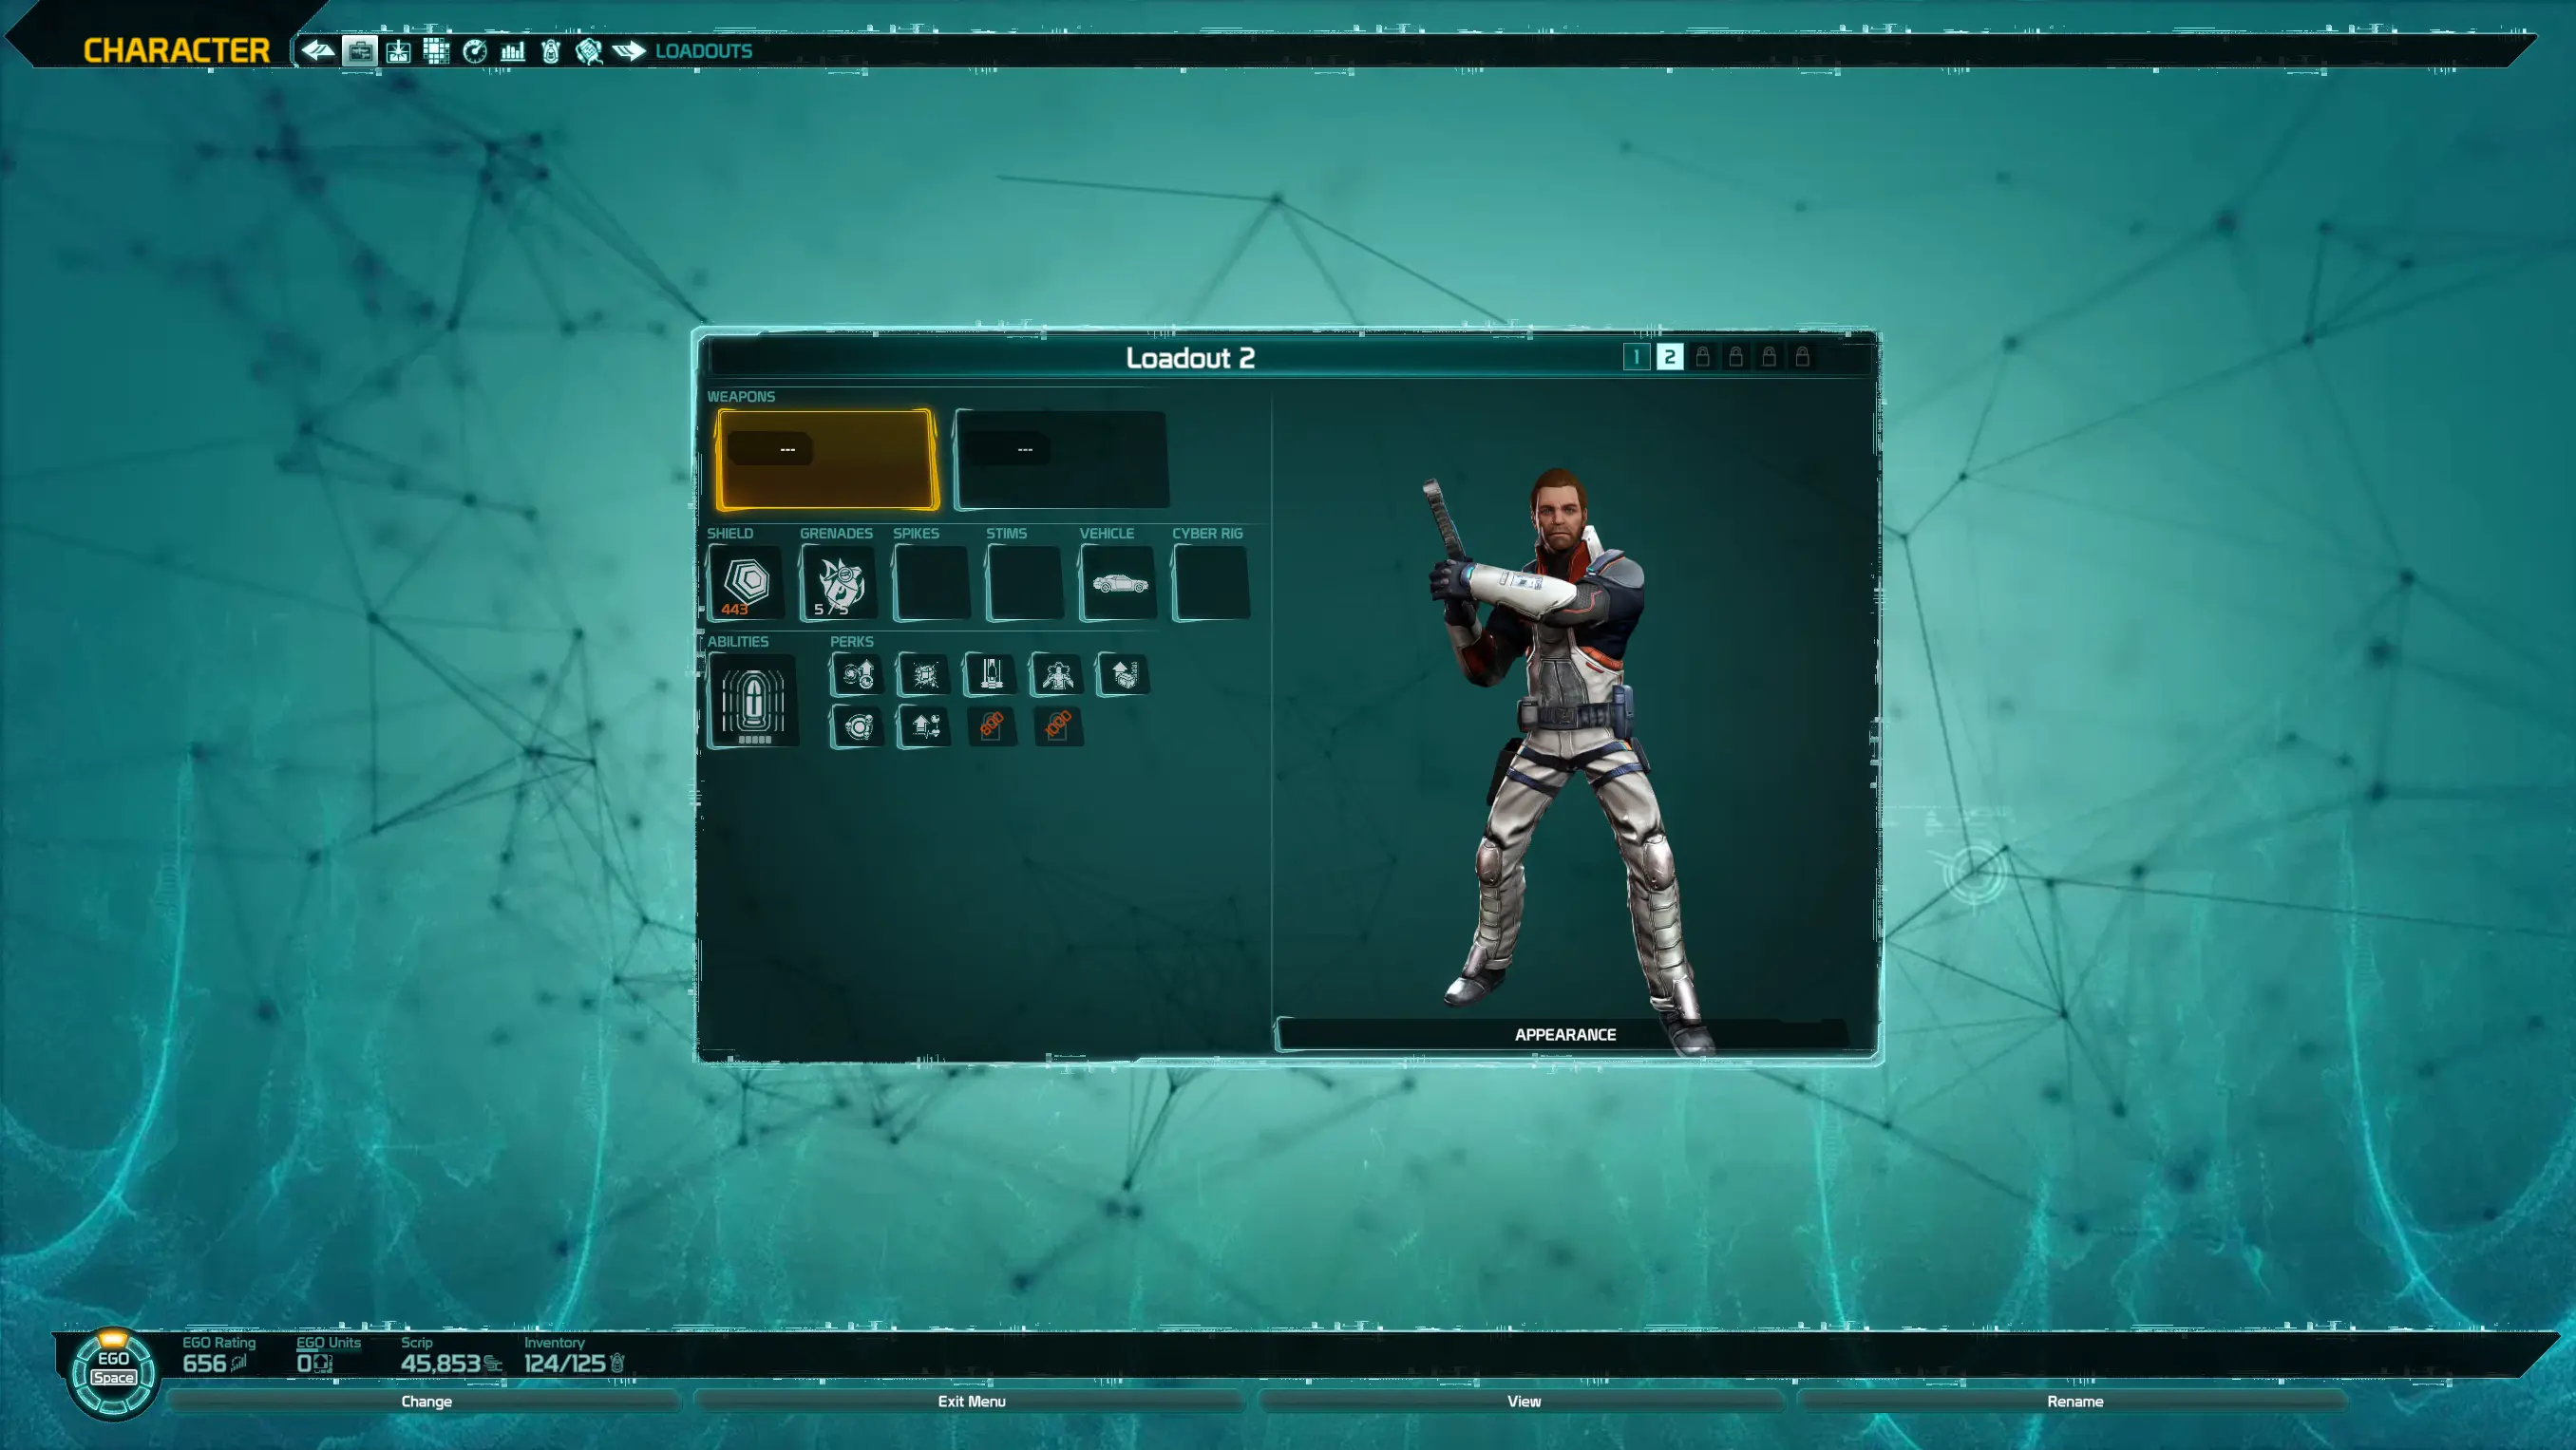
Now that the HUD is set, now you need to prep your PC who is acting as the “camera man” for “shooting.” You’re going to go into you Loadout and you are going to unequip both your primary and secondary weapons. This will force your character to have a basic pistol in their hands (a single shot pistol). The reason for this is because when it comes to other weapons (which include mods for scopes), some have more unique aim sights that might get in the way of the picture you’re taking or the video you’re shooting. This is especially true with sniper rifles. Also, by using the basic pistol, it also removes the risk of specialized weapon features getting in the way, like the target lock-on animations for certain rocket launchers. The smaller aim down sights for the basic pistol makes it easier to remove if you’re doing photos, and is less noticeable if you’re shooting video.
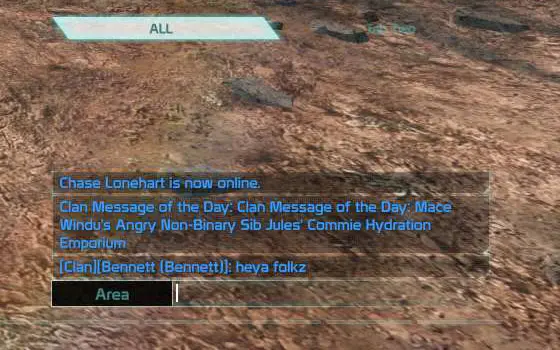
The final step is setting your chat box to TAB TWO. Hit the button to bring up your chat window (which is the Enter key for the PC). The tab that is highlighted is ALL. Select TAB TWO and you should be good to go. The reason for this is that the text for chat will go up into the useable area of the screen if left on ALL. By switching it to TAB TWO, you cut down the risk of having the text show up on the screen if you’re planning on shooting video and plan on Letterboxing it (see later section about Useable Area)
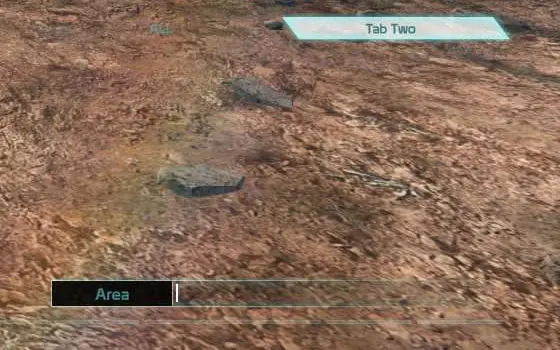
Author’s Note: I’d like to give a shoutout to Bennett for this heads up. Normally, Tab Two is disabled in settings. However, if enabled, text will show up there if you have turned on any text options for that tab under settings. It’s best to make sure that there’s no text showing up before you do any photography or video, as well as checking your settings to make sure TAB TWO is off.
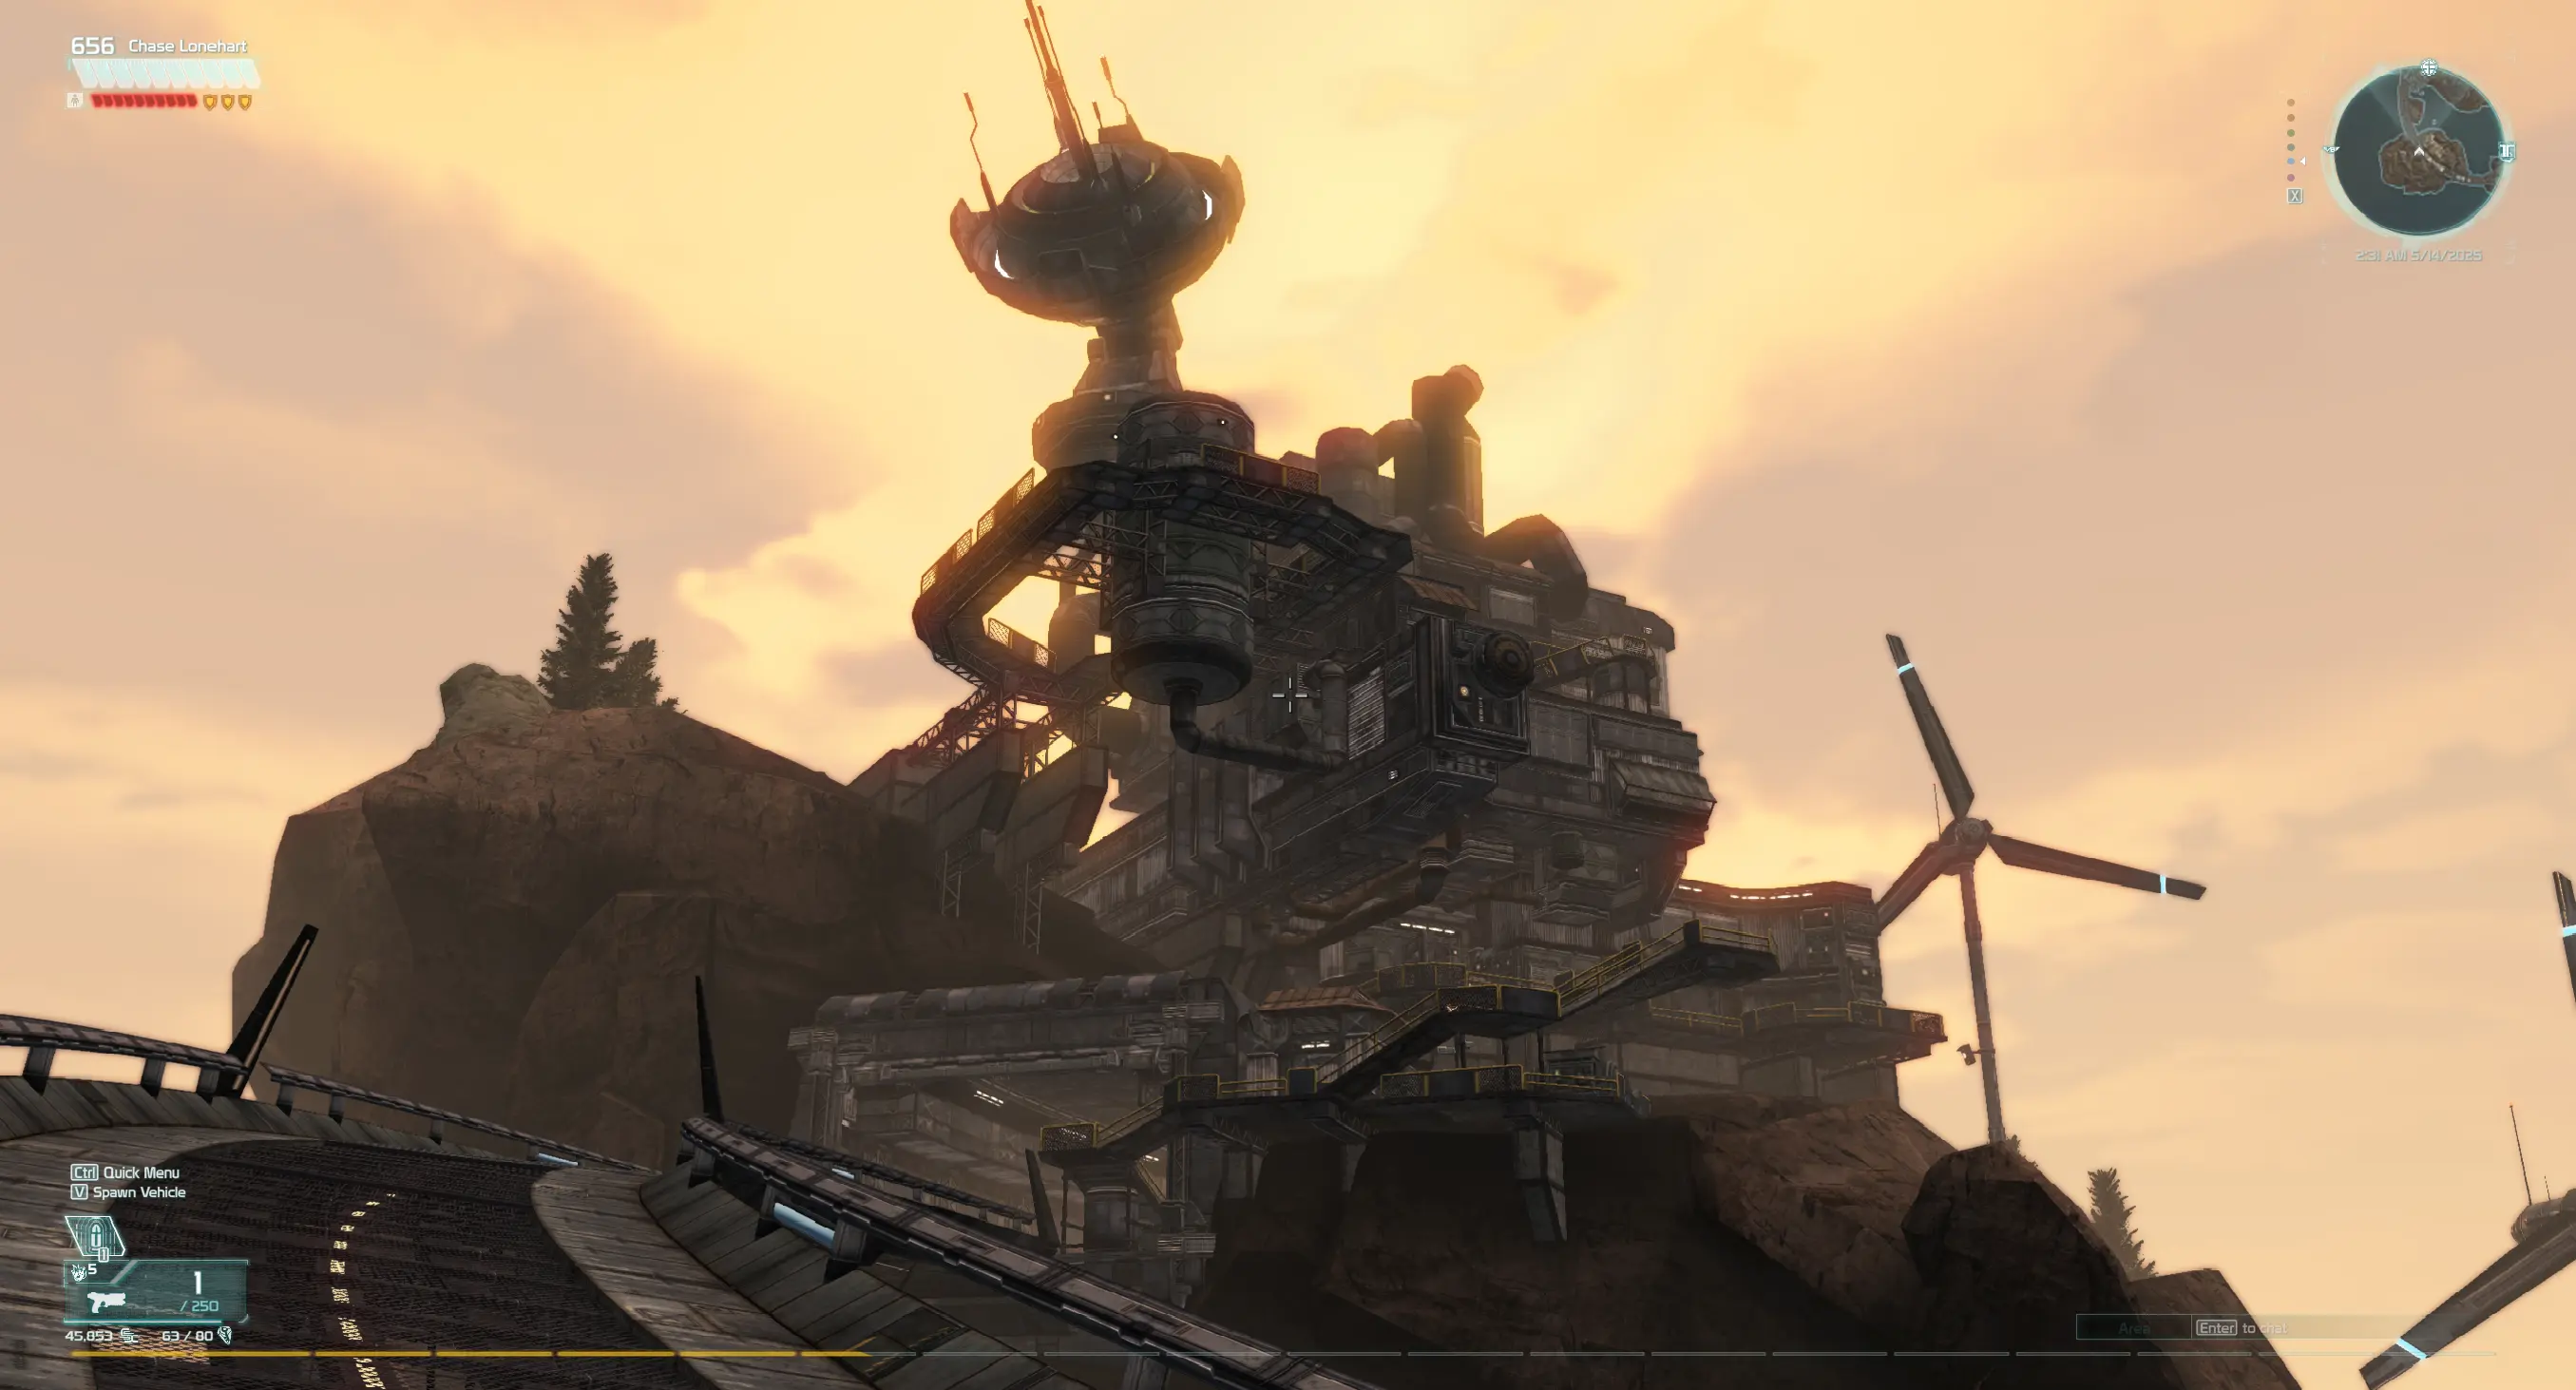
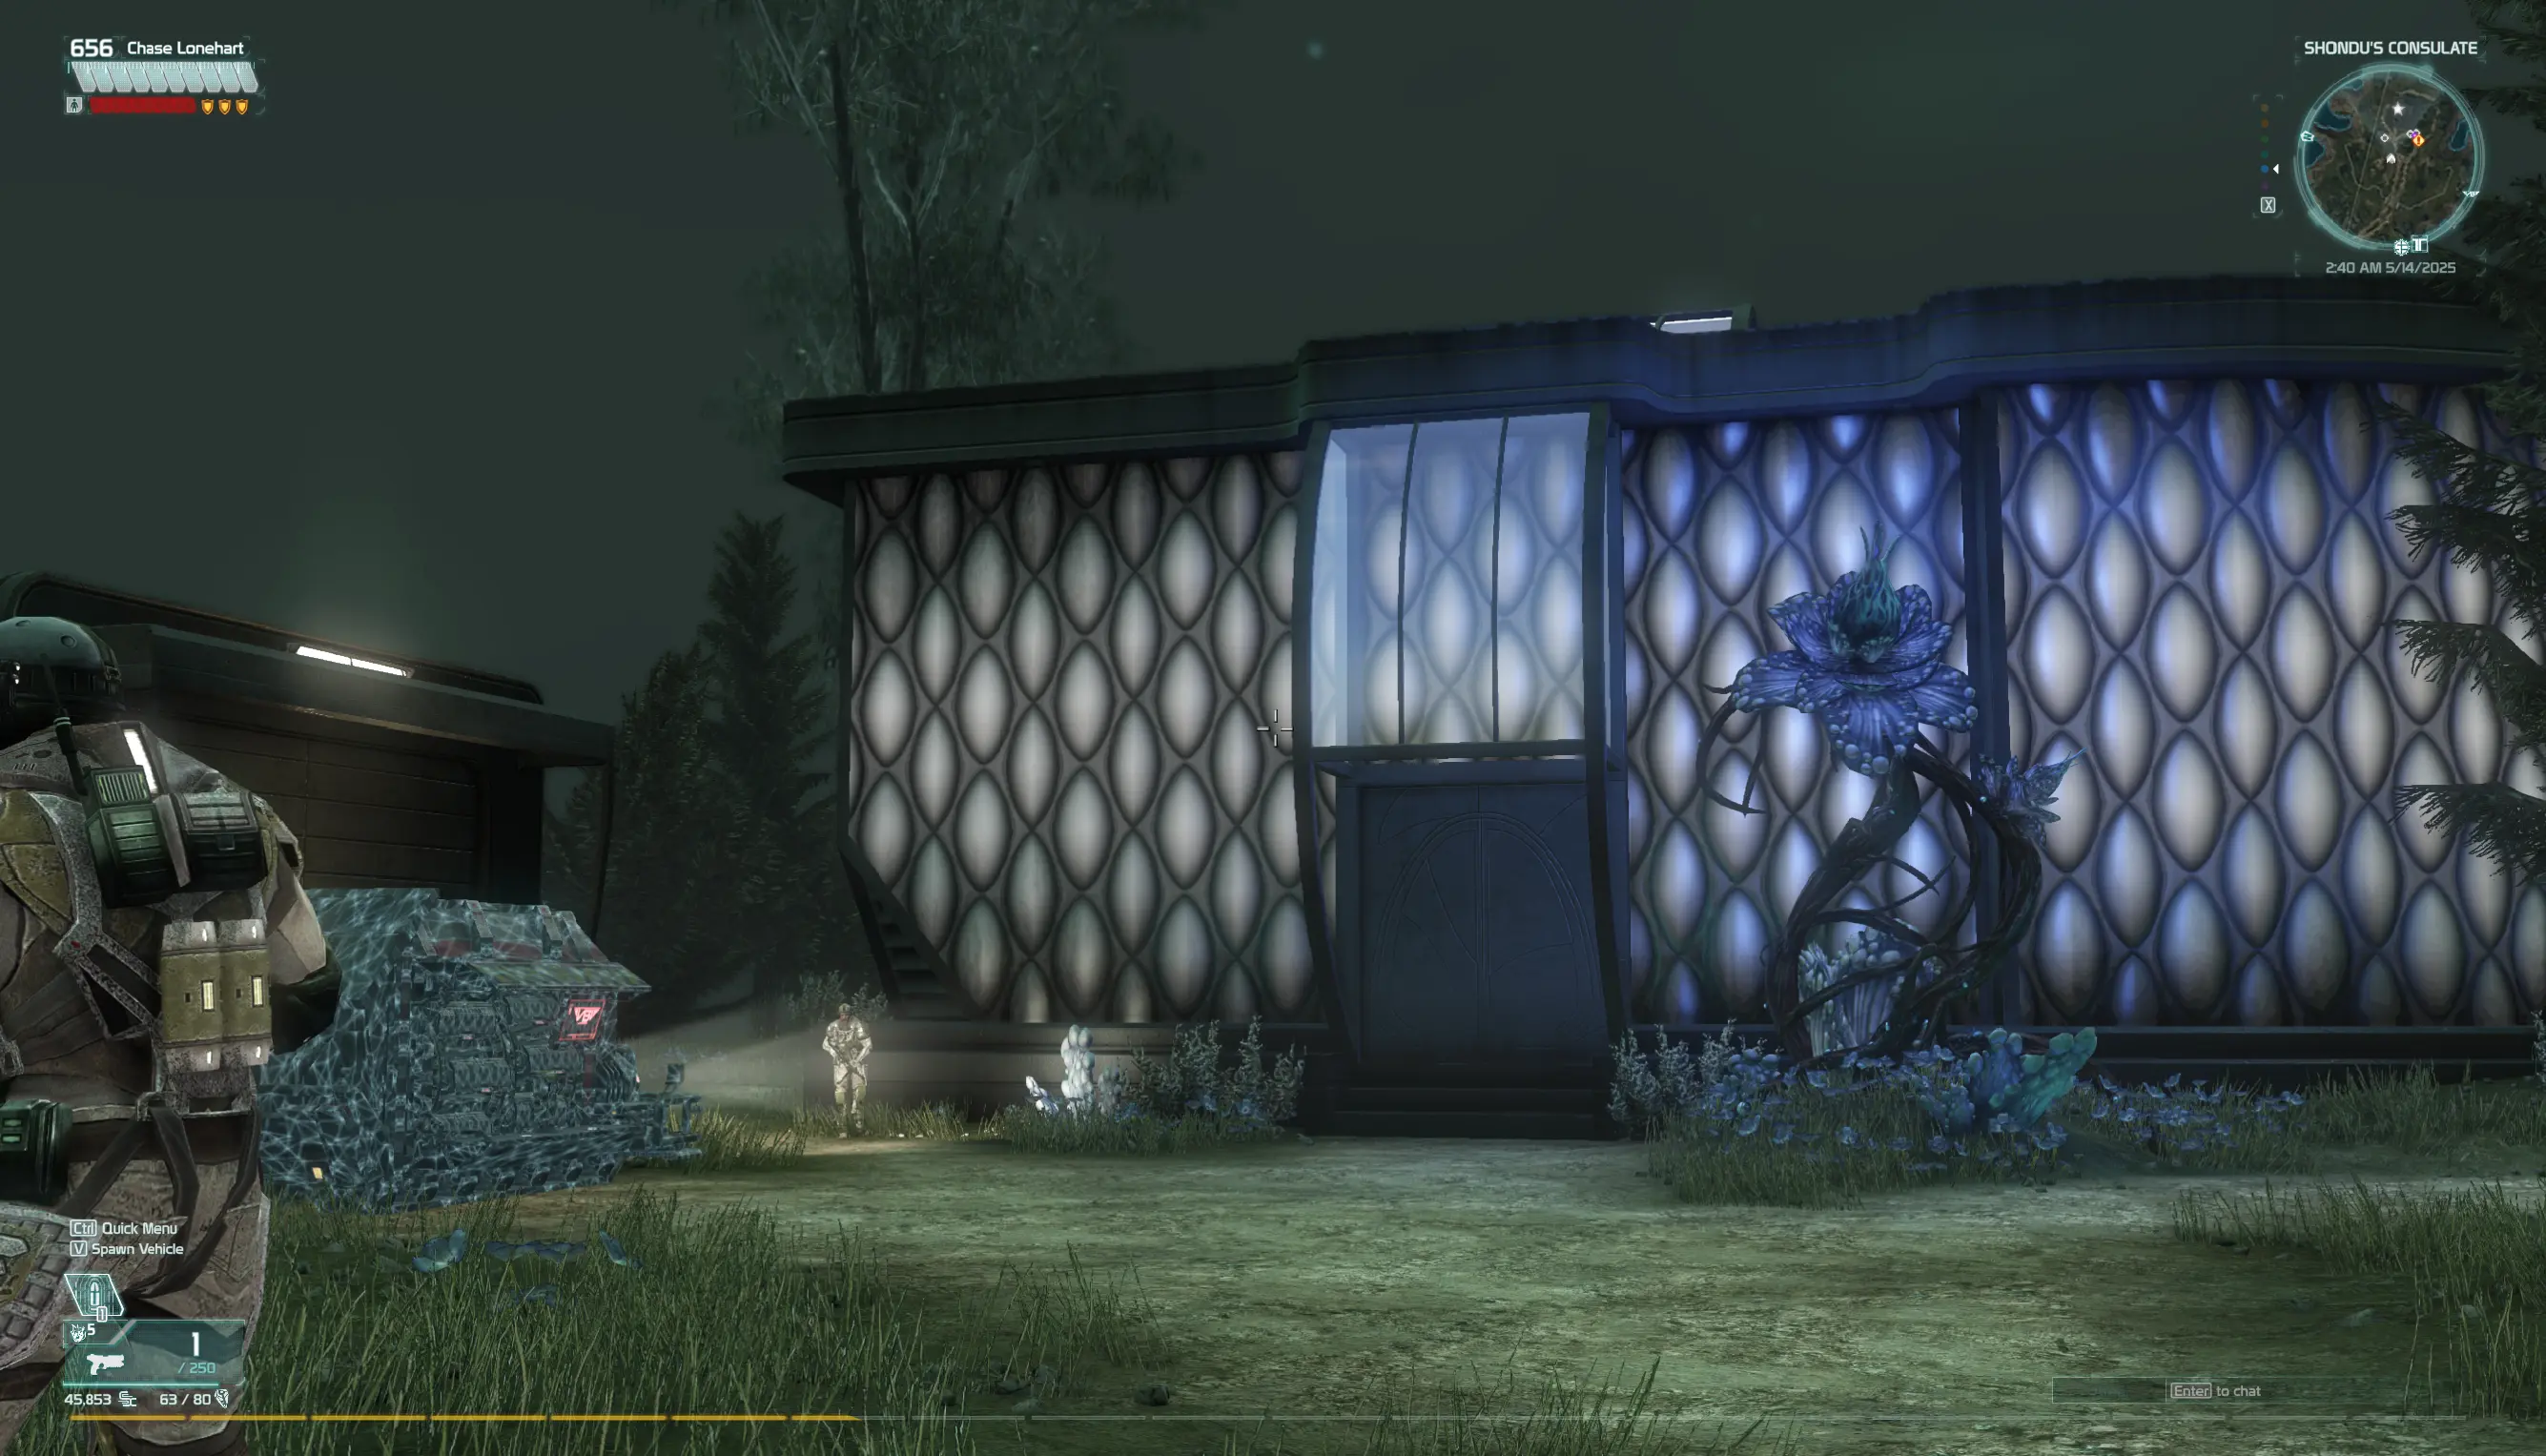
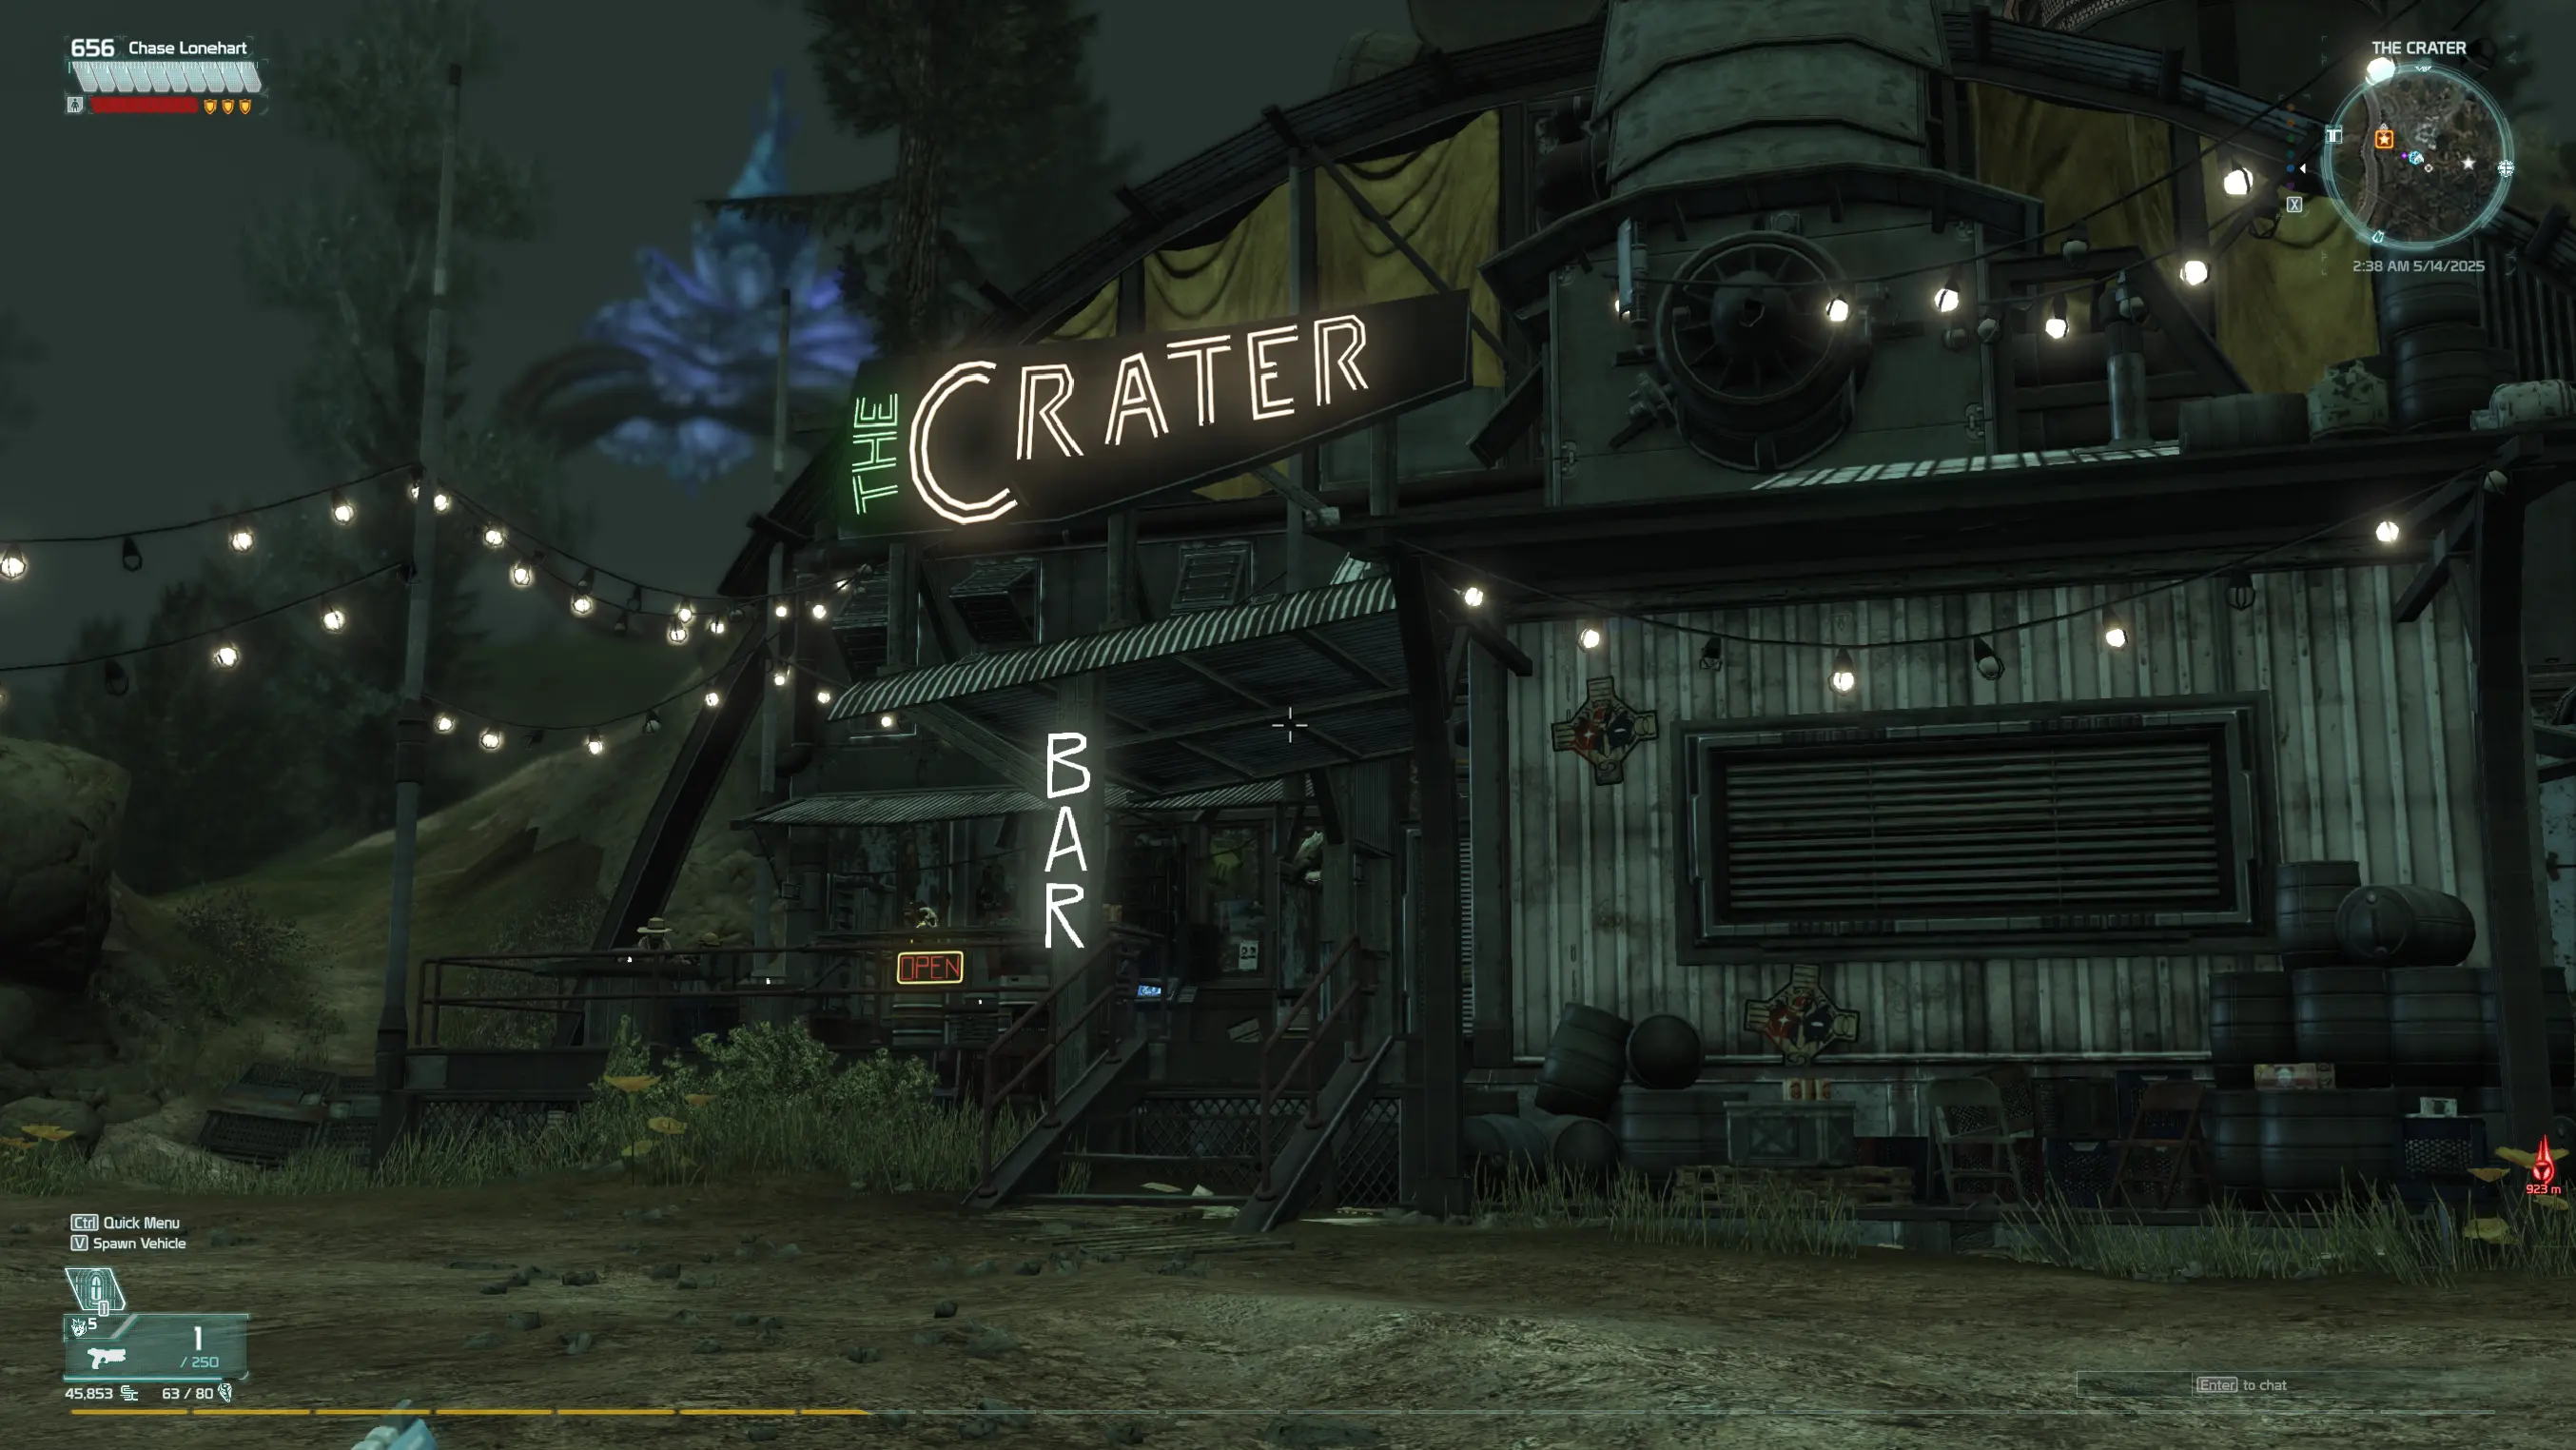
You’re going to go to a location of your choosing. One location has multiple spots that you could probably do this trick on, so it’s best that during your pre-production phase to locate said spots before you do any pictures or video, so you can find the best spots for your picture/video taking. If you see a spot you think might be able to be useful in pulling off this glitch, run over and test it (and make note of the limitations of camera movement if you’re doing the aim down sights option). When you find them, make note, so that it can help with planning your picture taking or video shoot. I do advise locations where enemy NPCs don’t spawn but players do, such as the examples below. However you can also do pictures in the country and areas where enemy NPCs do spawn, but keep in mind you risk not having many areas to perform the glitch and you also risk having your PC who is acting as your camera man being knocked down (though you can get somewhat away with it with Arkfalls or Incursions, the risk of your PC camera man getting down is still as likely).
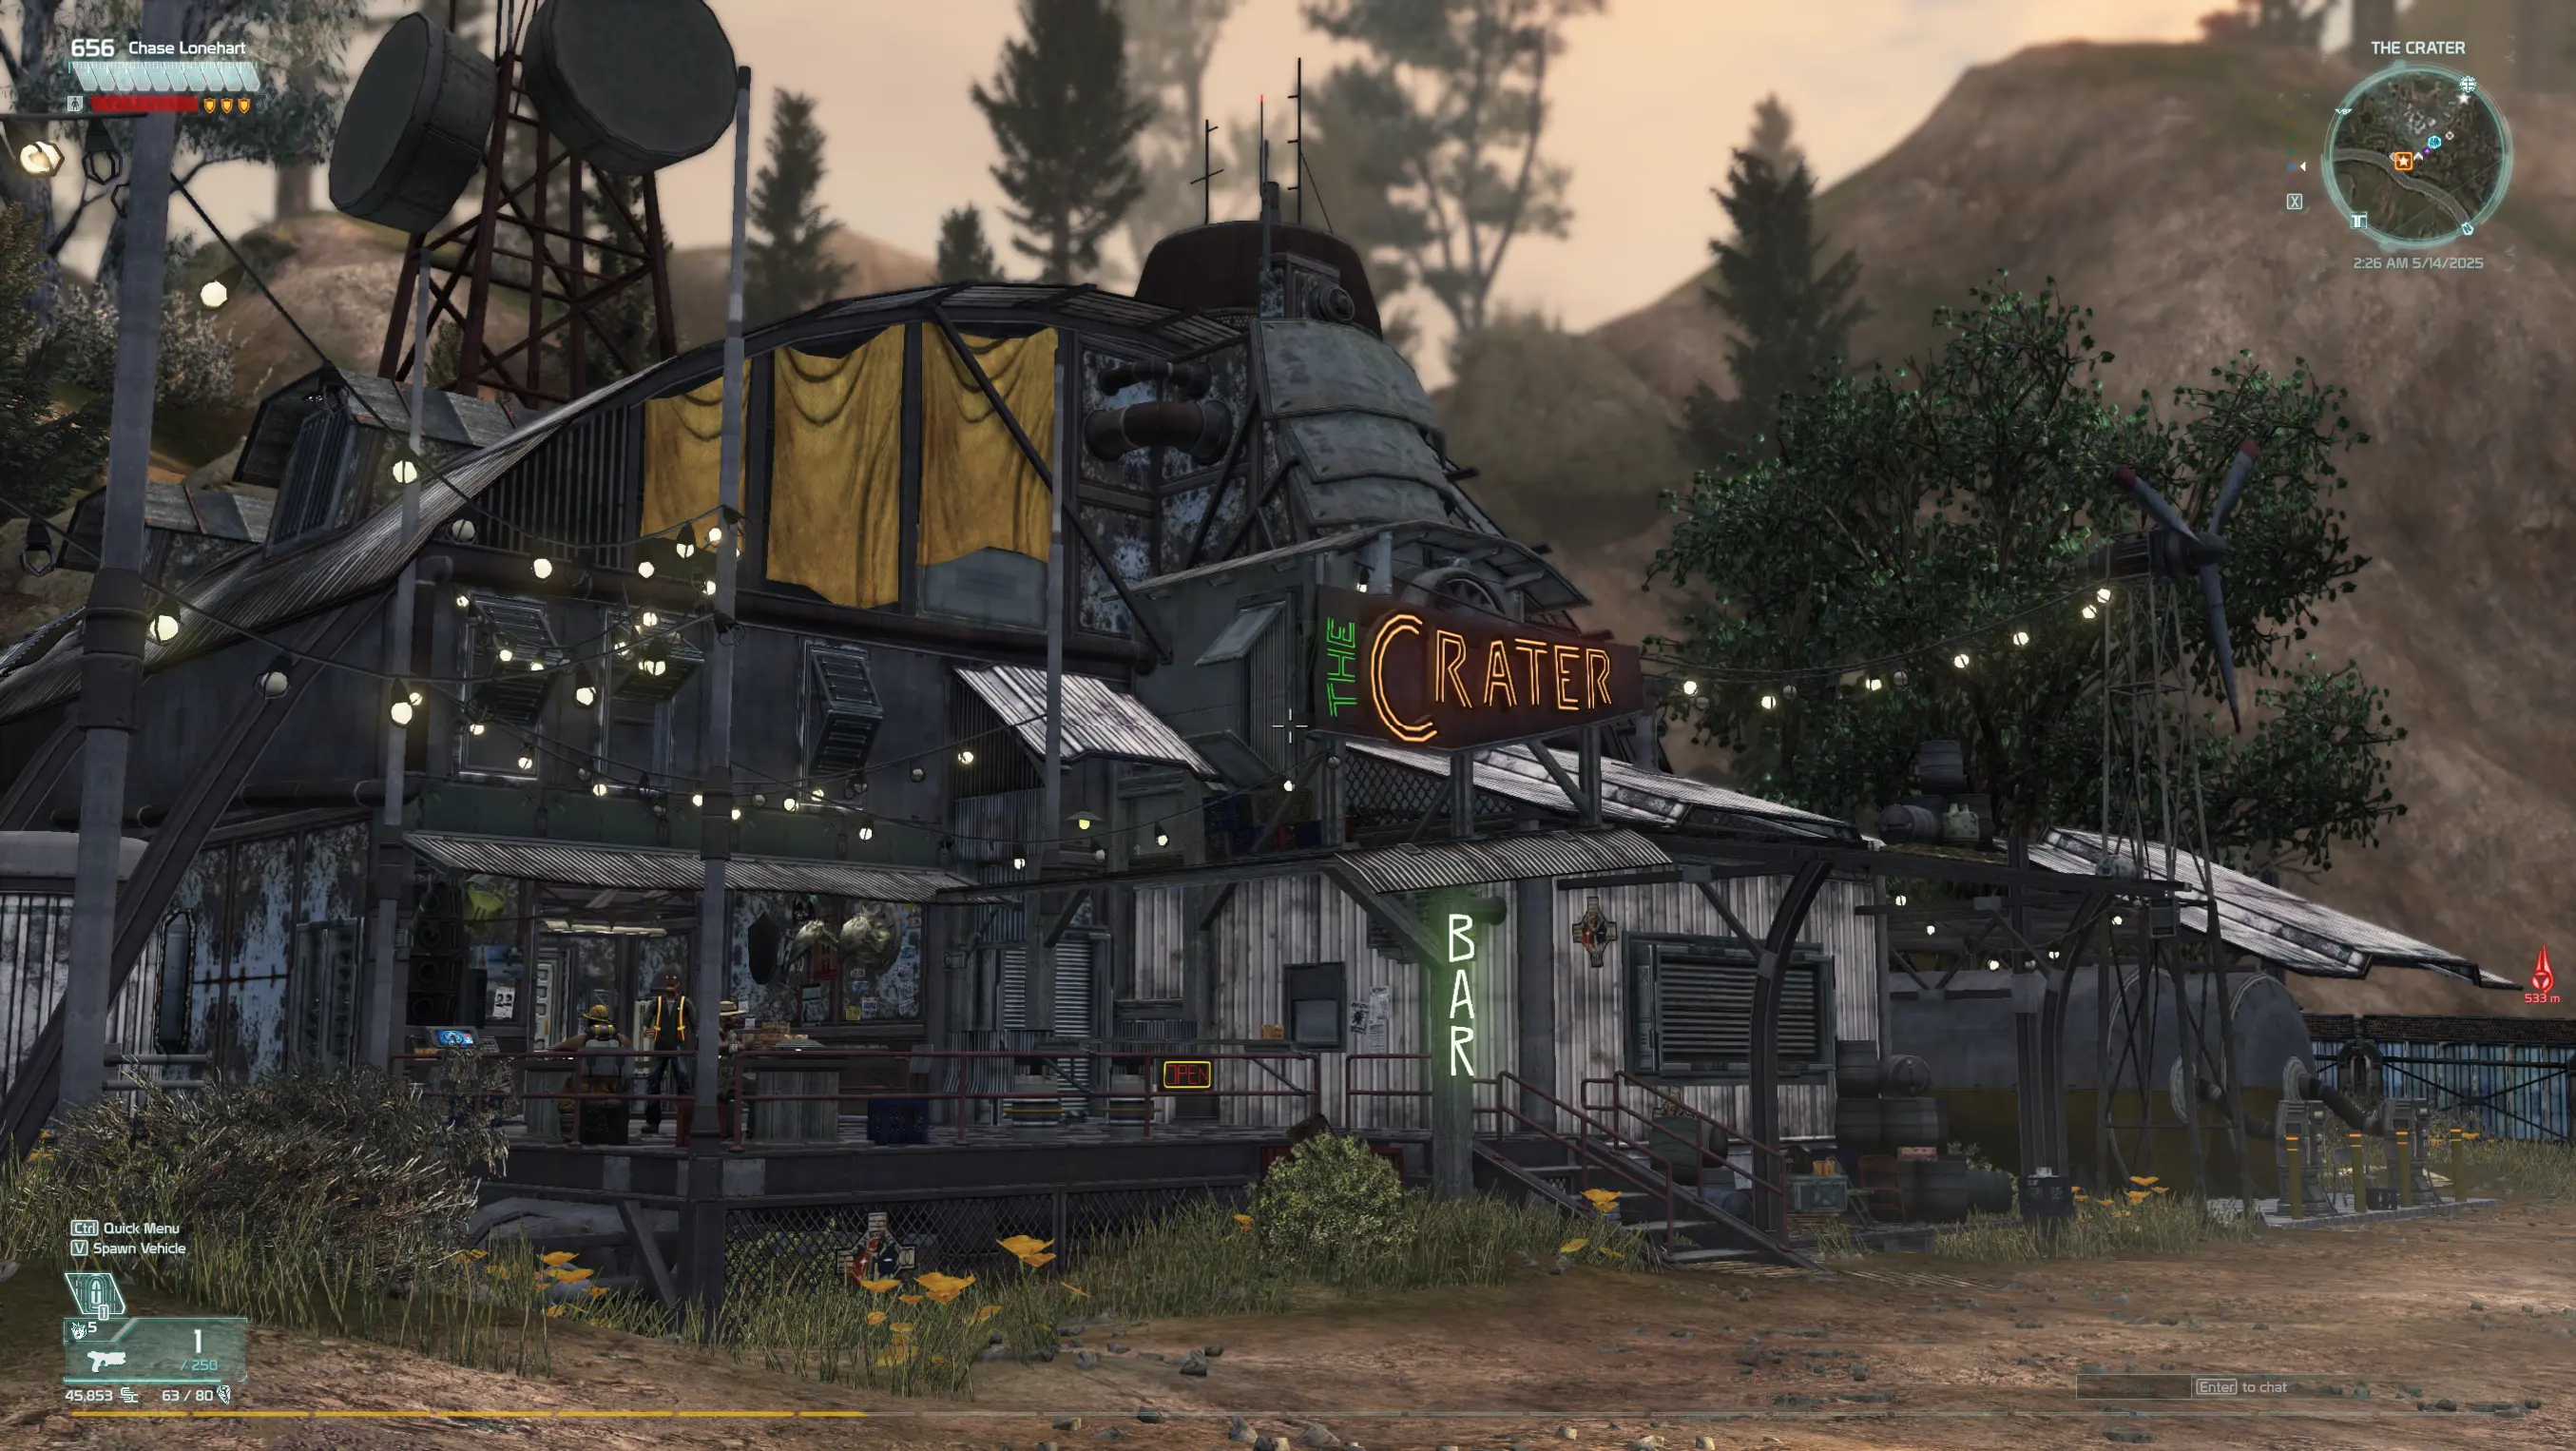
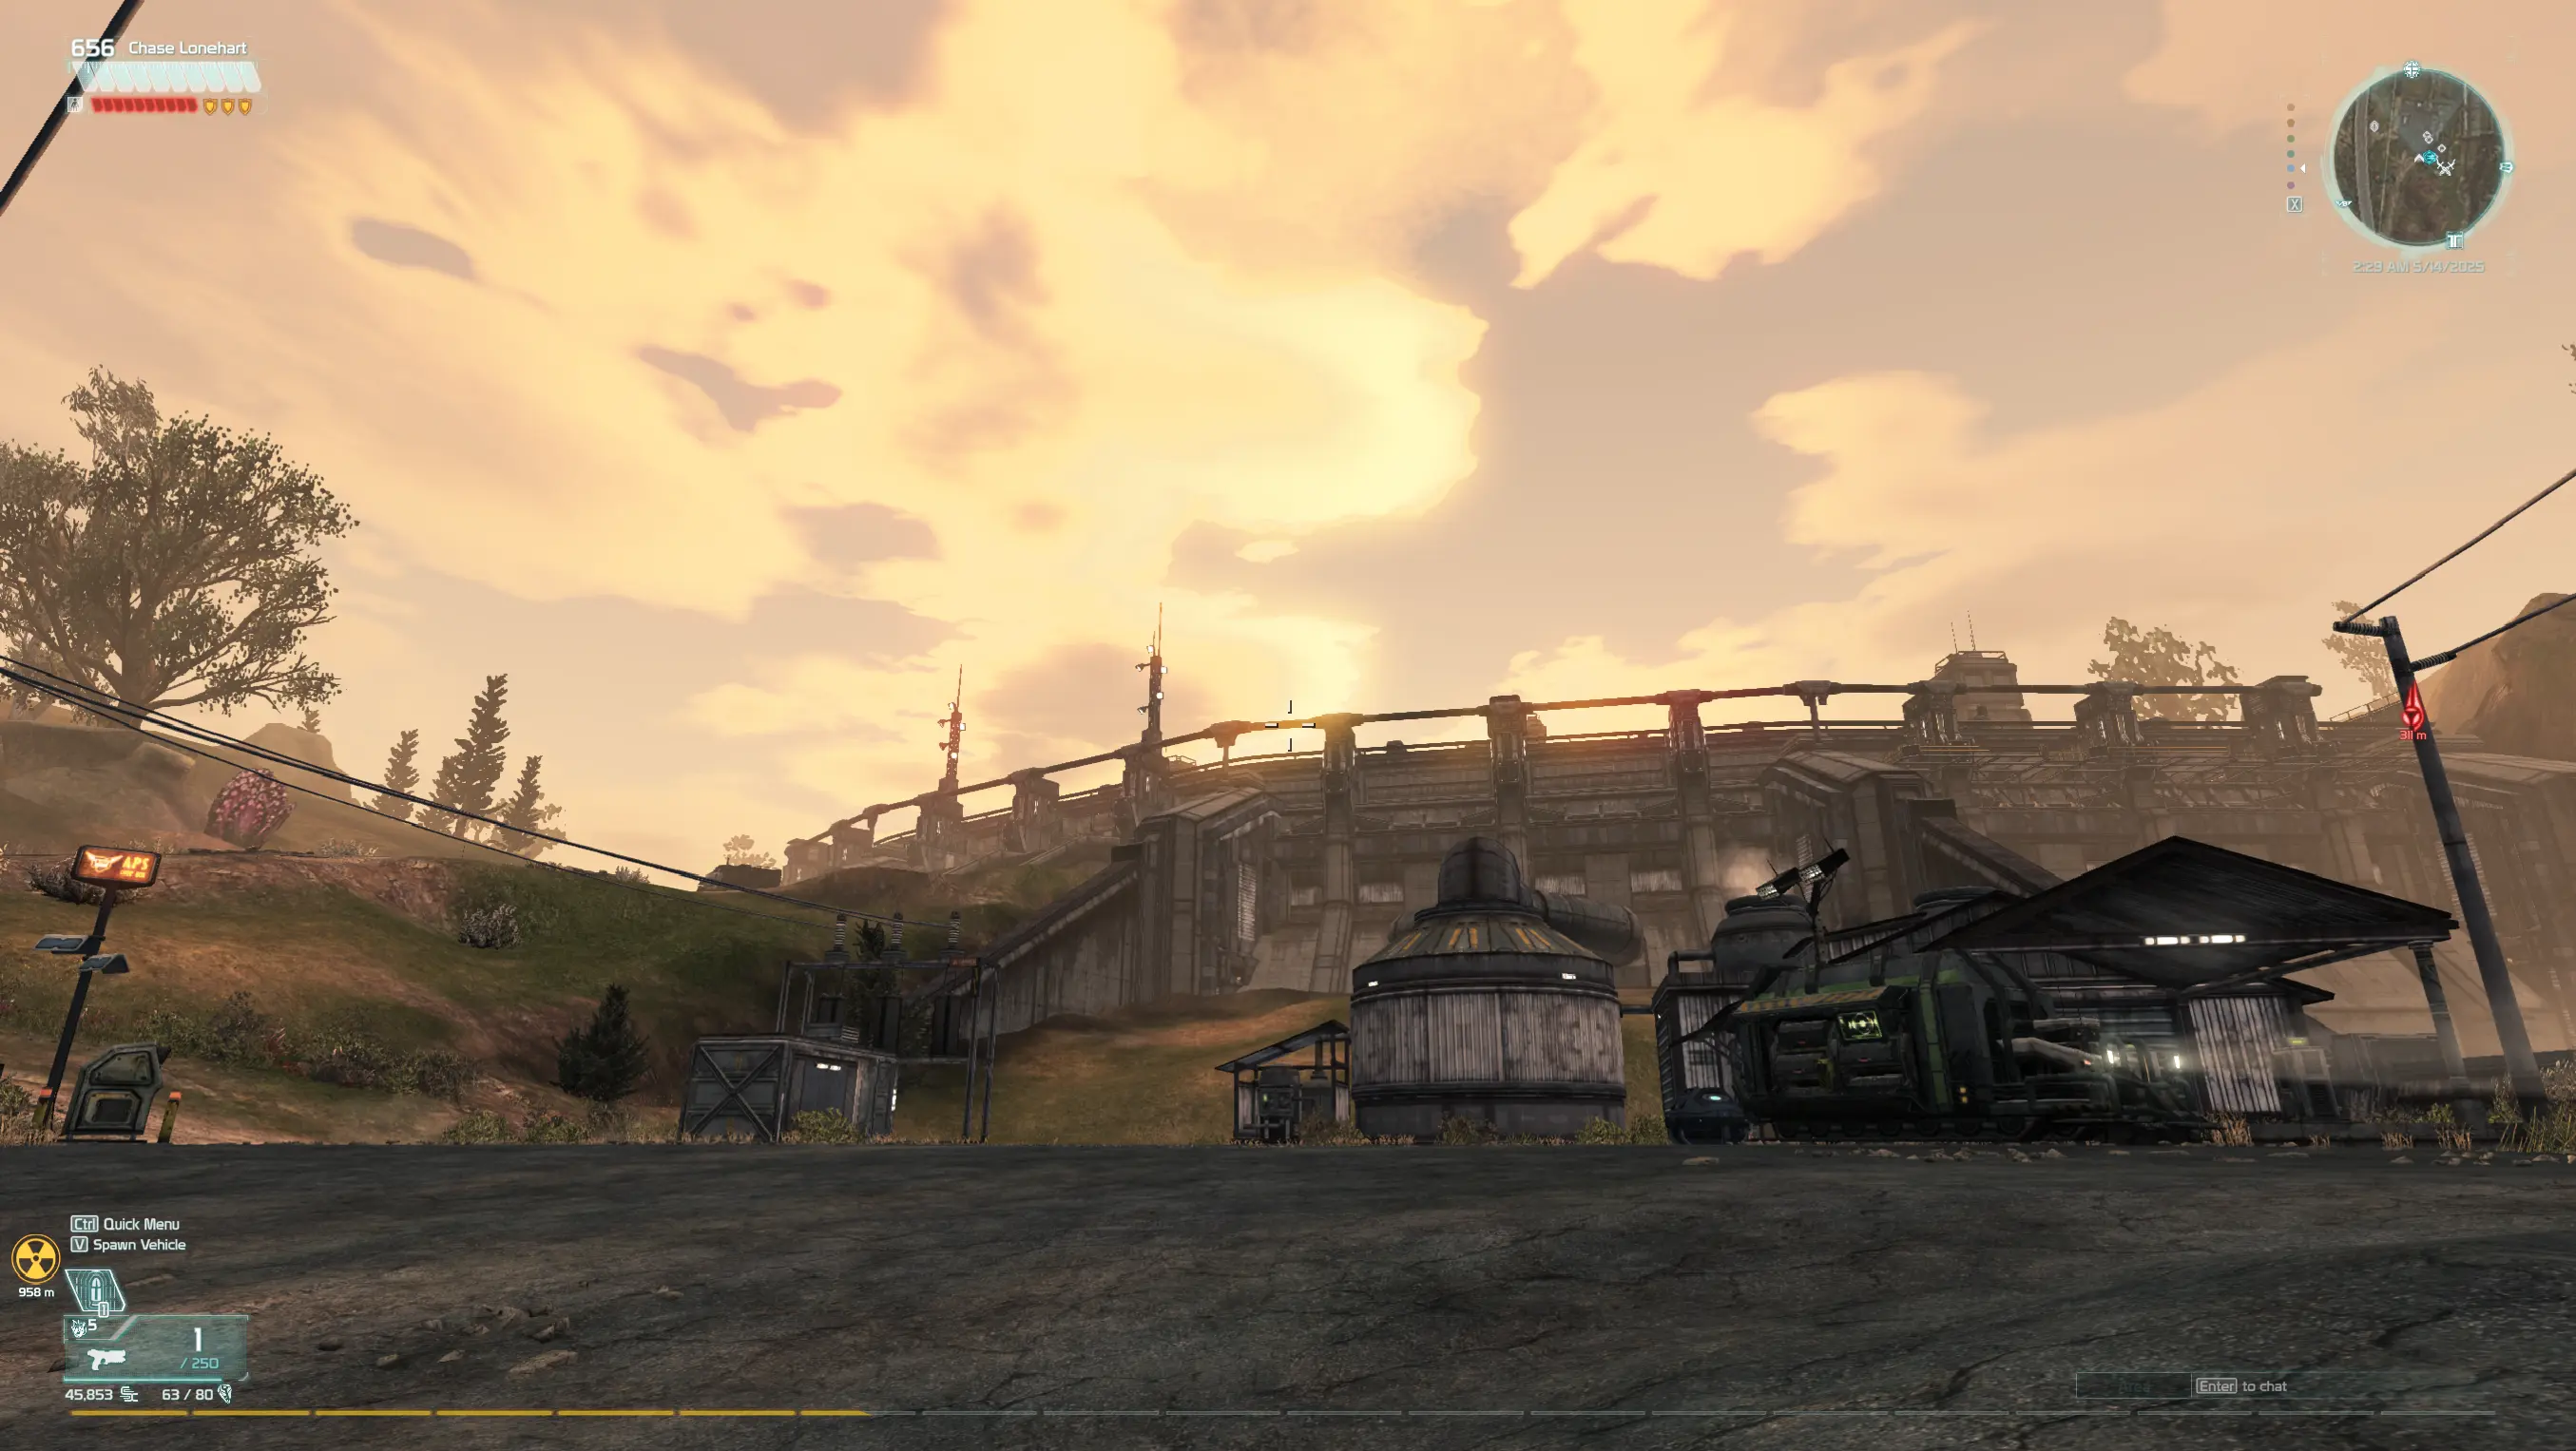
Now, you’re all set.
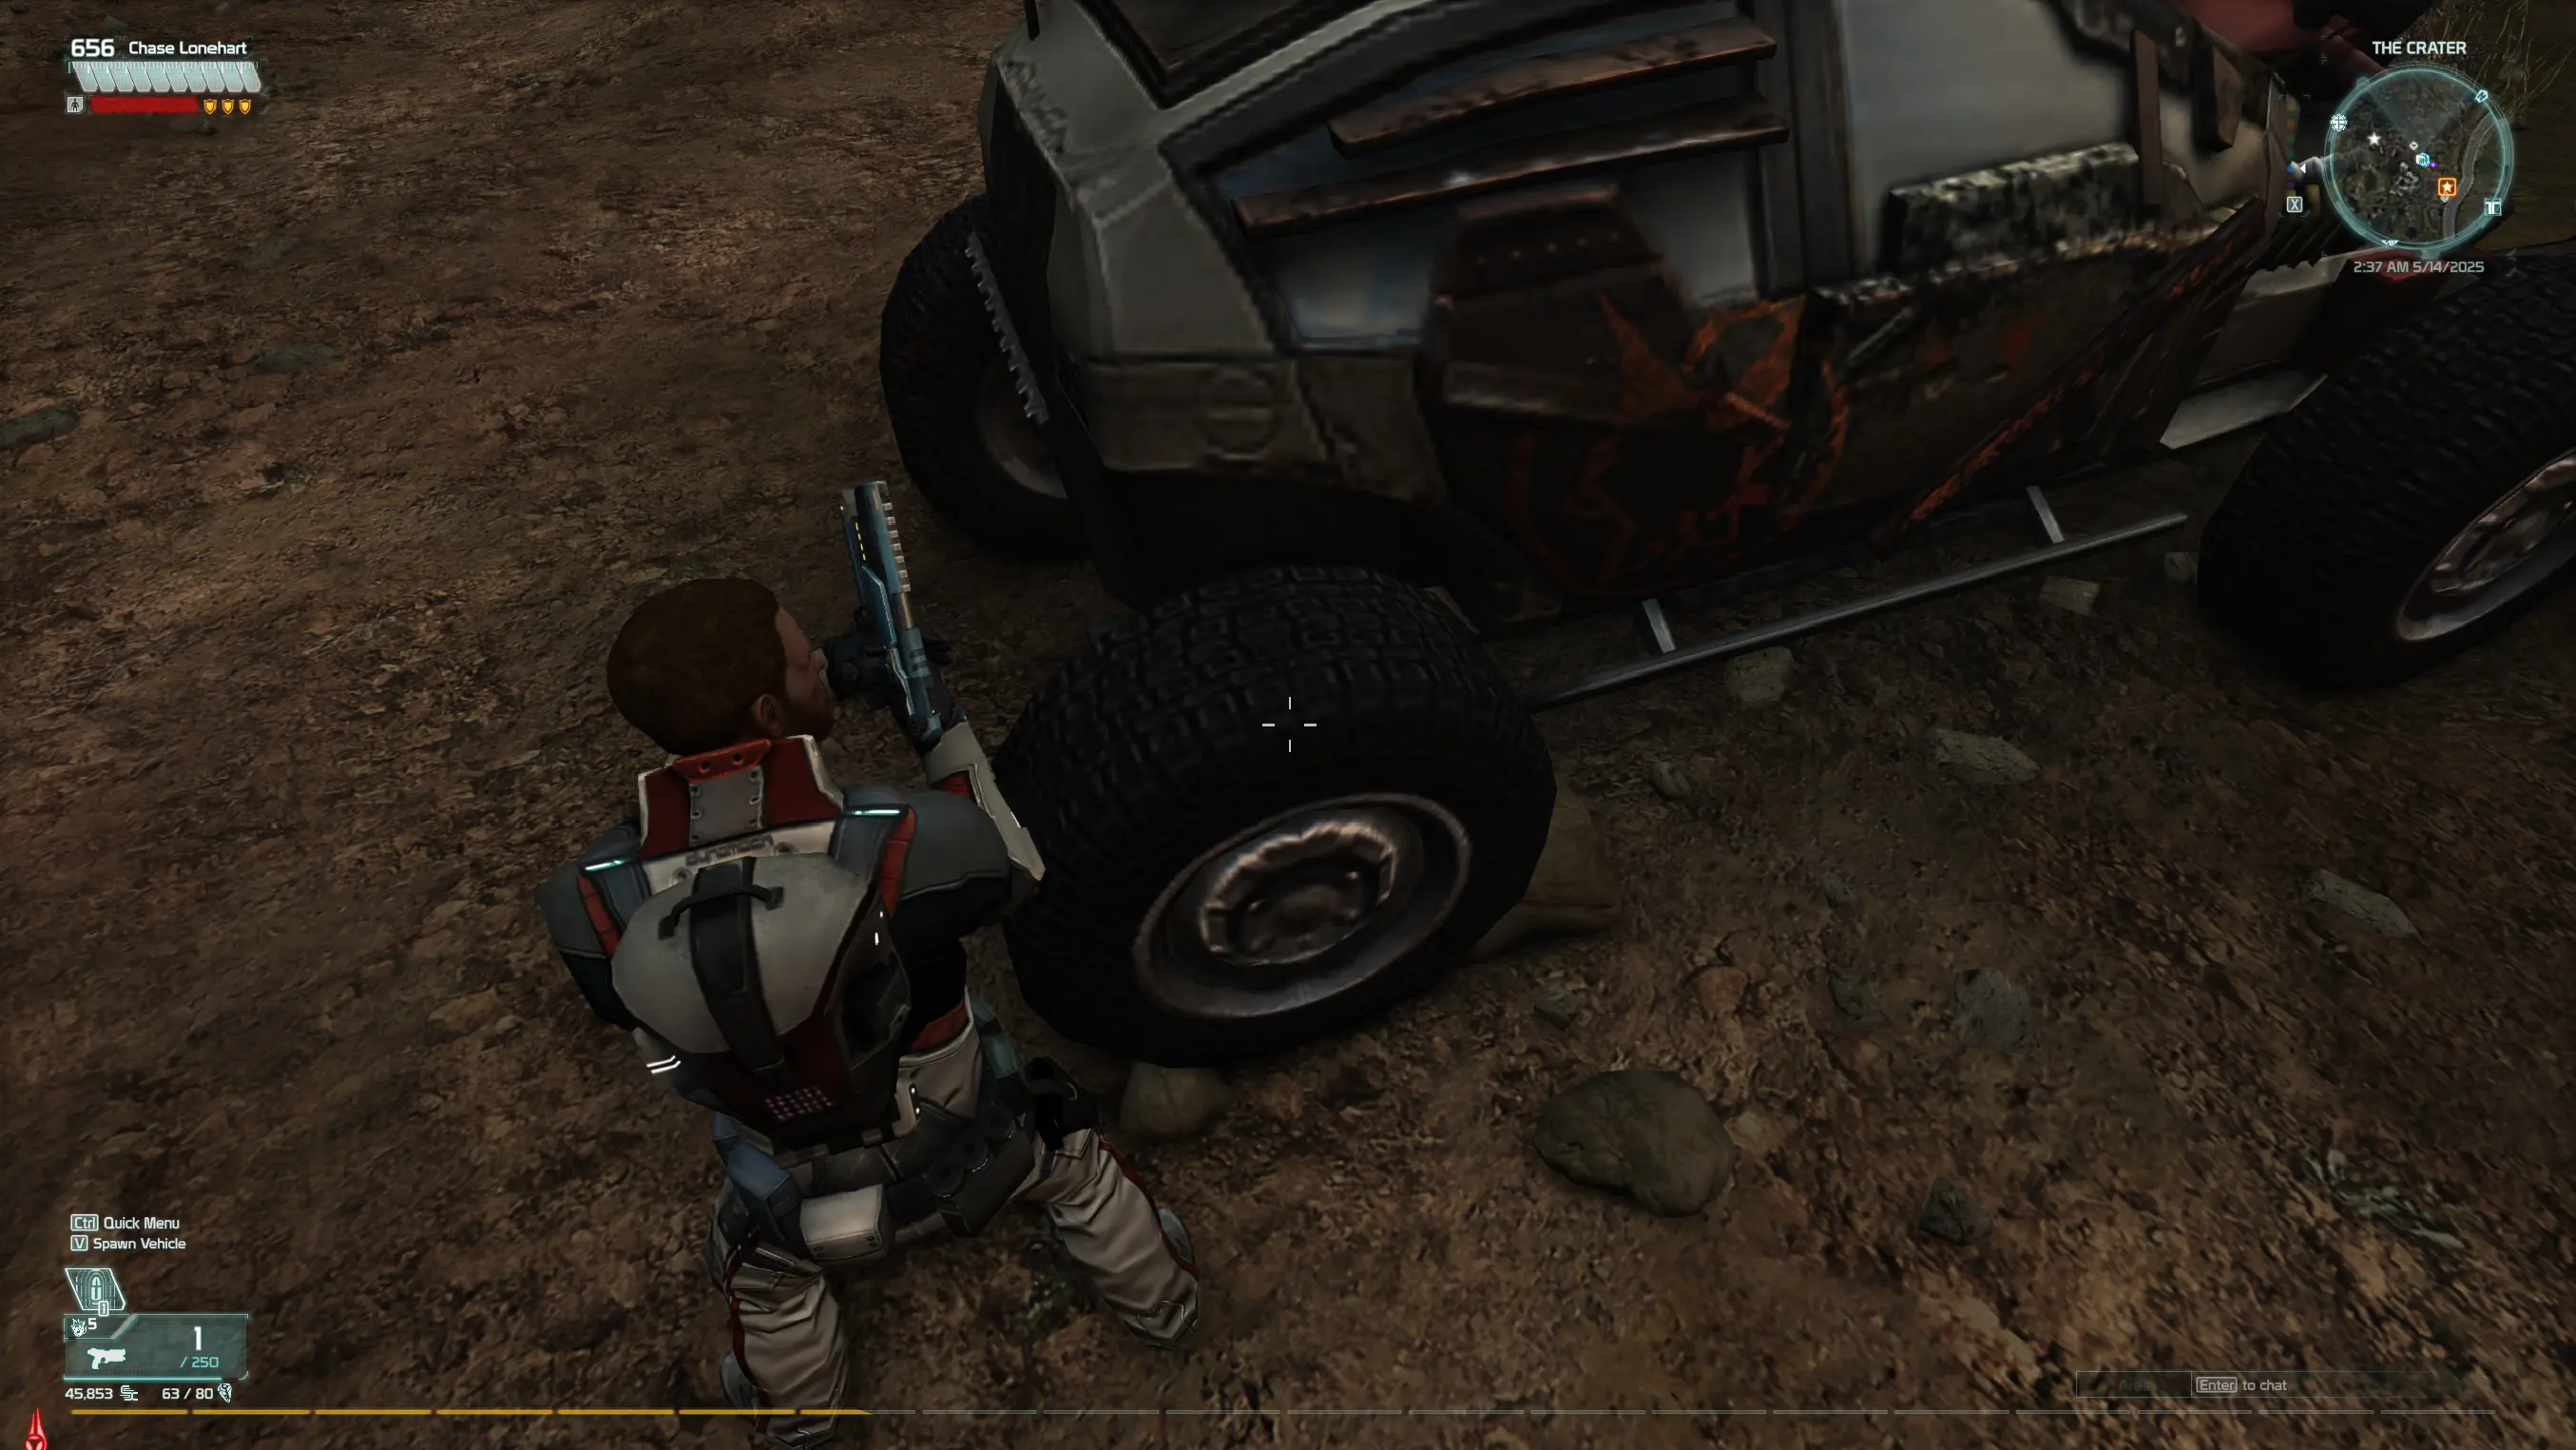
Step 1: Find a spot, then turn around so you’re back is up against an item (for example, the car you see in this picture). What you are looking for is the camera being pushed closer to the player character in coparison to before. If the camera isn’t closer to the PC acting as your camera man, don’t worry. Somes the camera may not move forward. Sometimes, if you’re lucky the camera will push forward to where it clips through the PC’s head (if it does or doesn’t, don’t panic). Proceed to the next step.
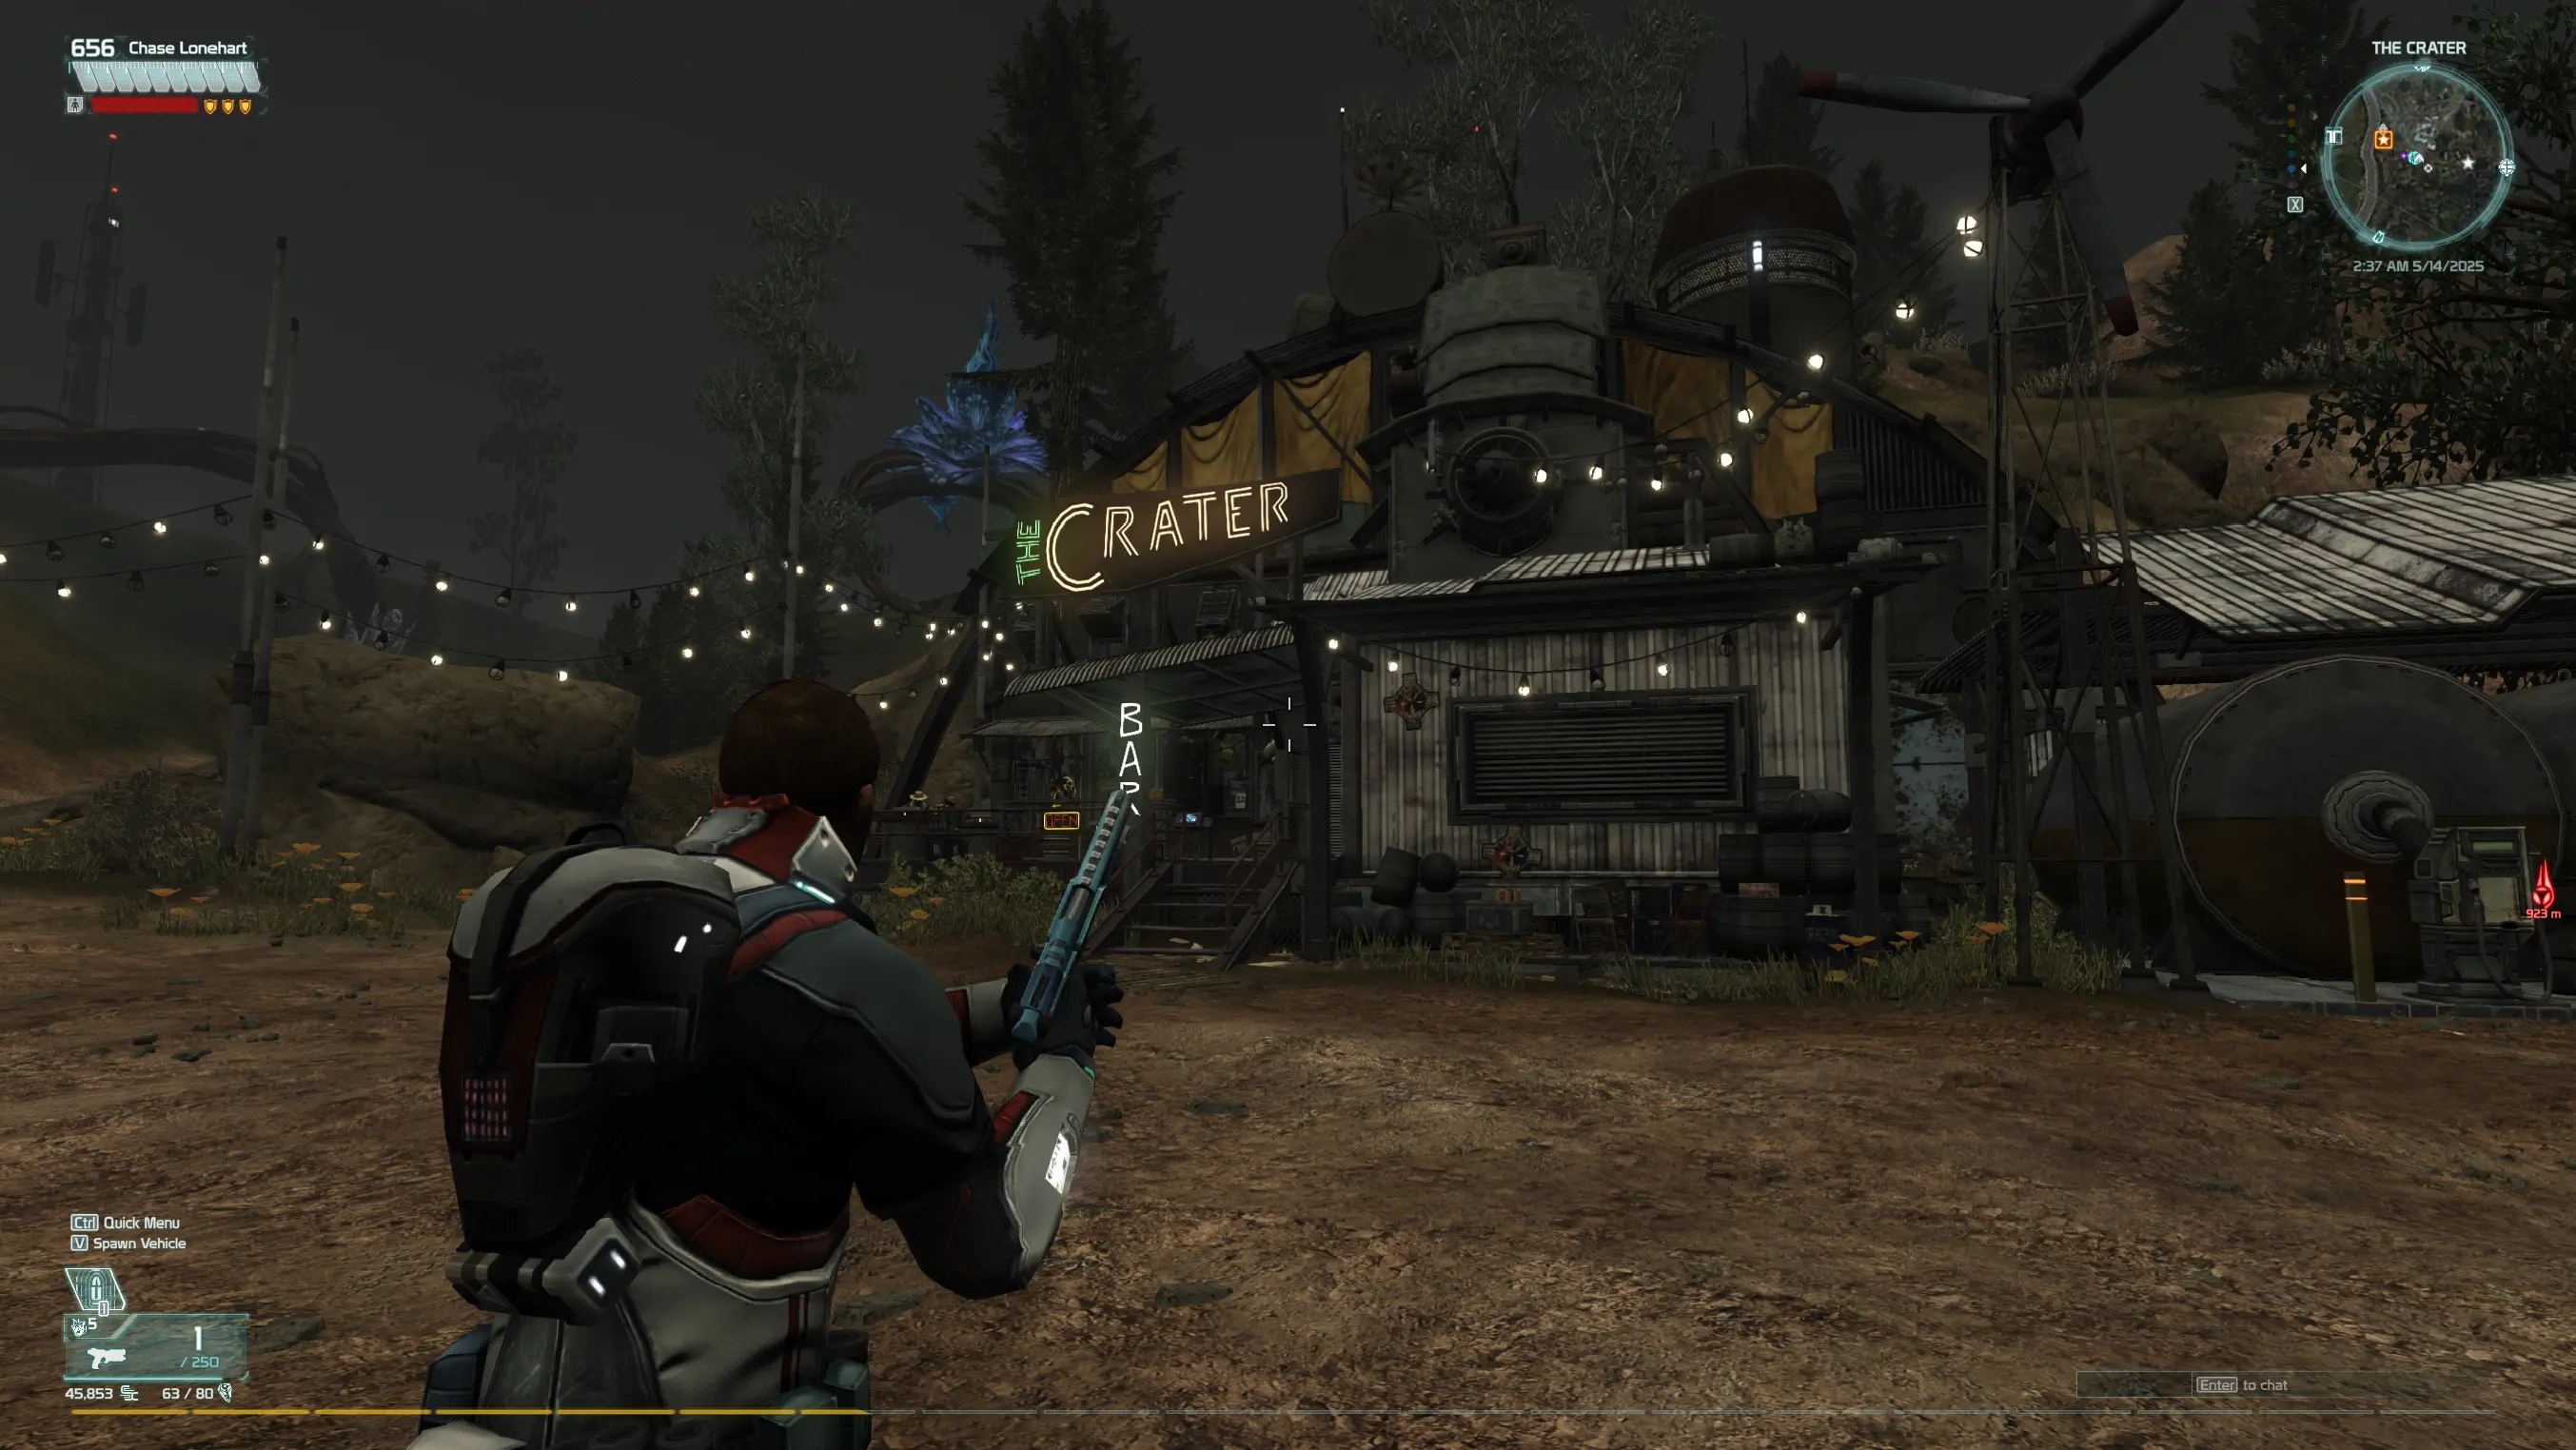
Step 2: Crouch. In some cases, crouching would be enough to force the camera forward and to move the player character out of the way. Sometimes, you might have to do a little bit of crab walking (be it left or right) to move the pistol your PC is using will still be in the left hand corner out of the way. If it doesn’t work completely that way, not to worry. Proceed to the next step.
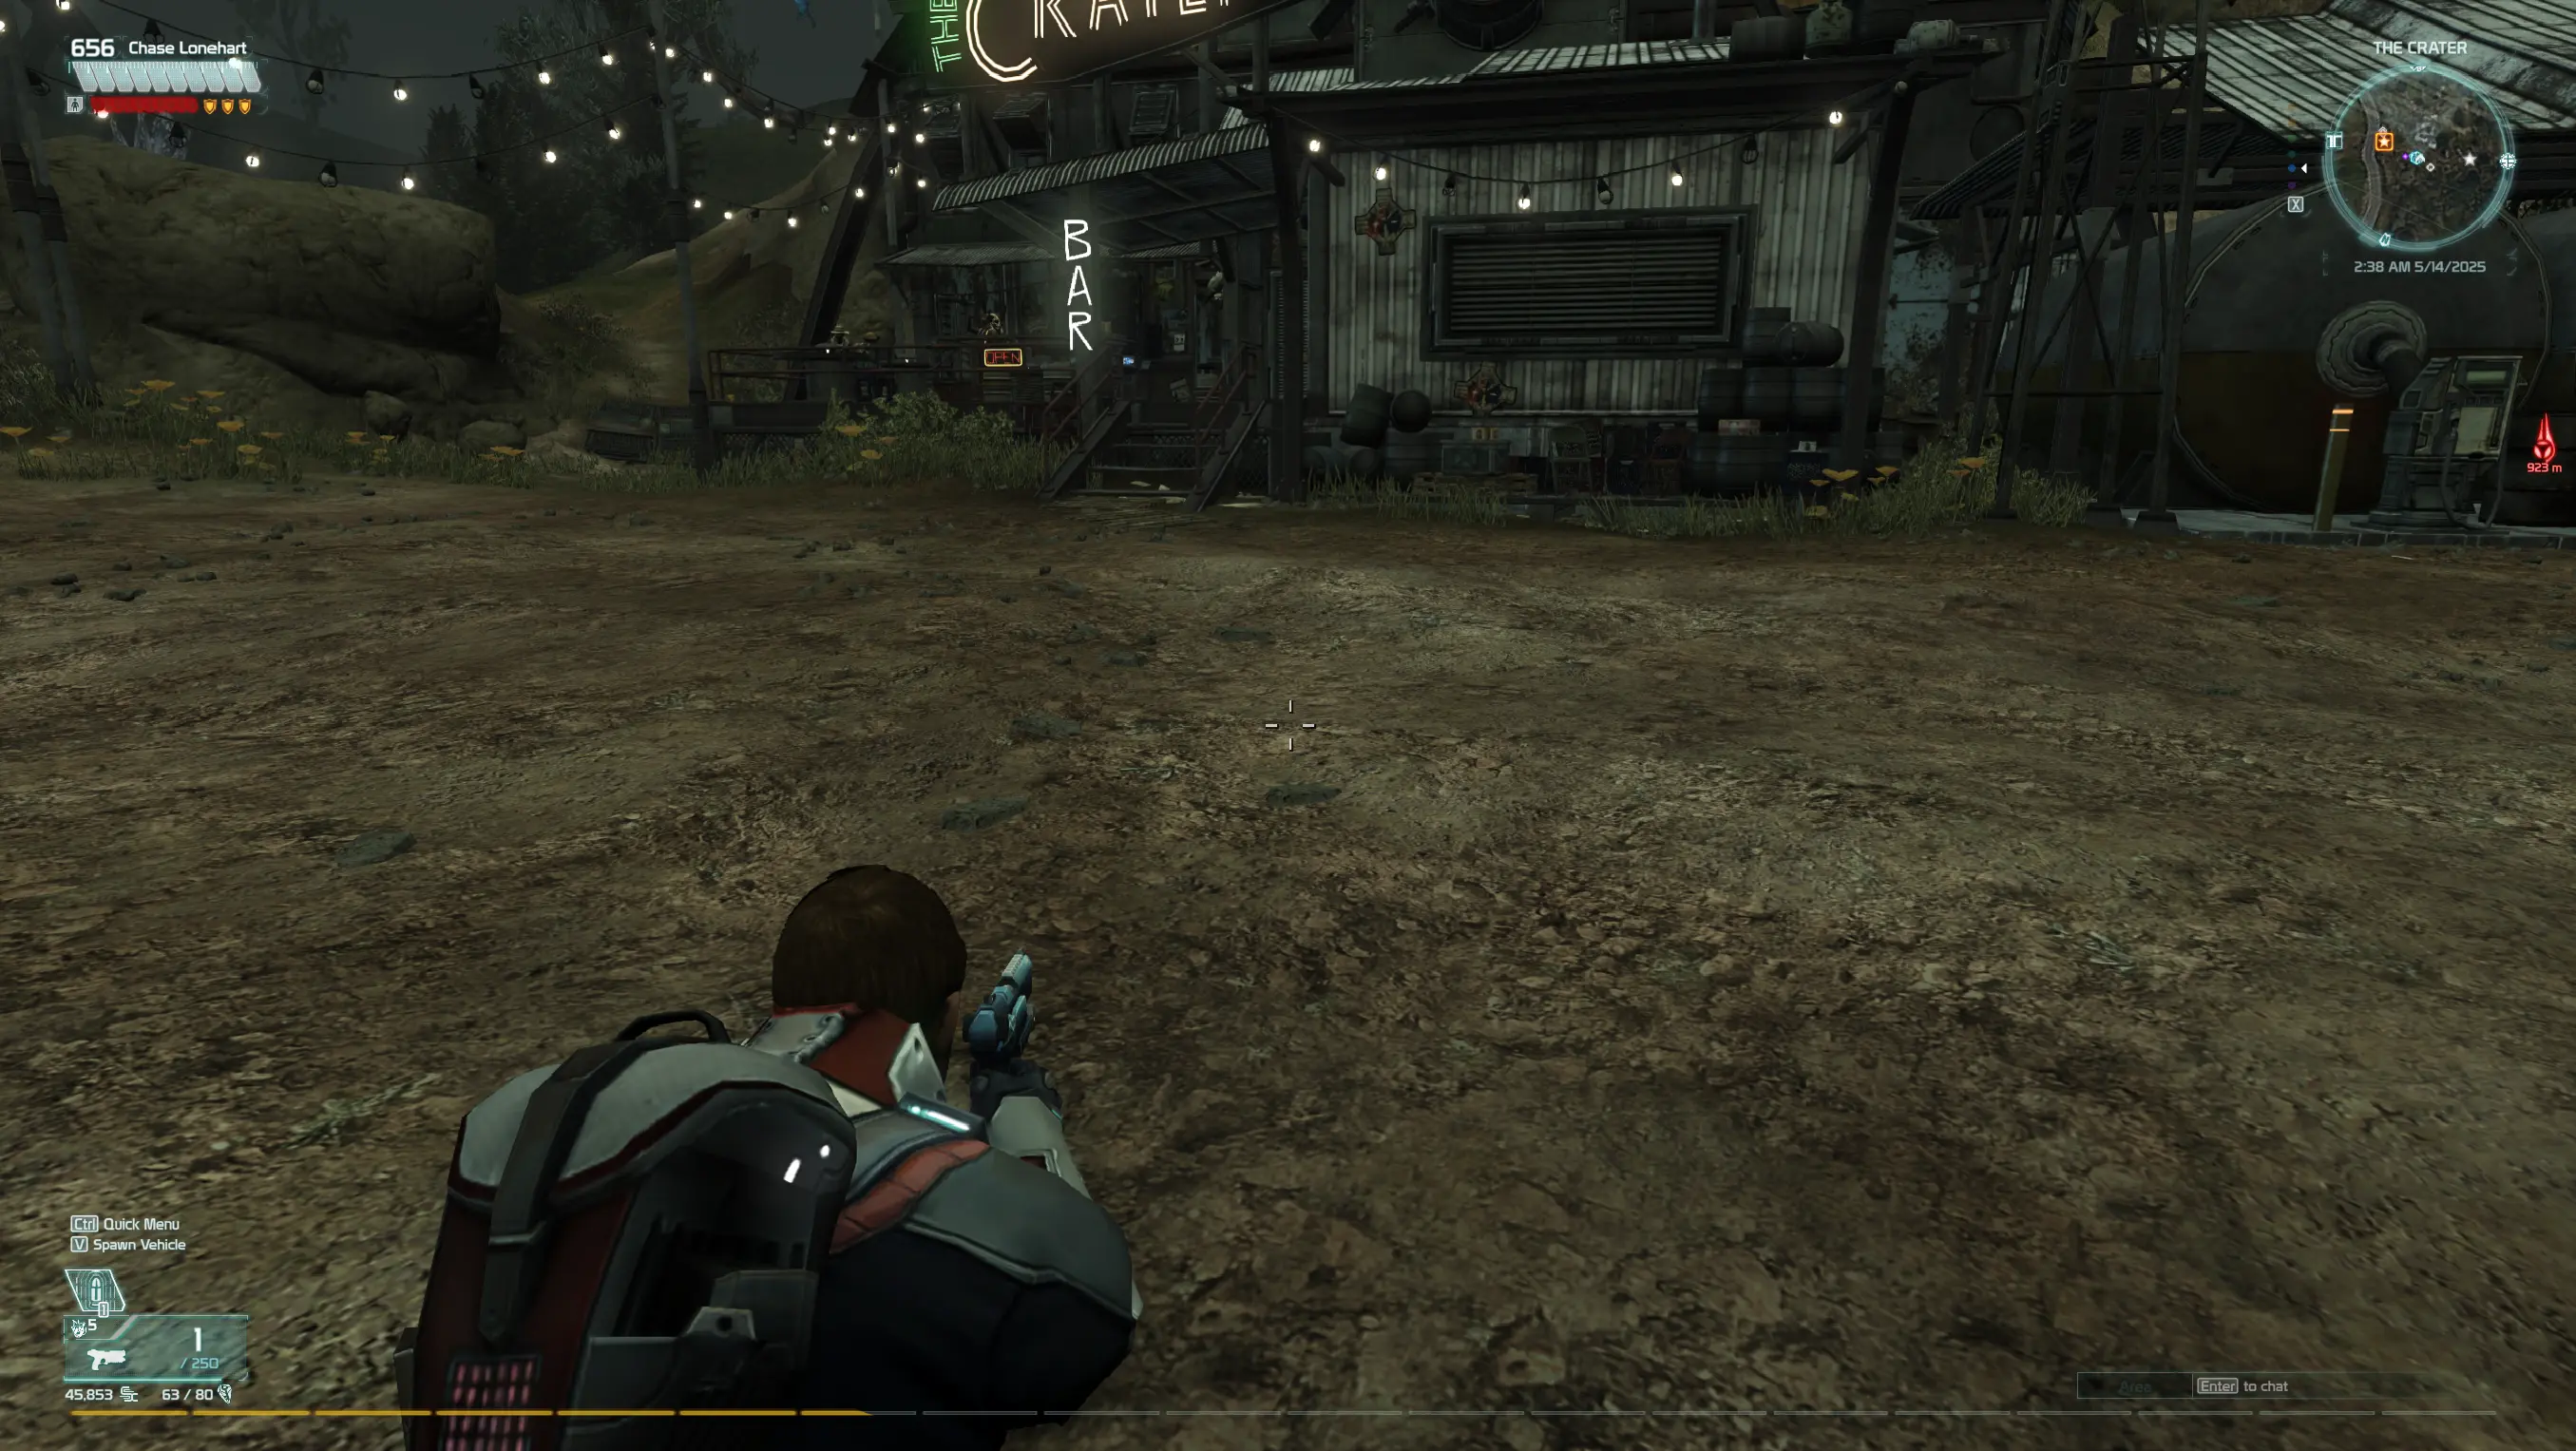
Step 3: Aim up slightly or use aim down sights. So, if the basic pistol is in view (especially the iron sights), you can aim up slightly to force the gun’s appearance off the screen (first picture). Or, if you us Aim Down Sights (second picture, holding down the right mouse button), not only will it force the gun out of view, but you can use it slightly as a zoom lens and it gives you more wiggle room without the fear of the gun showing back up in the shot (unless you aim too far left or too far right, which will cause the camera to fall back into place and your PC back into view due to the camera “sliding” off the item that was behind your character).
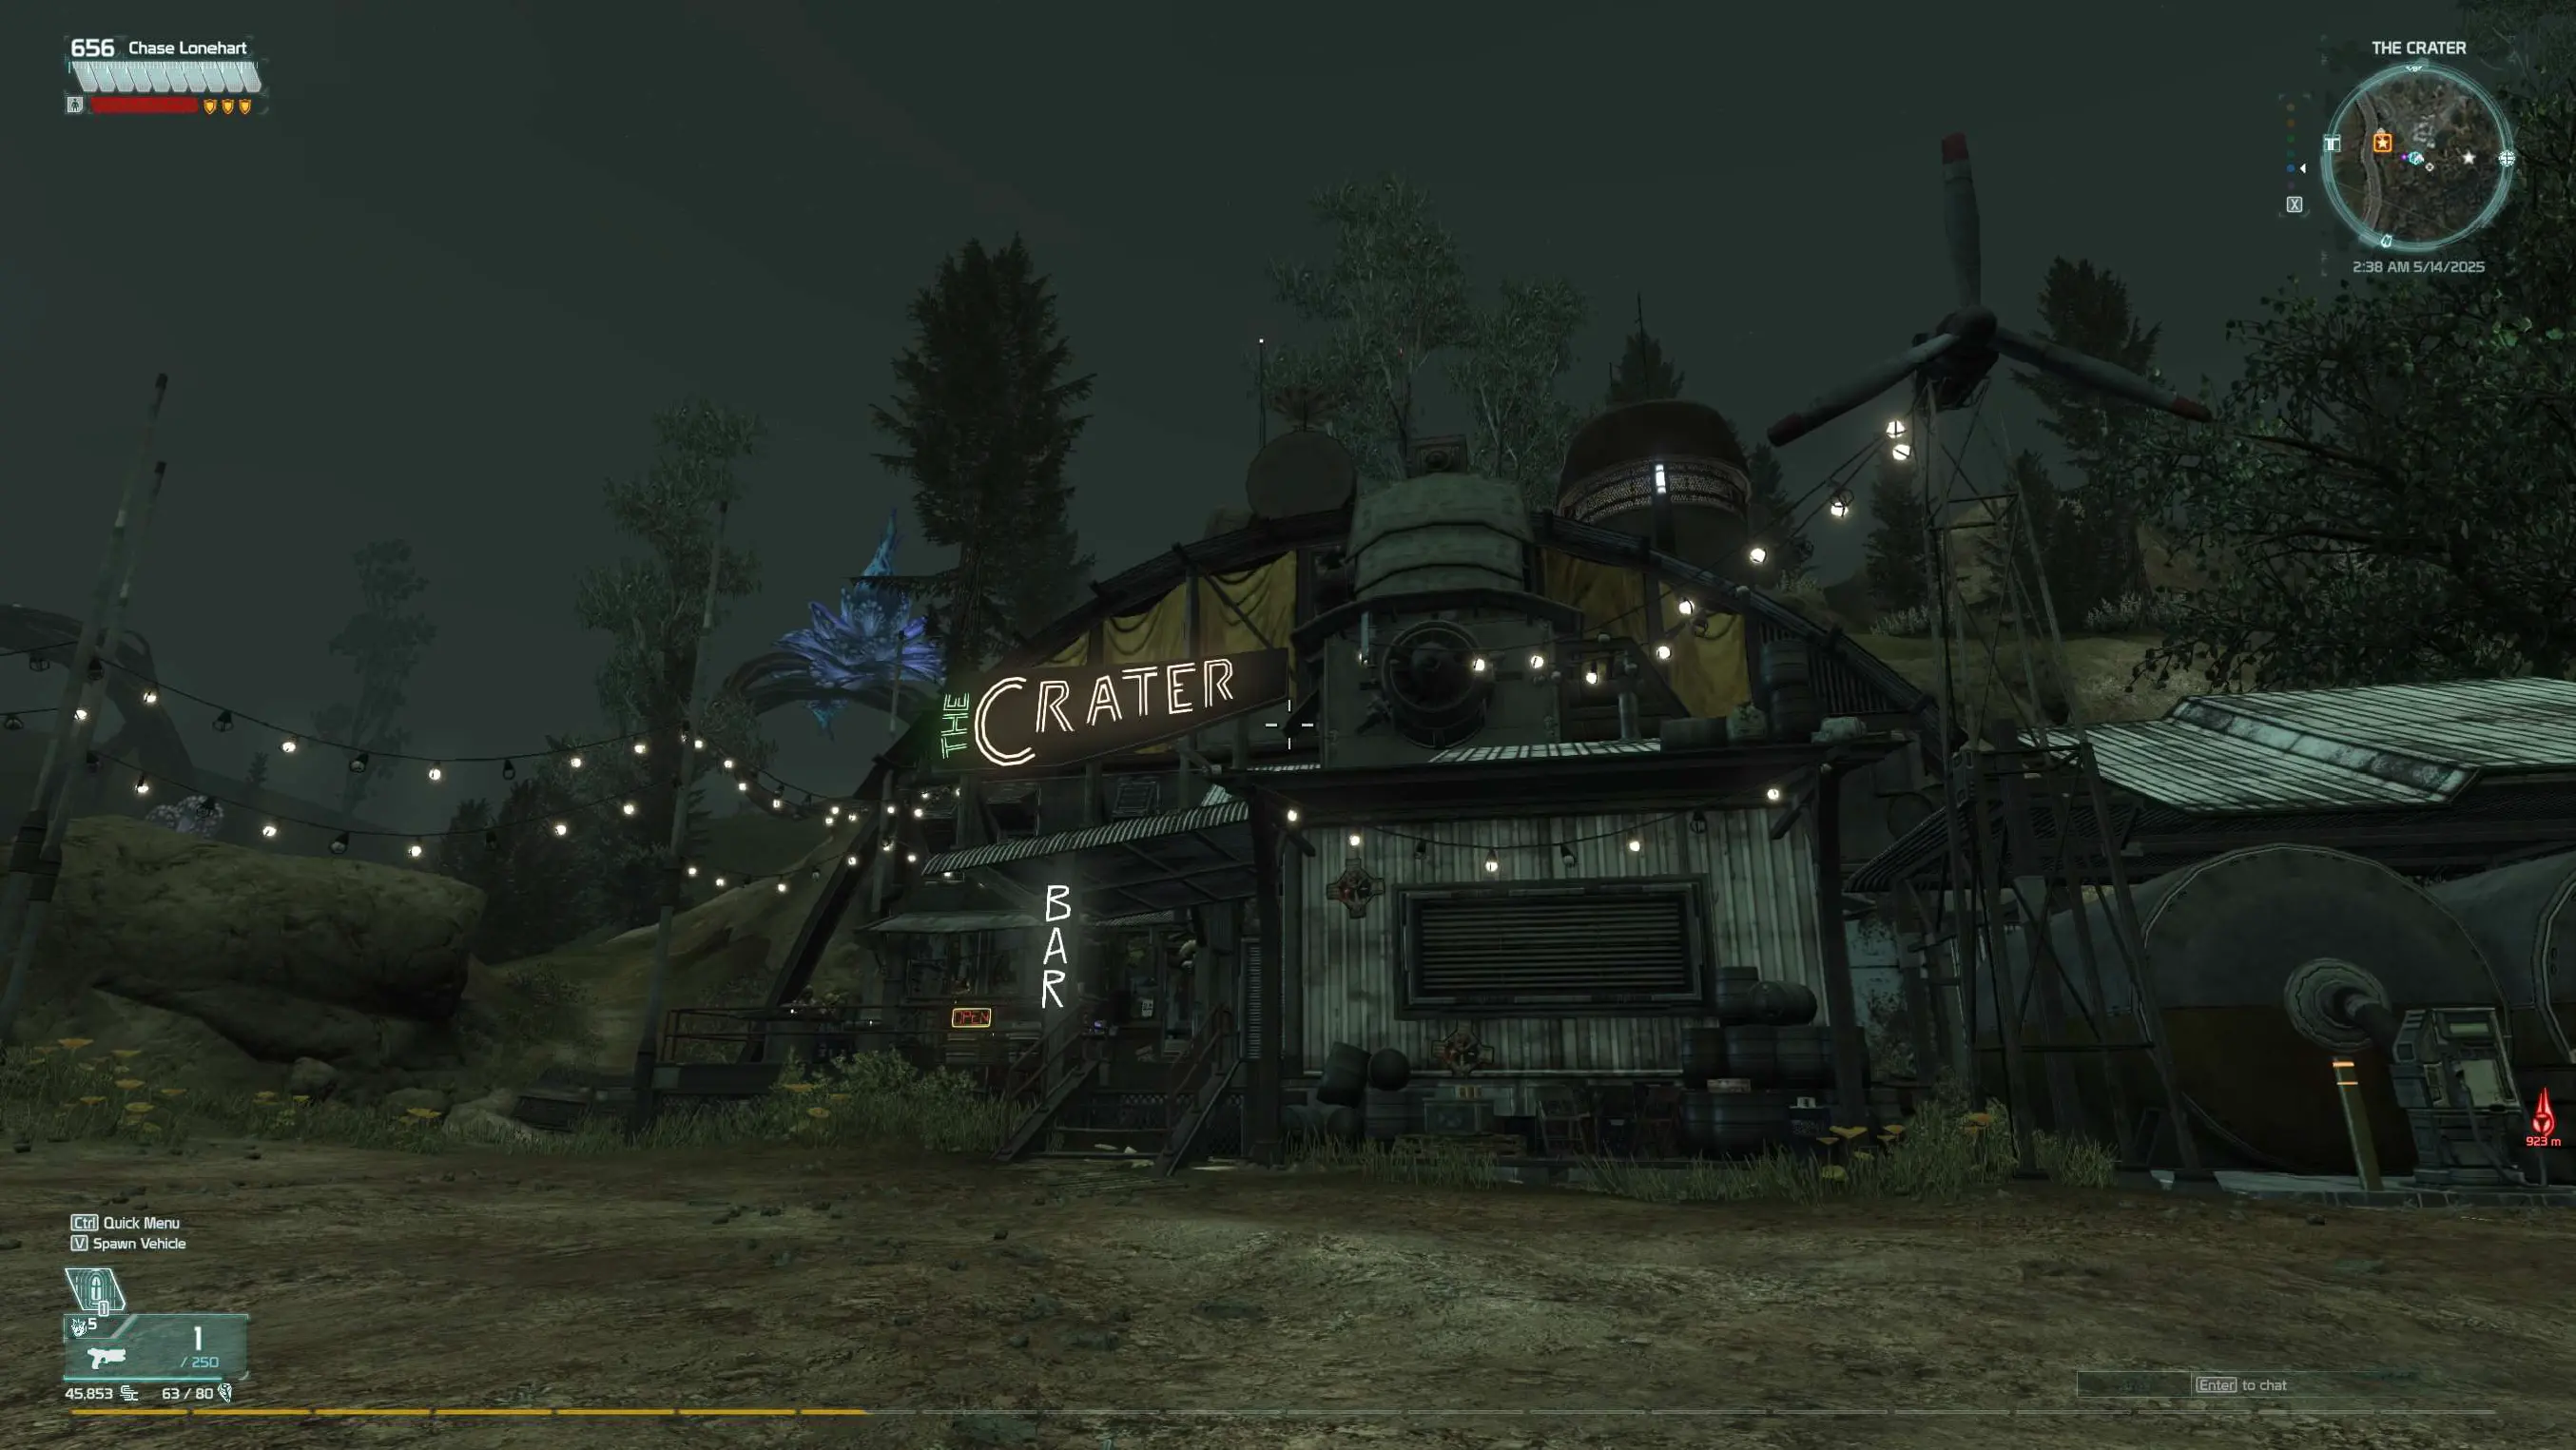
Author’s Note: If the text and images aren’t enough to get an idea on what is being done, you’re welcome to consult the video I made about it (as well as see examples of the Area of Use, which is about to be discussed) which is embedded above this article.
The Area of Use is the area that you’ll be able to use for pictures or video. There are three I have come across while filming the Camera Glitch Tutorial video. The Are of Use is where the HUD is not seen in the frame, which would require either cropping the photo/video to cut out the HUD, or using Letterboxing to be able cover the HUD and present a more “cinematic” presentation. I’ll cover the them now.
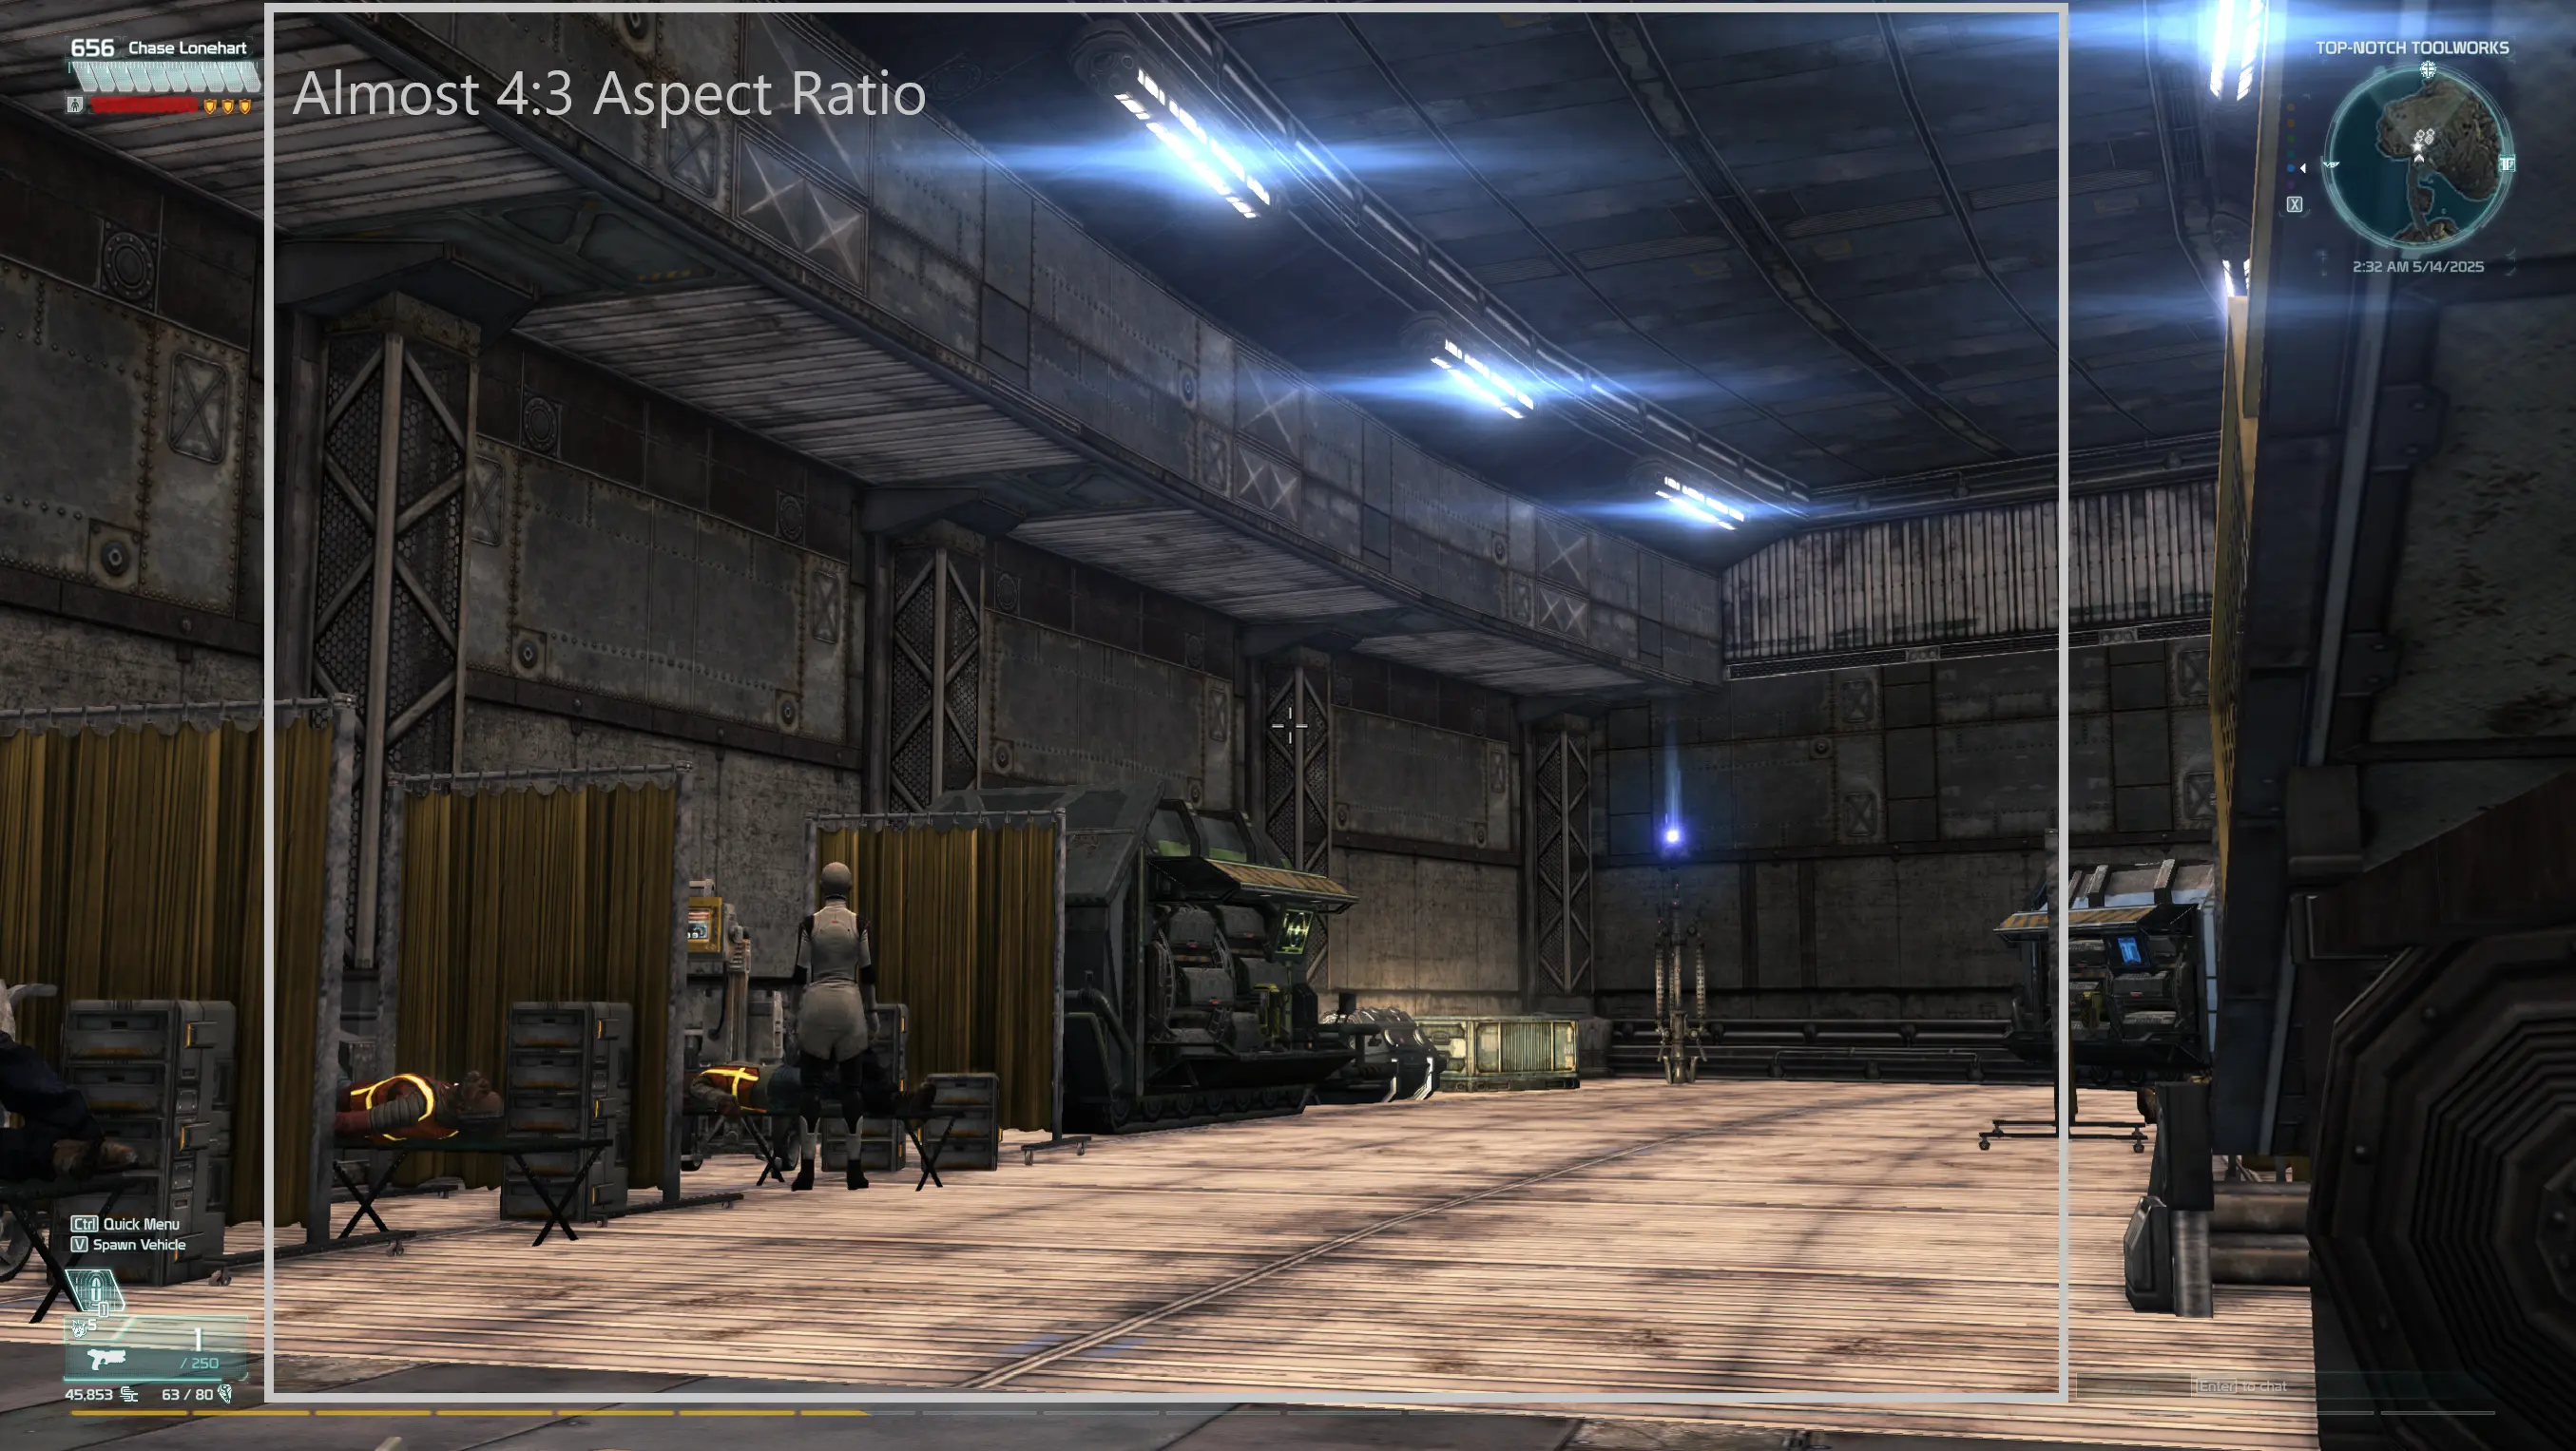
For those that aren’t familiar with the 4:3 Aspect Ratio, it is also referred to as “The Academy ratio” or “full frame.” Essentially, it was the standard aspect ratio that was used in motion pictures for many decades between the 1930s to 1950s. It also became the standard picture for television, basically being almost square-like in it’s appearance. If you’ve ever seen a classic TV show from between the 1960s and 2000, that is basically how it was formated. The Almost 4:3 Aspect Ratio Area of Use looks similar to that. I would advise also checking out older shows and movies in this aspect ratio to be able to see how staging was done, so that you are able to get full use of the area without risk of having something cut off.
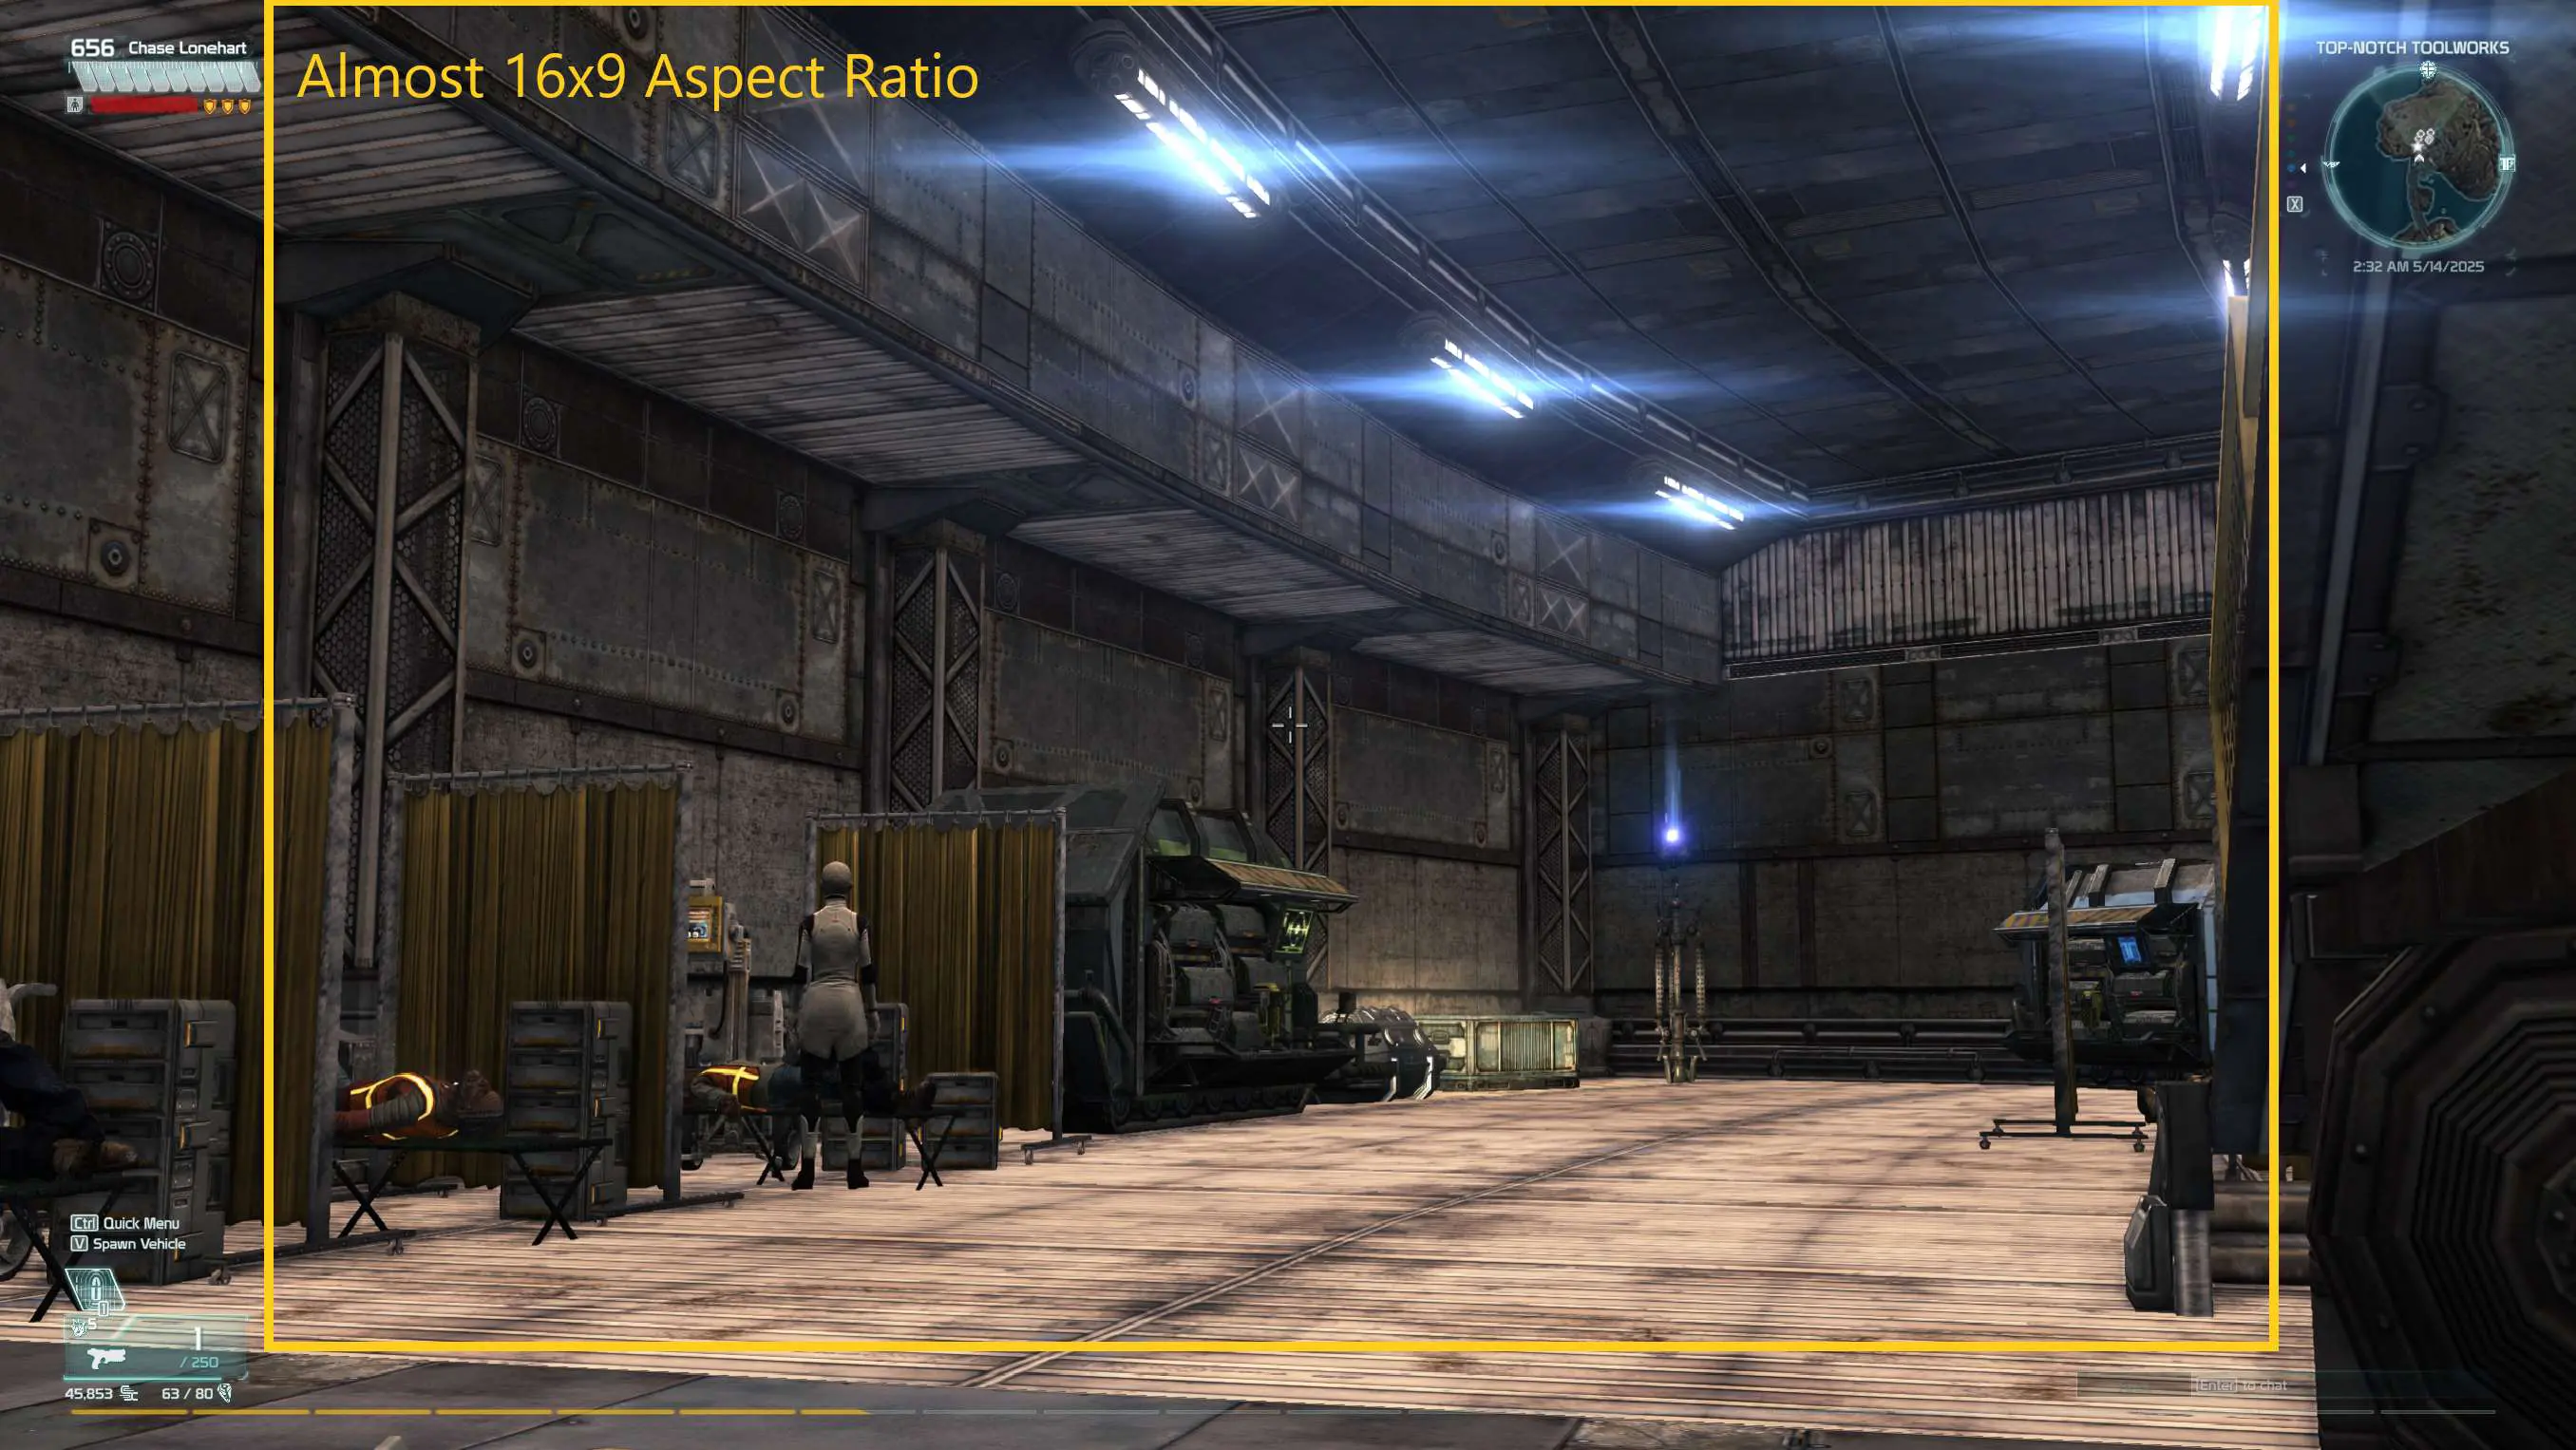
This is similar to the 1.85:1 aspect ratio, otherwise known as “Academy Flat” or just simply “widescreen.” This is the typical aspect ratio you see in motion picutres and more modern TV sets as well as consumer photographs. I actually didn’t realize this area was optional until I was doing an edit of the video, which prompted me to add the notaion after the discovery so to include it as a possible area of use. This gives a wider view to work with and pretty close to the aspect ratio used in the Defiance TV series.
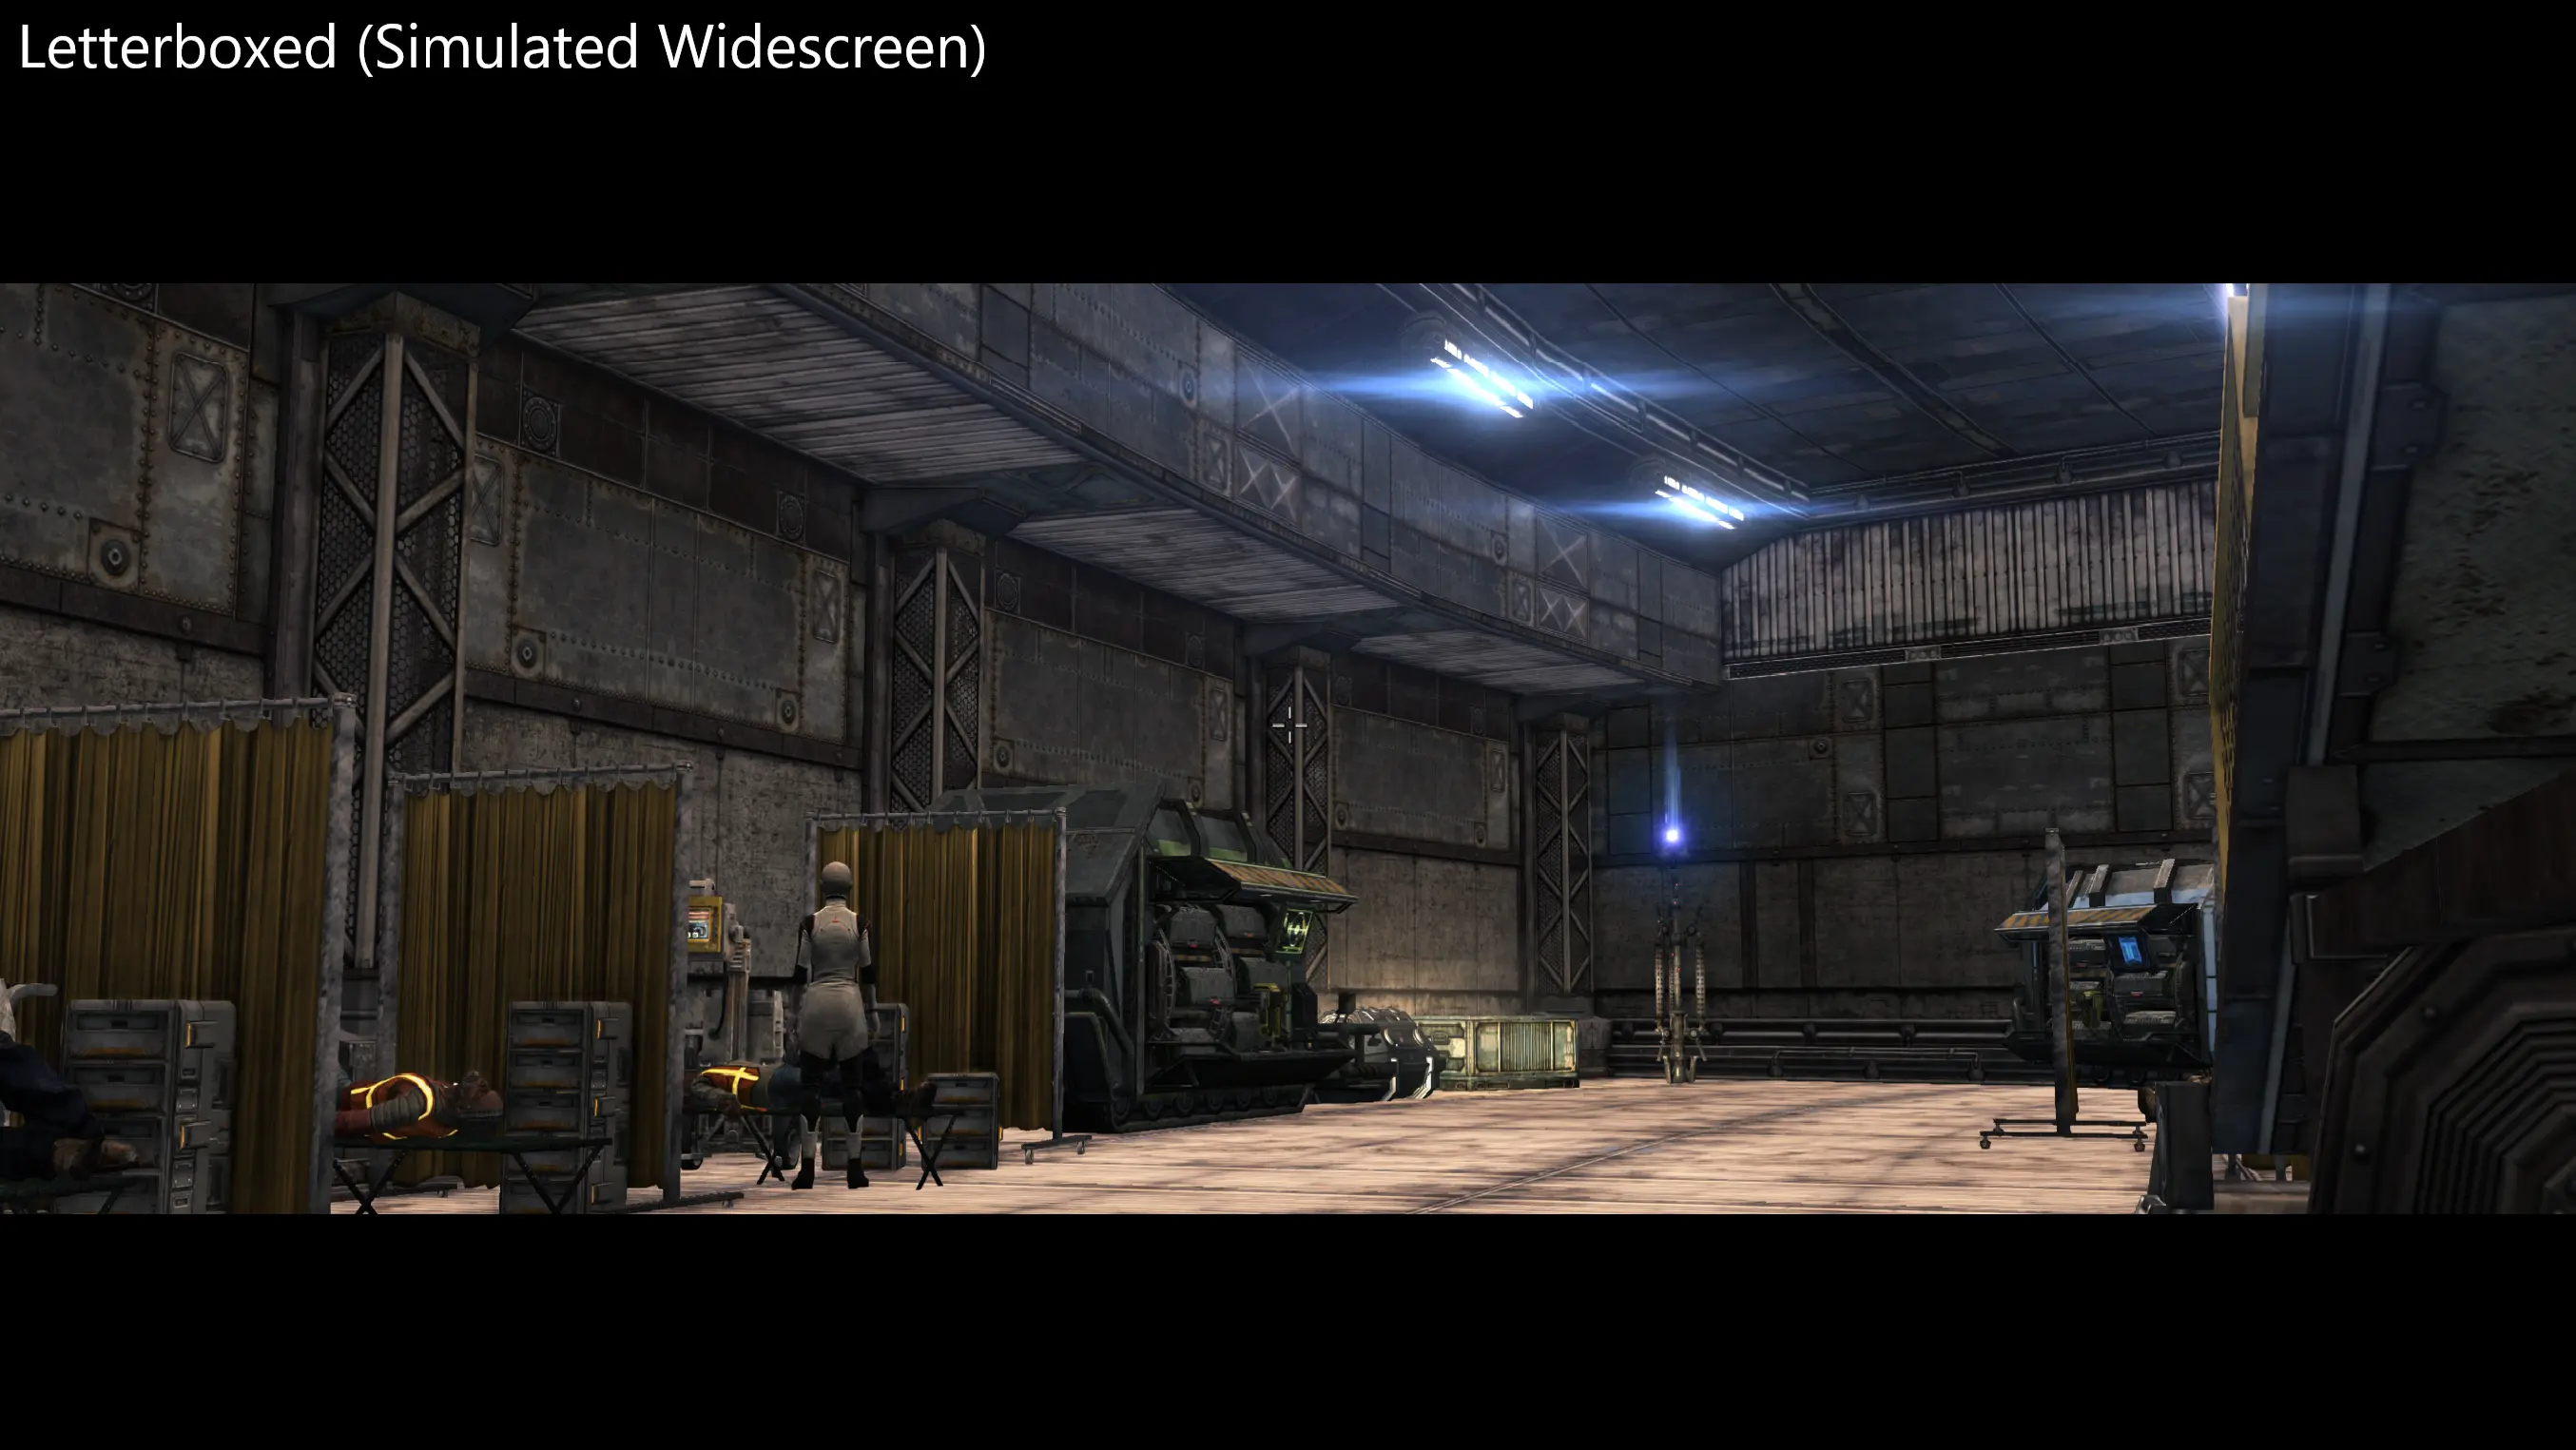
Letterbox was a means of presenting widescreen in a full frame aspect ratio or, nowadays, preserving a full frame picture in a widescreen aspect ratio. VHS tapes introduced “widescreen presentation” in which bars were introduced to the top and bottom of the frame to preserve the original widescreen aspect ratio of the film as it had been originally presented in theaters. For this Area of Use is presents the most “cinematic”, as it mimics the Panavision/Cinemascope style widescreen (this technique was used by Rooster Teeth, the creators of the hit machinima web series Red vs. Blue during the first few “seasons” of the show, in order to hide the HUD for the Halo multiplayer mode back before they “remastered” the footage to present it naturally in widescreen without the HUD and crosshairs being in view). This is best used for video instead of pictures.
Blocking is the term used in the film industry for the arrangement of actors and the camera in a scene. When it comes to using the camera glitch, you’re going to need to figure out the staging of where to put your “actors” for pictures or video. This is why pre-planning and going to the locations are necessary, as it not only helps for you to run around and try to find spots where you’re able to get good shots for the pictures or videos, but helps you be able to figure out where to place your talent so you’re able to get the best pictures for the most interesting picture or for whatever story you’re trying to tell for the video.
Photo of “camera man” and marks where your talent can stand.
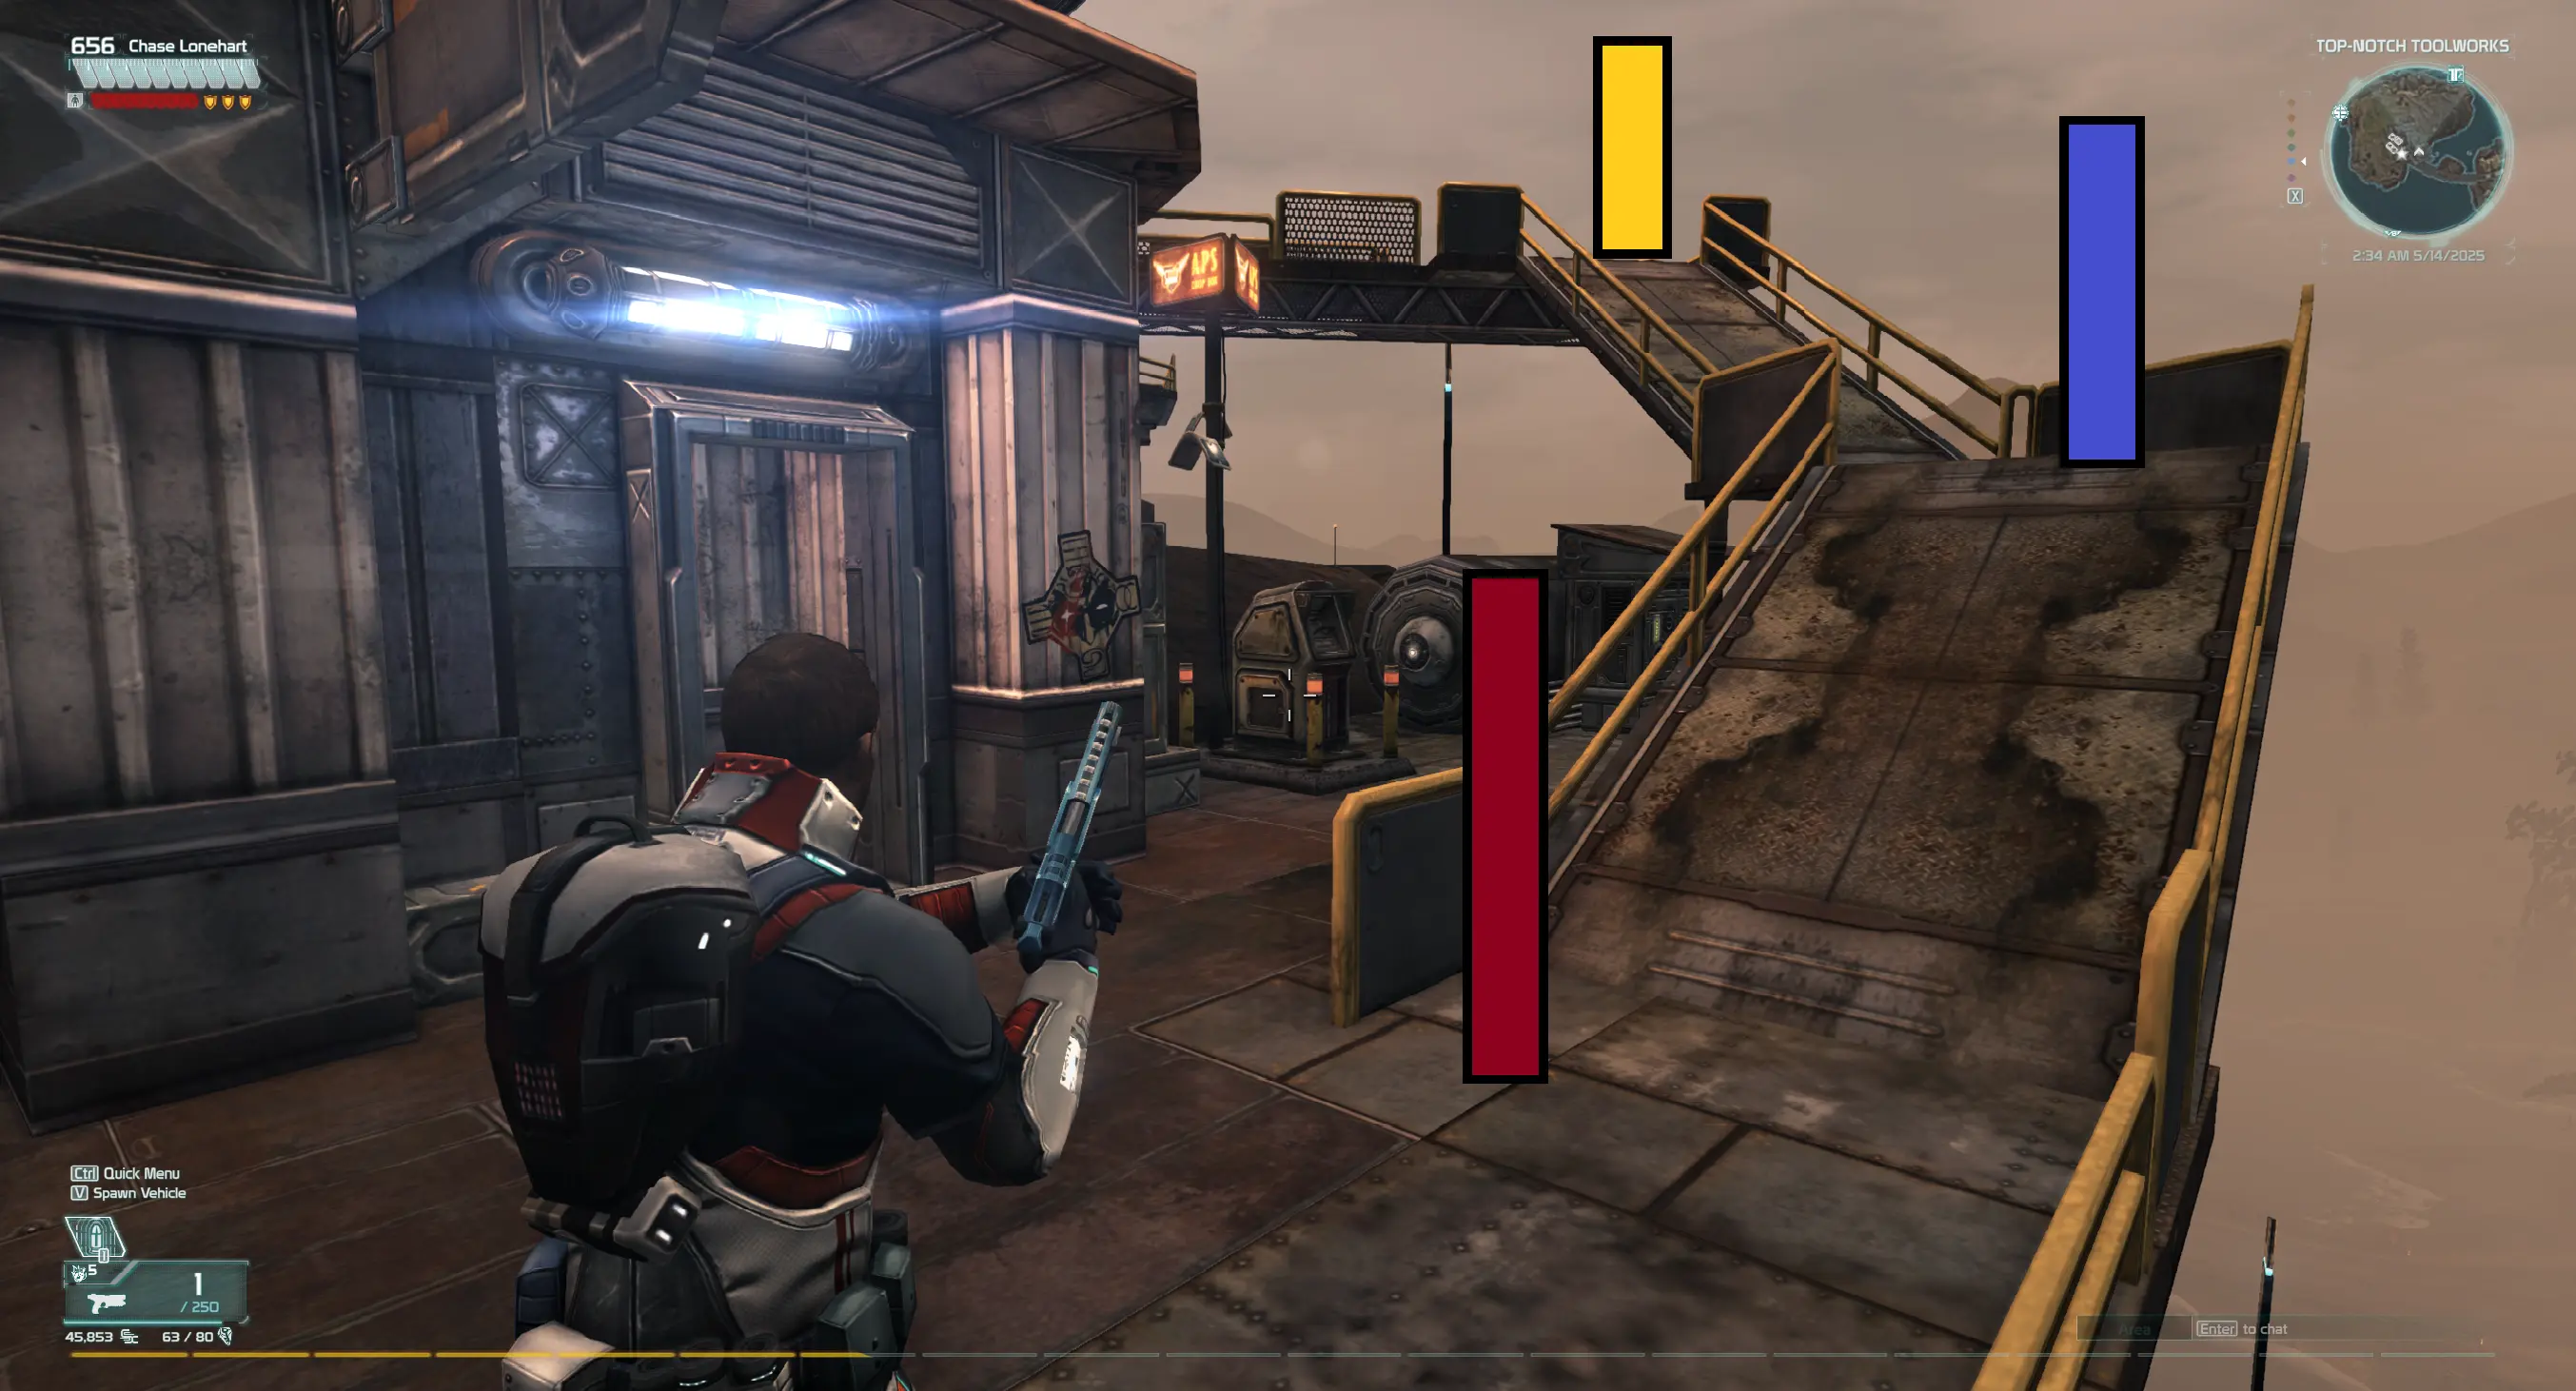
Photo of how it might look with “camera man” using camera glitch, and placements of where talent can be.
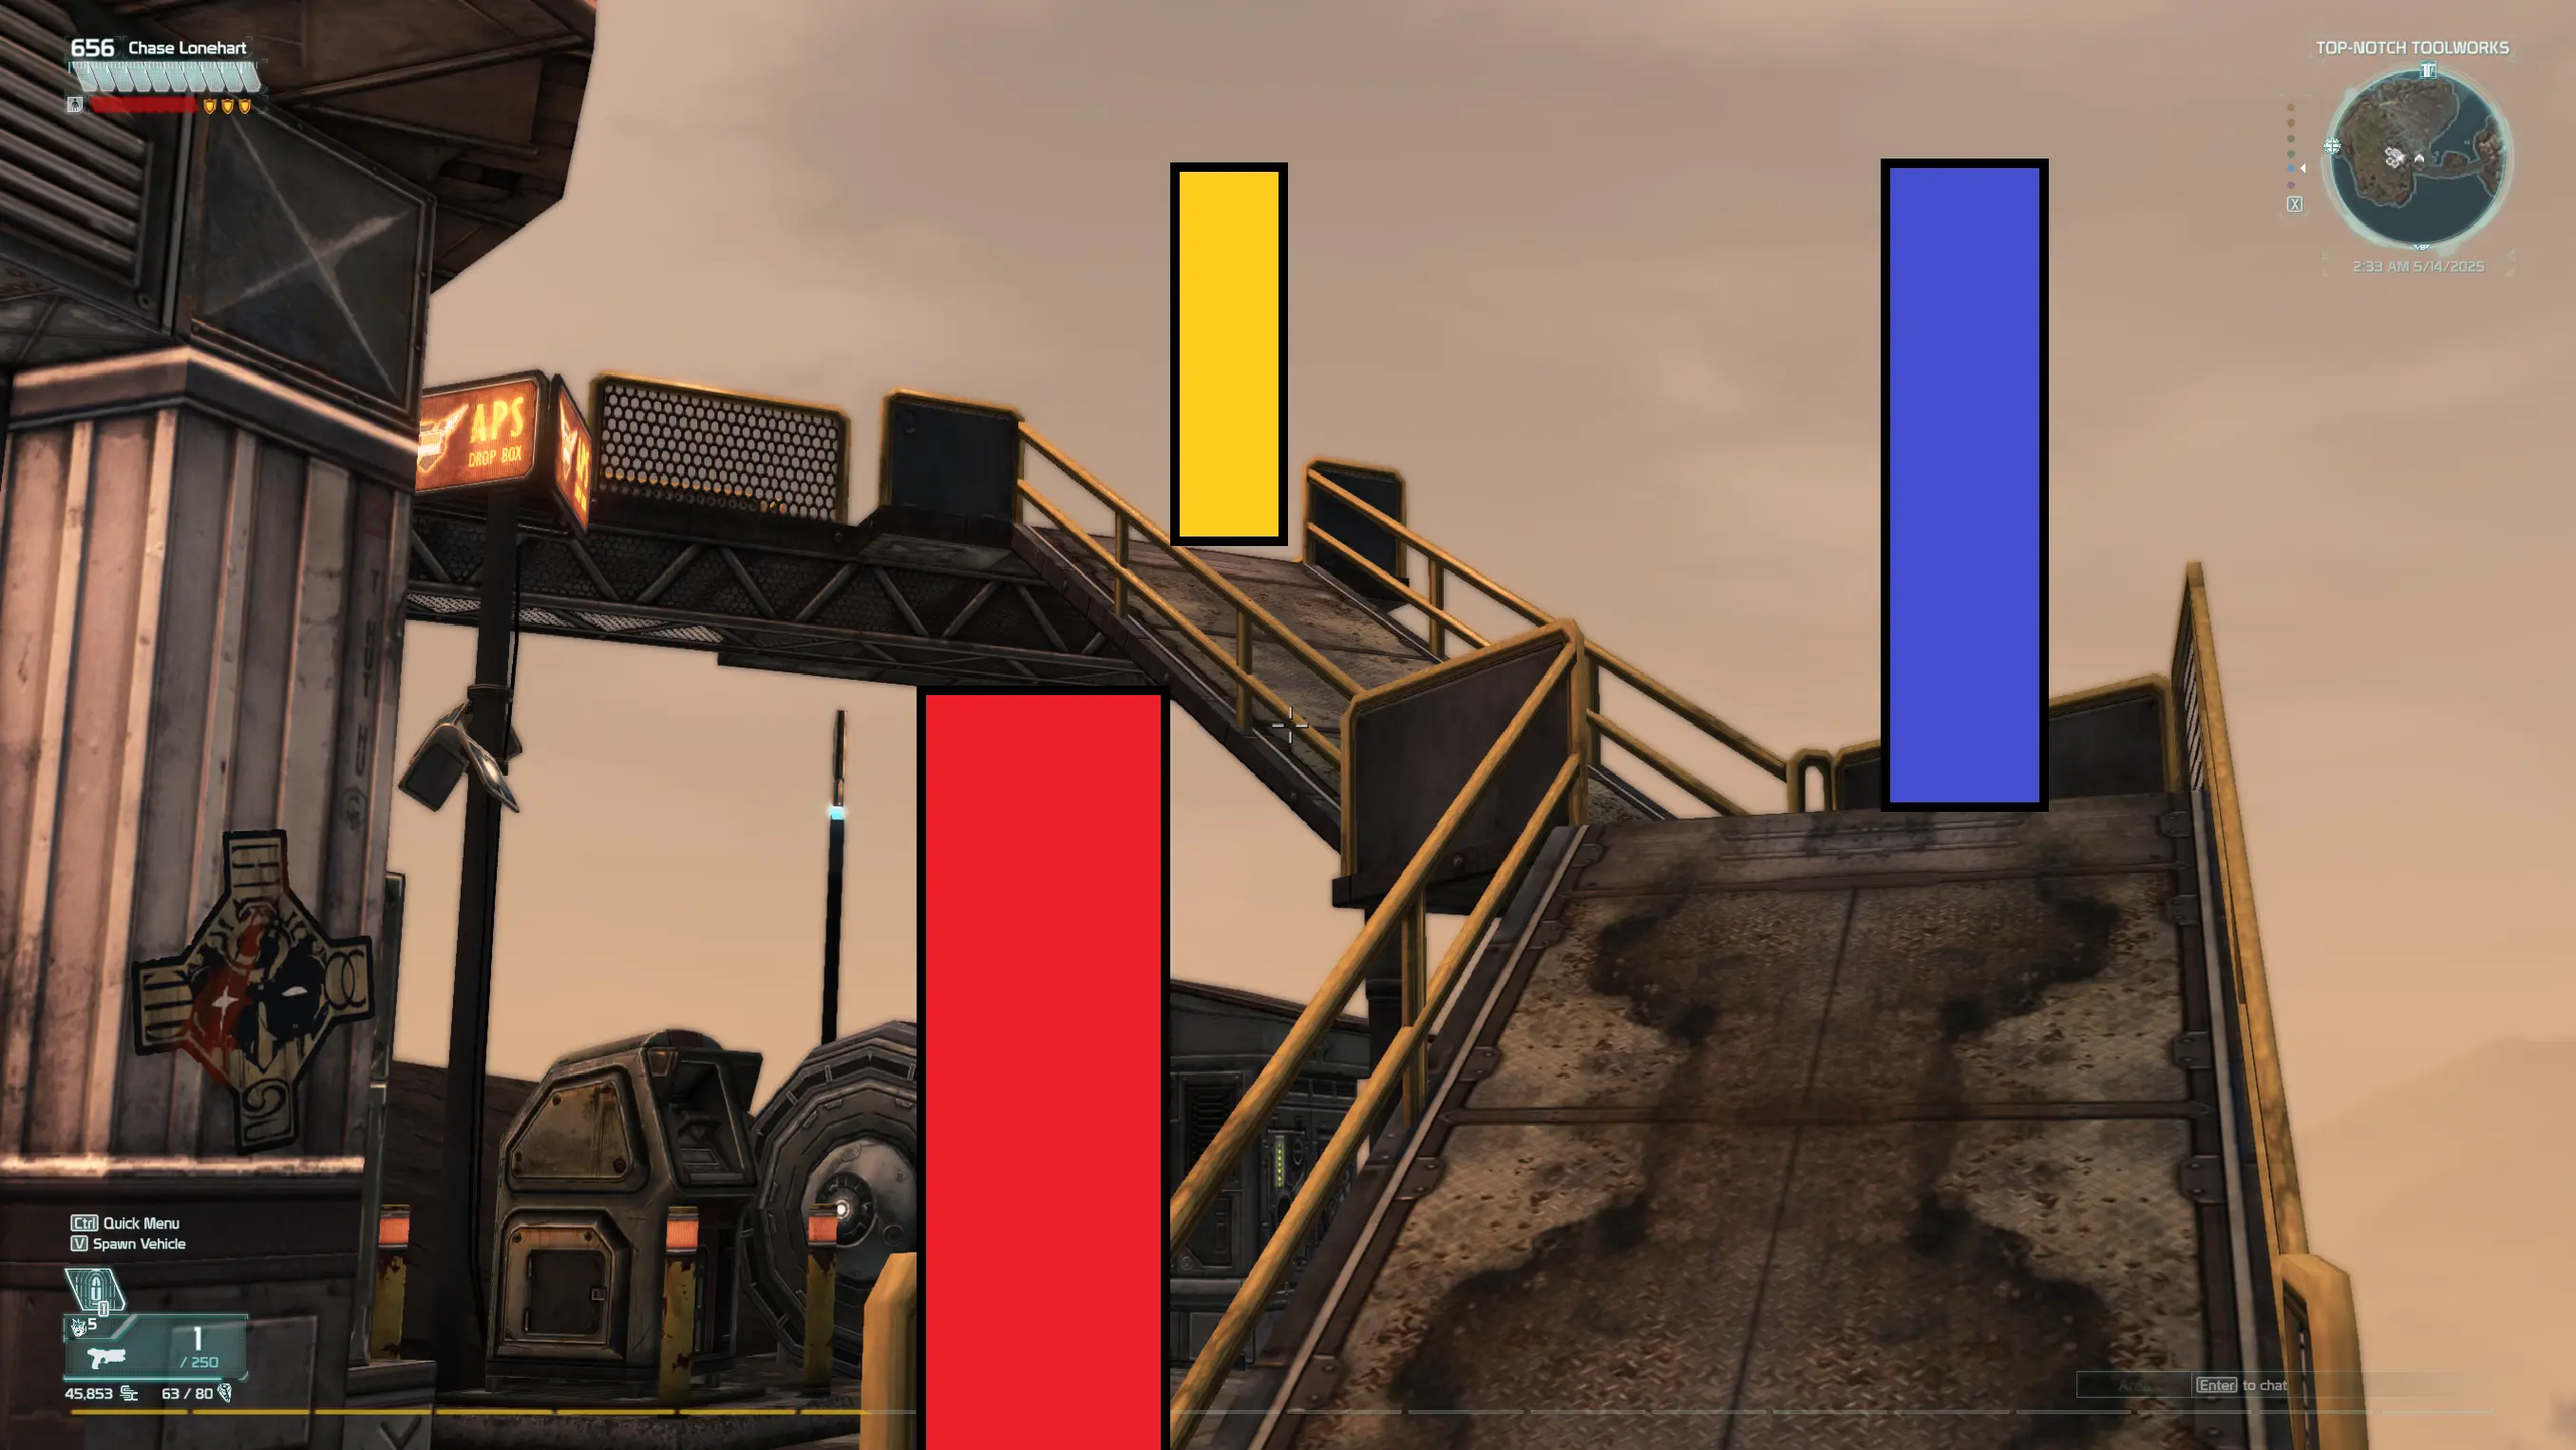
Outside of the usual “run and gun” and “standing” actions for players, if you’re doing a video that you need a little bit more than just standing around, the emotes can be useful. For example, the emotes include an emote for using the tablet device typically is seen when “scanning” stuff (like the Hellbug hormones during the mission that leads towards Happy Power Farms). The “dance” emote would be useful for a scene at The Crater, especially since there’s a jukebox on the porch near the table where we are first introduced to Varus Soleptor. Of course, the “greet” emote and the “cheer” emote also have their places. There is also the fact that with the mouse controlling the head, by having a character wear a helmet, you can have the character’s head bob and turn to mimic the motions of talking (which is useful if you plan on insert voice dubs for video).
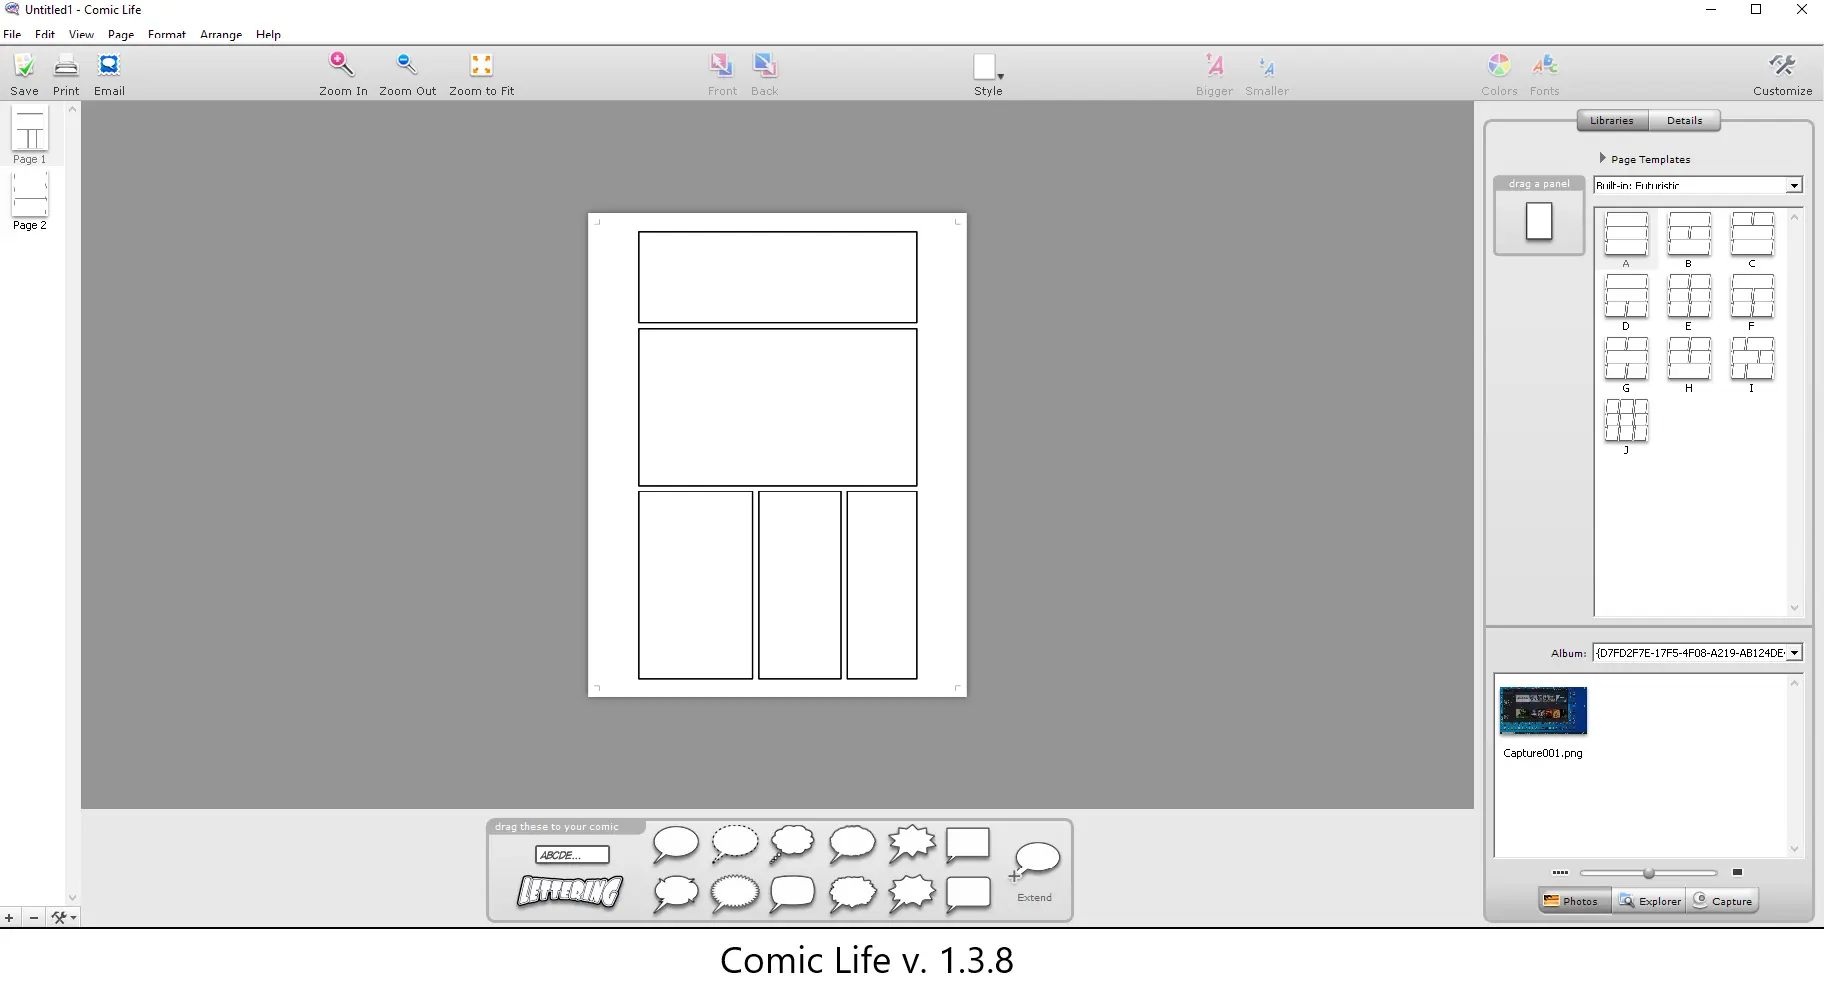
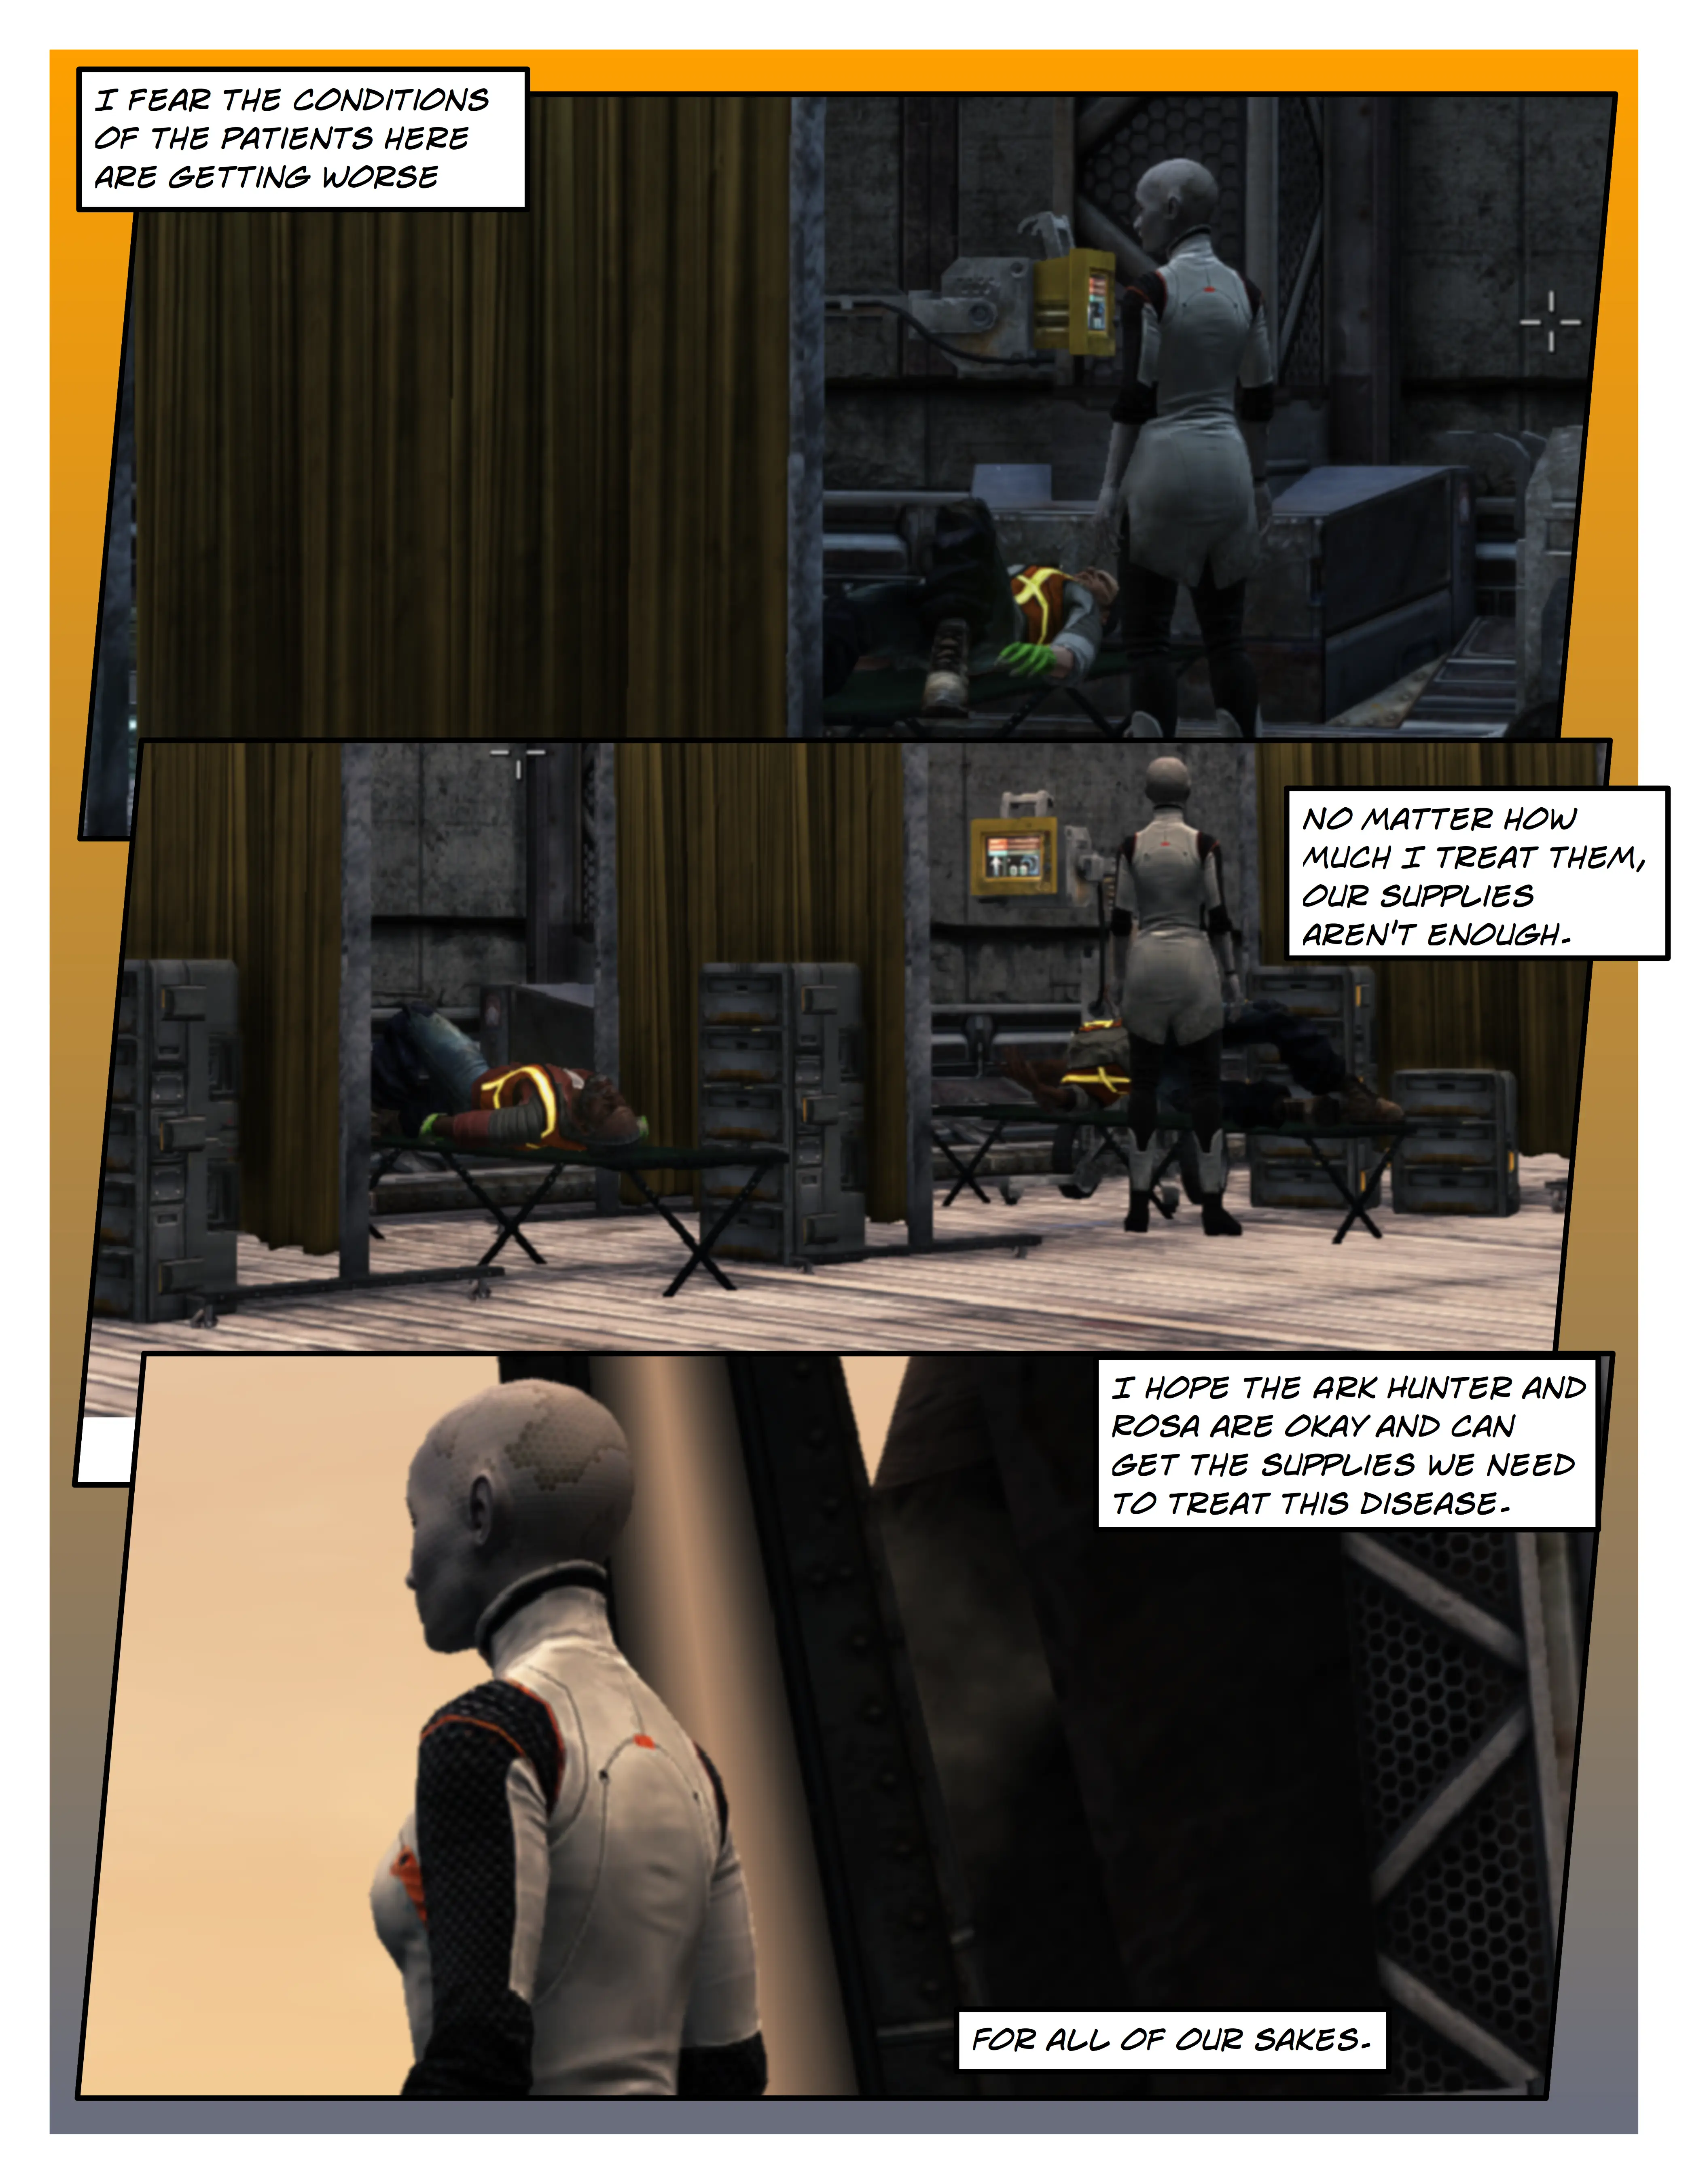
This brief segment covered the idea of doing what I refer to as a “machinima comic book fan fiction”, where it is creating a comic book series using machinima. There is software available where you can import pictures into templates and create comics with it. One such example is a piece of software called Comic Life. The program is really easy to us, it’s mostly drag and dropping pictures into pre-existing templates (but the program also allows users to make their own templates for pages in addition to allowing for the modification of the templates already featured), also adding action text (such as usual “Pow!” or “Boom!” you’d see floating on the page), text boxes (narration or additional info) and text bubbles (for dialogue, of course). There are various versions of such software that exist, or you can even just use photo editing software like Photoshop and GIMP (GNU Image Manipulation Program) to create the pages. So, depending on how much work you want to put into it in order to get the kind of visuals you want for your comic, using the comic book format is a great alternative to doing video if you have a story you want to tell but filming isn’t an option.
Example Page (Created Using Comic Life):
It’s really hard to know where things will go in regards to Defiance and machinima. However, by making machinima with the game and making Defiance machinima in general, it not only helps in promoting Defiance the game, but it keeps Defiance as a franchise alive. Fandoms are what keep works breathing, even after long after their story’s completion. Though the camera glitch is limited at the current time, it does provide a useful tool for creating fan works with the game itself. If there’s enough interest in using Defiance to make machinima, there’s a possibility that Fawkes Games may consider incorporating more machinima making abilities for users (like how Bungie added machinima-making features into Halo multiplayer games, such as options to have players who act as the “camera man” turn off their HUD, in addition to lowering their gun out of view, which gives the player models more a relaxed stance for talking scenes, amongst other features). Though a complete tool set would be awesome, something as simple as being able to turn off the HUD, a toggle to move the camera so that the player character acting as the camera man is out of the way or even having a Free Cam option would be useful (as we saw with their video “Defiance – Arkhunters, unite! [In-game Trailer]”, a Free Cam appears to exist within the game itself).
The camera glitch I covered can open the door for more potential machinima or at least opens the door to taking better photos for those who are looking to be more creative with their picture taking. And I hope that those who wish to be creative and expand the world of Defiance can take what I’ve discussed here and run with it. The fandom can expand and keep the love of Defiance as a story alive. Features and abilities to create machinima also give users more reasons to play the game (outside of the obvious fact that the game is good and fun), as well as giving outsiders who are just starting the game to be able to create materials for it (like giving YouTubes the ability to create unique thumbnails of their characters at a location for videos of their playthroughs, or create unique video openings for their videos).
I’d like to give Thanks to the following people:
Fawkes Gaming - For bringing Defiance back, and allowing us to have Paradise once more.
Clubside - For not only hosting this article here, but for archiving all of the videos from the Defiance YouTube Channel.
Miss_Kateya - For not only providing the tip about the brief HUD turn off trick, but for the Defiance Wiki.
Bennett - For recommended adding the advisement about TAB TWO.
KNNDefi - For providing the bypass to the copy of the game I had to allow the in-game world to run when the servers were closed, which lead me to discover the camera glitch.
BrickyRB and Zovik - For your effort to bring Defiance back after it’s closure, and for giving us hope when all seemed lost.
And to you, dear reader and (possibly) fellow Ark Hunter. I hope this article has provided some useful information and spark your interest in doing photos or making machinima with Defiance. I look forward to see what everyone comes up with. DEFIANCE!
