This first section of the guide covers both new character creation and the Tutorial mission, “Recovery Mission”. After launching the game you are presented with the character select page.

As you’ve just started you have no existing characters so the Create New Character option is shown. Standard accounts can create two characters with the option to buy additional slots. After selecting New Game you are shown the opening cinematic.
Cinematic 1
The Votans’ arrival was more immigration than invasion.
Peaceful attempts to integrate collapsed into decades of war and chaos.
The Earth was transformed. Extinction seemed inevitable, until…
The Battle of Defiance.
Human and Votan soldiers defied orders and united to save innocent lives.
This valiant act inspired the belief that we must brave this new frontier together.


(Location: Earth Republic Stratocarrier, New Freedom, West Coast Deployment)
Captain Noah Grant (overseeing cargo bar): Listen up people! We just passed the Golden Gate! We’ll be on site in less than twenty, so you got ten to secure the rest of that gear and get yourself strapped in for a landing! Repeat ten minutes until lockdown, people!
Captain Noah Grant (noticing the situation): What the hell is this?
Karl Von Bach (continuing): I don’t care what your protocol is. You’re here to help me, so that’s what I want you to do.
Captain Noah Grant (interrupting): You’re dismissed, Private. What’s the problem, Von Bach?
Karl Von Bach: You better get your men in line, Captain Grant. I want my equipment out of storage. My ark hunters and I depart as soon as we land.
Captain Noah Grant: The Earth Republic isn’t a limousine service. Your gear’s locked up and we don’t have time to dig it out. Now please, find your seat.
Karl Von Bach: No offense, Captain, but I think your orders were to do as I ask.


Captain Noah Grant: My orders come from my superiors. People in Manhattan wearing uniforms. Like this. And those orders are to keep you safe while you locate your alleged arktech.
Karl Von Bach: Alleged arktech? There is no alleged, captain. Do you see this? With this ark-core and the rest of the technology that I’ll find in the Bay Area, I will repair this world. And be its hero, of course.
Captain Noah Grant: You’re in a restricted area. Get to your seat.
Karl Von Bach: If anything happens to my gear, I’ll send the bill to your superiors. (Walks off)
Captain Noah Grant: What an asshole. (Addressing cargo bay personnel) Let’s move people. Time’s ticking. (Addressing passenger area) What is this, a dorm room?! Everyone get to your seats! (Passing Nolan and Irisa) You two! Let’s go!
Joshua Nolan: No problem, cap.
Captain Noah Grant (Addressing the player): You, too.
Player Creation
There are six pages available for creating and customizing your character. Some options will be restricted based on the Species and/or Gender you choose.


Character Create
- Species/Gender: Human Male, Human Female, Irathient Male, Irathient Female, Castithan Male, Castithan Female
- Class: Assault, Assassin, Guardian, Combat Medic
- Archetype: 1, 2, 3
The Species/Gender choice sets up the base body type, which is further refined by the Archetype choice, which offers three slightly different facial models. Your choice of Class will determine your starting EGO Power, secondary weapon and outfit. The game only features two clothing categories, headgear and outfits, and you’ll begin with a single outfit. You’ll be able to unlock additional outfits through Missions and Pursuits, as well as purchase them from the Bit Store.
Customization (Face)
- Skin Color: 8 choices for Human and Irathient, 4 for Castithan
- Character Voice: 6 choices
Skin Color is simply the tone applied to the body model, some species have a limited selection. There are six character voices, you can play a sample of each to see which you prefer. While you are a silent protagonist through Mission cutscenes, your character can be quite chatty at other times, making random comments based on making a good shot, taking damage and many other situations. This choice also affect the Emotes available from the Quick Menu.
Customization (Eyes)
- Eye Color: 8 choices
- Eyebrows: 8 choices, not available for Irathient
Obvious options here, and the choices are unique to the different Species.
Customization (Hair)
- Hair Style: 8 Choices
- Hair Color: 8 Choices
- Facial Hair: 8 Choices, not available for Females
Customization (Details)
- Tattoos: 8 Choices, not available for Irathients
- Irathient Markings: 8 Choices, only available for Irathients
- Blemishes: 8 Choices
- Facepaint: 8 Choices
- Makeup: 8 Choices, only available for Females
These options apply to the face as most Outfits have specific looks for any exposed skin on the body. You can get pretty crazy mixing and matching these, and always have the first option which is the equivalent of “none”.
Confirmation (Page 6)
- Name: Text box for entering your character's name
When you are satisfied confirm your new character. The name will be checked against the current playerbase to avoid duplicates. Some special characters are allowed such as spaces so you can create first and last names. There is a filter for some “naughty” words. Once the name is accepted the previous cutscene will resume, now featuring your customized character.
Cinematic 2
Captain Noah Grant: Now, ark hunter.
Karl Von Bach: Hold on, Captain. That one isn’t wearing your beloved uniform. They don’t take orders from you. (Addressing the player) Sorry about that, friend.
Captain Noah Grant: We land in ten. Strap in!


Karl Von Bach: I never got to brief you on your EGO implant, so we really need to- (Explosions and ship violently shakes) What the hell?
Soldier (Addressing Grant): Sir! They need you on the bridge!
Karl Von Bach: I think I will actually get to my seat. When we land, don’t go anywhere. The EGO activation can be a bit jarring without a proper briefing.
(Player takes seat)
Joshua Nolan: Relax. It’s just a little turbulence. Completely normal.
Irisa: No it’s not. We’re all gonna die.


Joshua Nolan: She’s actually quite charming once you get to know her.
(Explosion causes lights to go out)
Ship Computer: Alert. Hull integrity compromised. Initiating evacuation sequence. Alert. Hull integrity compromised.
Joshua Nolan: Hold on! We’re going down!
Ship Computer: Alert. Hull integrity compromised. Initiating evacuation sequence. Alert. Hull integrity compromised.
(Nolan and Irisa’s pods launch but the player’s is jammed)
Ship Computer: Evacuation pod launch in 3, 2…
(Another explosion, player’s pod launches, fade to black. Fade in on pod on the ground.)
Cass Ducar: Brace yourself, Cass. This could be real bad. Okay. (searching pod) Uhhh. Which of these dealies opens this bitch? (finds button) Ah. Nice.
(Pod opens)
Cass Ducar: Holy shtako. You’re alive. Name’s Cass Ducar. I saw you land. Well, maybe that’s not the right word. It was more smashing into the ground than landing. I sort of expected you to be a bowl of soup in there. (player has flashes) Um. What are you doing? (more flashes) Whoa! Are you okay? Do you need help? Can you hear me?


(More flashes including a strange figure)
Cass Ducar: Here. Sit down before you pass out. I’m sure you took more than a bump on the head, so rest. Get your feet under you. I’m going to go see if anyone else needs help.
(Cass begins to walk off)
Cass Ducar: Oh. You might want to arm yourself a bit more. The locals aren’t known for their charm.
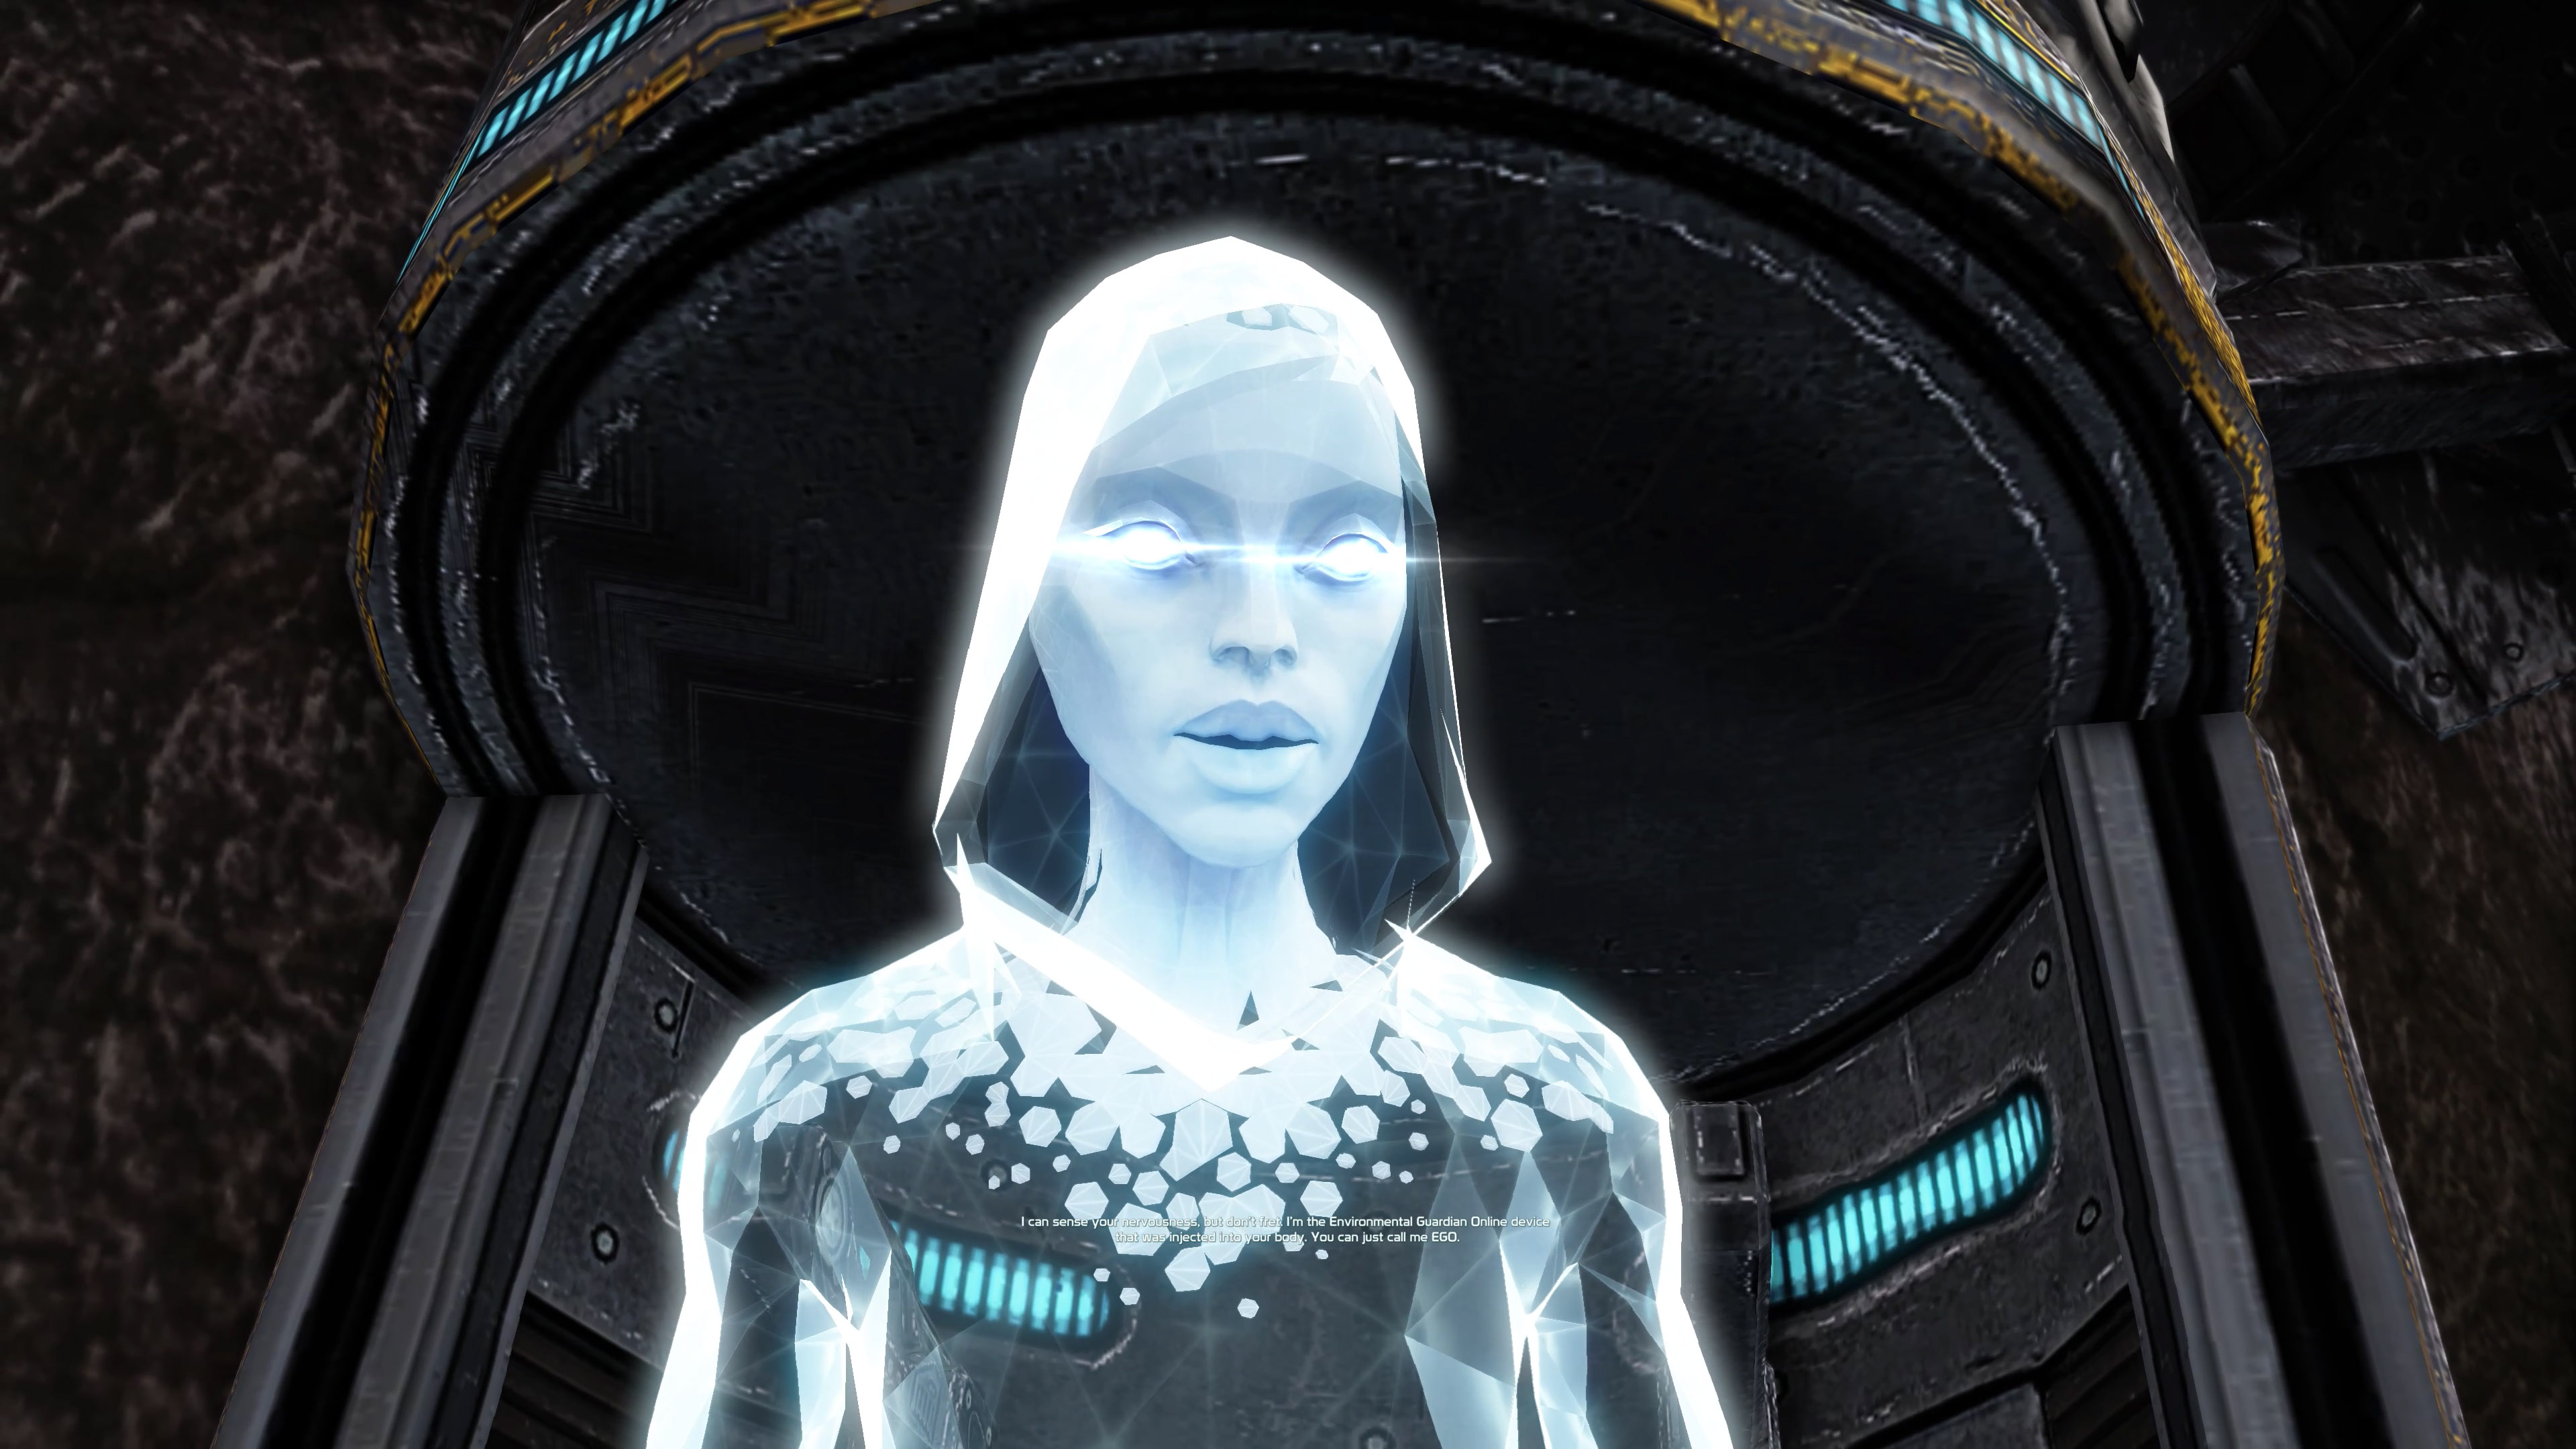
(Cass leaves and the figure from the flashes appears again)
EGO: Hello. Oh. Good. You can hear me now. I can sense your nervousness, but don’t fret. I’m the Environmental Guardian Online device that was injected into your body. You can just call me EGO. Please forgive me. I’m having some trouble getting all the behaviors activated, so we might experience a few hitches at the beginning, but I’ll sort it out. We have lots of go over, so we should start.
Crash Site
When the cinematic ends you are placed in a tutorial area that is not part of the open world map. If you bring the map up at this point, you’ll see an irregular shape, the label “Crash Site” and a Legend describing the marker that represents you on the map. You can freely explore this area once you begin the tutorial mission, but there’s not much to see, though you can get a feel for how the terrain affects the coloring of the map. Normally EGO welcomes you and prompts you to activate the first mission card by saying, “You can interface with me to signal when you’re ready to proceed. Let’s try it.” However in the accompanying video you won’t see of hear this and it is a common bug related to skipping versus not skipping cutscenes.
Note
At this point you can bring up the EGO Menu with  and access a number of functions. If you played the original version of Defiance there’s a good chance some items, including Outfits, Headgear, Vehicles and Titles, are waiting in the Claims section of the Store portion of the menu. Also, if you have purchased any of the Class Packs from the relevant Defiance Store page (be it Steam or the Defiance website for PC, Xbox Marketplace for Xbox One of PlayStation Store for PlayStation 4) those Classes will be available in Claims as well. The Starter Class Pack only includes the standard Classes you could choose during character creation so it doesn’t make much sense to switch at this point, but the Crusader Class Pack and Engineer Class Pack offer you options you didn’t have during the creation process. If you’d like to begin your game with either of those simply click on the item in Claims. If you have multiple Classes there the last one you click on will become your active Class. If you want to ensure the Class you want to begin the game with is active go to the Character portion of the EGO Menu, switch to the second Tab and verify which one is selected. If it is not, navigate to the appropriate one on the left (with the d-pad, arrow keys or mouse) and click on it. The top EGO Power of the pyramid will change to reflect the starting power at your disposal. This change will not affect your starting weapons, they will still be based on the Class you chose during character creation.
Recovery Mission
Tutorial Mission Code
M01
Description
Recover weapons and gear while EGO attempts to bring bio-integrated functions online.
Rewards
100,000 , 500
, 500
Walkthrough
As you bring up the mission card EGO says, “We need to find Mr. Von Bach, but first we’ll need to gear up.” This is the only “main” mission where there is prompted voice, only side missions will have voice when the card is displayed, and it will be a random introduction from the person assigning the side mission from a stock set of clips. All other main missions, which are also assigned by EGO, have no voice prompt. At this point you can decline the mission which will cause the voice prompt to play again when you interact with the mission marker. The mission card will be the same no matter the type, including a description, list of rewards, avatar icon for the character associated with the mission and buttons to accept or decline. Throughout this guide the walkthroughs will skip these repetitive elements and jump into the first objective. If you bring up the map while a mission is active, you’ll see most of the same details that were on the card. Usually the current objective is displayed but not always, and the option to abort the mission will be available except during this tutorial mission.


After accepting the mission EGO says, “Let’s hurry. We need to collect the necessary equipment as soon as possible, so we can start looking for Mr. Von Bach.”
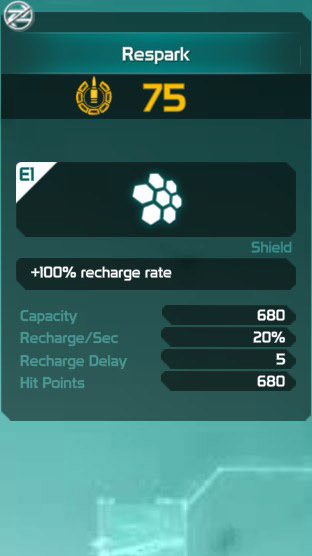
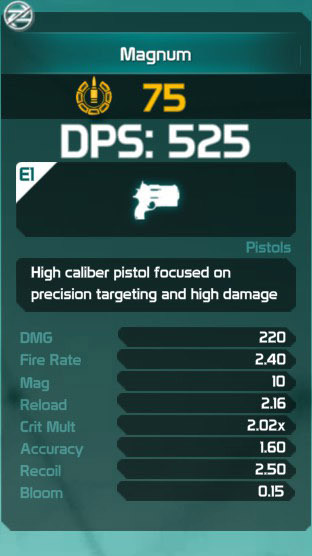
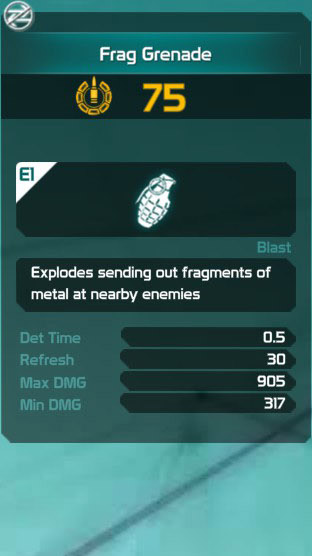
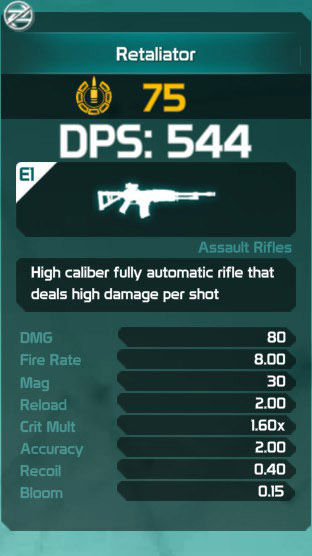
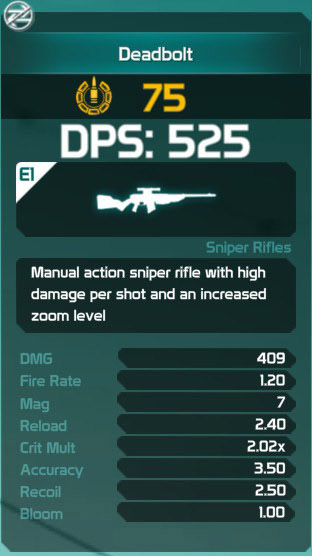
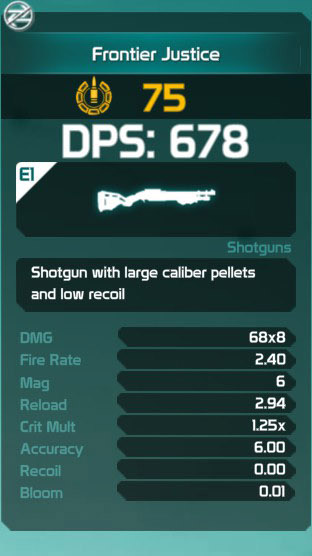
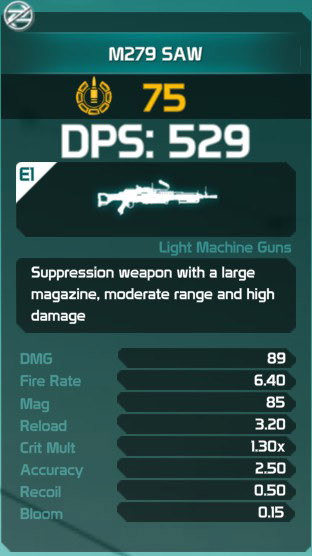
Objective: Find some gear. You’ll see your first objective marker, an inverted yellow pentagon with a distance in meters and the bottom point filled indicating the location. Most missions will also show the current objective on the map and will snap the center to that spot if you bring it up. When you reach the spot, you’ll find an equipment crate. In the game world these crates are used to refill ammo, but here you will receive a grenade and your alternate weapon. Each character begins with a pistol and picks up a secondary weapon based on the class you chose during character creation. For Assault you receive an assault rifle, Assassin a bolt-action sniper rifle, Guardian a pump shotgun and Combat Medic a light machine gun. You also receive ammo for your equipped weapons only. You’ll need to access the in-world supply crates to max out your ammo for all weapon types. In addition to the secondary weapon you receive a Respark shield and Frag grenade. Each of the possible items is visible below:
After accessing the crate EGO says, “Particular weapon types work better for specific situations, so you’ll want to get used to switching back and forth between the primary and secondary weapons.”
In-game Tip: Press  to swap between your primary and secondary weapons
Objective: Inspect the rubble. The marker ahead leads you to a wall. Once you reach the location the wall explodes and you’re confronted with your first group of enemies, Mutant Riflemen. One of them says, “The enemy is here!”
Objective: Defeat the Mutant Patrol. There are three Mutant Riflemen to kill. This is a good time to test auto-aim, where squeezing the left trigger attempts to snap to the nearest enemy as well as zoom for more precise aiming. You can also try killing with both weapons and observe the indicators that appear including the amount of damage done, critical kills and amount of experience points (XP). XP is used to raise both your EGO Level and your Class Level as described in the Introduction.
In-game Tip: Press  to sight in with your weapon and take more accurate shots.
Another group of three Mutant Riflemen appear so take them out as you did the earlier batch.
Objective: Defeat the Ambush. A helicopter flies in to drop off another batch of Mutants. At this point you receive advice about grenades from EGO, “Grenades have a cool down period, so there will be a short break before another one is ready for use.” Try to kill all four Mutants with one well placed grenade, but feel free to take the group out however you like.
In-game Tip: Press  to throw grenade
Another helicopter arrives dropping off a fresh batch for you to execute.
Objective: Defeat the Mutant Swarm. Push ahead to find a fresh group of Mutants, some using vehicles for cover. At this point you’re advised to use your EGO power.
In-game Tip: Press  +
+  to use your EGO power
The usefulness of your EGO power at this point varies by your chosen class. Assault’s Sprint power can be used to race around the enemy but doesn’t last long enough to deal with them all. Assassin’s Cloak could be used to line up a first headshot, but you reveal yourself when you fire so you may want to save it to escape if you take a lot of damage. Guardian can use the Barrier for protection during the initial volley but again it doesn’t last long enough to handle the entire encounter. Combat Medic should save the Healing Bot for use only once your shield is drained. In addition to Mutant Riflemen you’ll be introduced to the Shotgunner at this point and they do significant damage up close. Deal with the enemy however you see fit but after several kills a “Slaughter-mad Rampager” appears. This is a variation of the standard Rampager you’ll encounter in game, with a helmet to dull the damage of headshots and more health than normal. He can also throw his melee weapon, something you won’t normally encounter until your Power Rating is higher. Take him out as soon as possible and then deal with any remaining enemies in the area.


Objective: Help Cass. With the swarm defeated EGO alerts you, “I’m receiving a signal. I’ll patch it through.” The message is from Cass who says, “Can you hear me? I need help down here! It looks like the mutants are getting organized for an attack.” Following the message EGO says, “Oh, no. We better help her.” As you head down to the marker EGO says, “According to my readings, those creatures are actually humans! However, their DNA is severely mutated.” You’ll find Cass shooting at some mutants.
Objective: Interface with the reactor. After reaching her Cass says, “We need to shut these dudes down. If we don’t, you can forget about finding any survivors.” At this point you should eliminate any Mutants before going to the reactor at the mission marker though it’s not required. There is a delay in EGO’s directions making it likely you’ll perform this action before being directed to by voice despite the on-screen text directions. In the accompanying PC footage, you’ll see me stand around waiting for the voice over to trigger, but in other videos you’ll see me rush ahead and the voice will happen well after this objective is completed. Eventually EGO says, “I have the ability to hack into most computer systems. Get to that thorium reactor and I’ll see what I can do.” After interacting with the reactor EGO says, “Excellent, I was able to reactivate the fissile materials. The reactor will overload and blow this entire base off the map. But, we’ll need to keep the mutants from disrupting the process.”
Objective: Destroy Staff Sergeant 18A542D. This is your first encounter with a Mutant Minigunner. They take a fair amount of damage so go for the headshots to put him down. Cass says, “What did you do to that thing? It looks like it’s going to explode.”
Objective: Get the Advanced Weapon. A crate along the back wall is your next mission marker and appears well before EGO says, “Now, that looks useful! I’ve spotted some advanced weaponry.” Go to the crate, open it and equip the gun. Despite the showing of 9,999 rounds you won’t run out.
Objective: Protect the reactor. At this point you get a conventional turret section except you’re not stationary. Helicopters fly in dropping off Mutants who also jump out of trucks. Be aware that you have to cover about a fourth of a circle radius around the reactor as you’ll miss some to your left hidden by the crates and other environmental objects. Don’t worry about your own health, you don’t take damage during this section. Notice the “Chain Kill” pop up which happens whenever you kill an enemies in rapid succession. This is a common bounty you’ll be offered in the future. After you’ve killed 75 enemies the next cutscene will be triggered.


Cutscene: You and Cass run out of the camp guns blazing (notice you’ll always have a pistol in cutscenes regardless of your equipped weapons). The base explodes behind you as you leap over the wall. After helping Cass up she says, “Thanks. You have an EGO implant, don’t you? That’s amazing! First time I’ve ever seen one in action. You know? I think we’re gonna make one hell of a team.” Cass gets on her Runner, a version of the type of vehicle you’ll soon get. This particular model will become available to you after a much later mission. She says, “A little backup can take you a long way in this crazy place. I’m heading to the crash site. They’re gonna need help. I’m sure we’ll be in contact…” She salutes you, “Ark hunter.”
After a loading screen you are dropped into the game world. The entire map is available to you from the start. You’ll get a few notifications at this point including one about spending an EGO Class Point. This is a bit of a misnomer as your EGO Level is separate from Class Level, it’s just a coincidence that the Tutorial mission earned you enough XP to upgrade both your EGO and Class at the same time. While your EGO Level and Class Level are often in sync through the 25 Levels of your first Class, they aren’t at the exact same XP points. The bottom of the display has dashes that fill with yellow as you earn XP, and this indicates your progress towards the next EGO Level. The second tab of the Character portion of the EGO Menu has it’s own bar indicating your progress towards the next Class Level.
In-game Tip: Press to spend EGO Class Points
An indicator on the left says, “New Content Available: New Missions: Press  to open Map”. Throughout the various storylines this will appear whenever a new mission marker becomes available. Unfortunately, it is the last notification you receive in a batch. What this means is that as you progress further in the game the rewards you receive from events and missions get displayed first and often take quite some time to get through before you see this indicator so it’s easy to miss. This guide is constructed to make sure you are aware of all your options and notes a few issues related to the visibility of available content.
If you open the Map here, you’ll see the only Mission available, the one that is also right in front of you. Now you should open the Character portion of the EGO Menu and switch to the second tab, Class Tree. You have a single point here to spend. Your choices include bumping up your first EGO Power to Level 2 or unlocking one of the first three Passive benefits of your chosen Class. Read the options and decide then exit back to the game world. Feel free to consult this Guide’s Class Details pages if you want help making this decision. If you chose to activate a passive for this step, you’ll get a notification, “Pursuit Update: EGO Evolution: Earn your first perk: Press to view Pursuit”. If you upgraded your primary EGO Power, you’ll earn this later. This is your “hint” to explore the Goals section of the EGO Menu. Despite the notification pressing will not actually take you to the relevant part of the display. A bug in this and other Menu code takes you to a higher-level portion of the display forcing you to drill down, often without knowing what section to view. In this case the Pursuit is EGO Evolution under the General section of Pursuits. While you’re in the Goals section switch to the second tab, Contracts. You’ll notice that you need to reach EGO Level 3 before this section is revealed. In the next part of this Guide we’ll unlock Contracts and explore how to take advantage of them as you progress through the game.